I’ve been studying my snail Cuthbert, and really learning a lot of interesting facts. I know they’re slimy, strange little creatures that eat your garden plants, but they still merit study in my opinion. So I went outside the strange thing was I just walked over to a huge Sycamore tree and felt directed to look right at it’s base in the long grasses, tucked between some big roots. I pulled the grass aside and there, lo and behold two snails! I must have felt the “Snail Vibes” hahah.
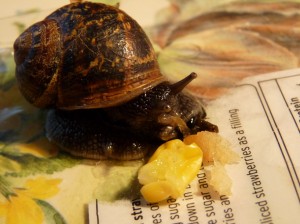
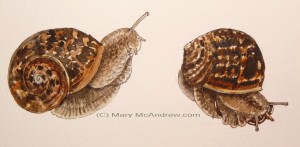
One of the snails was this big guy (or girl!) that has now been named “Jabba the Hut”! He’s munching on some sweet corn here. Enjoy the simple stages of painting in watercolor shown below, to give you an idea of how I paint them.
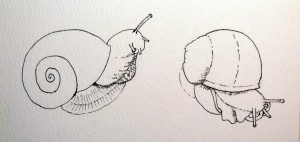
First I did drawings using light pencil, then go over it my micro permanent pen, keeping it simple and cartoon-like so I could add the detail with watercolor.
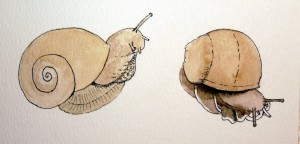
Then I look at the snails to see what pale color I see ‘underneath’ the other darker colors. I make a wash of this color and put it on, and while it’s wet, sometimes I drag a bit more of the wash or color into areas I want darker, with the tip of my brush.
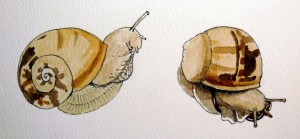
Here you can see I’m just adding a bit more details and colors, keeping it simple. Look for dark patterns and be careful to leave light or white areas alone.
Sorry my stages kind of jumped here, I think I got busy and didn’t photograph any more stages! But all I did was kept looking for pattern, colors and shapes, let areas dry before adding new patterns so it doesn’t all blur together. If it does, take your paper towel tip and push it on the area to blot it, rub with brush tip and repeat until you get it lightened. You can add dappley marks with your brush tip for texture.
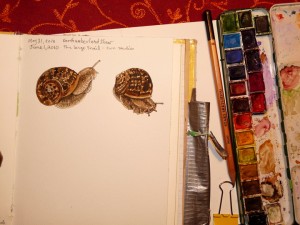
This is my sketch book along side my pan of watercolors, this is what I used to paint them.
Hope you enjoyed more snail studies!
The initial line drawing hardly shows at all in the finished work. Very helpful. Thanks.
These watercolors are awesome, Mary! Absolutely wonderful. I can definitely see a nature painting book in your future. Looks like you’re getting some wonderful work done. I sent you an e-mail a while back…don’t know if you got it or not. Just basically to say that we’ve been by your house a few times, and all is well. It’s been very hot, humid, and rainy here. The weeds are growing like crazy! I did Allentown…sales were definitely down in comparison to other years. It rained before and after the show….but during 11-6…no rain! East Aurora this weekend. No rain is predicted….so if I can stay dry, sales or no I’ll be happy! Keep up your wonderful work!! Say “Hi” to Gary, too. Kathie
Your snail sudies are beautiful. Keep on!
hi Mark, glad you came back to see the next snail studies, I am glad it helped somewhat. You should try an experiment and paint something small with just watercolors (pencil line drawing first), one with watercolor that you let dry then draw with permanent ink pen on (micron) and one where you start with micron pen drawing first..then watercolor. I think it’ll show you how they look different in style, maybe you’ll see how much or little line to add with the pen after.
I have some posts coming up where I’m playing with Inktense black watercolor pencil..then wc washes on. It’s cool.
Hi Kathie, thanks so much! Yes, a book, well lately I’ve been thinking about how drawing buildings is such good practice for comparative measurements. I hate when it rains at shows! good luck with the next one.
Your watercolour of the snails is beautiful. Really like how you’ve put up the different stages.
thanks, I’m glad you enjoyed the stages, I find it helps those who are trying to learn how to draw and paint to see how I worked on it.