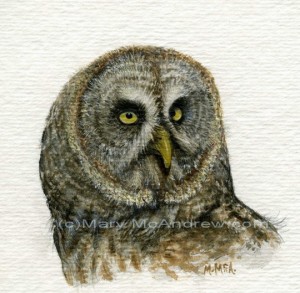
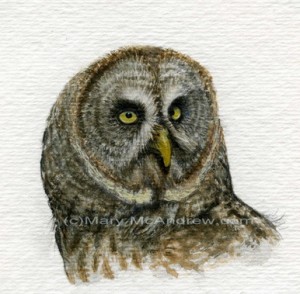
My finished miniature watercolor painting of a Great Grey Owl, measuring a mere 2″x2″! Be sure to check it out in my Owl Gallery too. It’s an owl named “Aspen” that I photographed at the Keilder Water Bird of Prey Centre in Northumberland England. I’ll show you the stages of painting and talk about how I did it below.
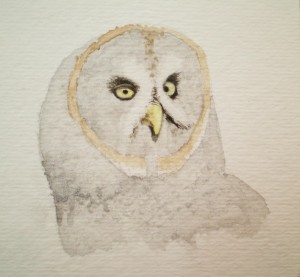
This shows the first stages of painting, the beginning washes to lay down the values, color hue and expression of the painting. I first started with a light sketch in pencil, lifting it as much as I could with a kneaded rubber eraser before painting. Then I painted the washes and sprinkled salt on wet areas to see how it would ‘pull’ the color and create interesting patterns. It is at this stage of the painting that you can get a feel for how the painting will go, will you be loose and expressive? Will you go for more details? Sometimes I think we have to let our intuition guide us, or perhaps our mood.
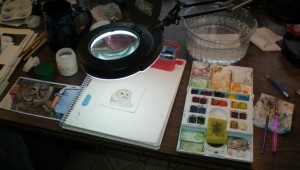
This picture shows you my set up for the first washes, I always start flat on the table so the color doesn’t run. Many times on larger paintings I stand up and work loosely with my brush. (check out this short Utube video of me working on the “Screech Owl” painting, it shows how I paint loosely when standing). This set up shows my photo reference to the left, the salt above that, then my field palette to the right because I’m right handed, the water bowl above that. I keep a white paper towel folded nearby for wiping off excess water and it allows me to see if there’s paint left on my brush. You see my magnifying lamp which I find good because the light is cool and matches daylight; but I don’t use the magnifier on it as I find it clumsy to use my brushes under it and I bump into all the time when I lean in super close! Sometimes I use a hand held magnifying glass or you’ll see pictures later of my glasses.
Now here in stage 3 you see I’ve jumped ahead with lots of details and color. As you work, squint your eyes at the photo and your painting to catch large areas of value that need to be developed and notice color hues. At one point I felt my owl was too brown so I washed a very watered down blue grey over areas, but only on very dry areas. In areas you need to lighten you can either lift color with a damp brush and blot with a paper towel, or you can add it using white watercolor or gauche mixed with your paint colors.
Now on purpose I’m going to point out some things that I found to be unsatisfactory in my painting and I changed. At stage 3 here, I felt like I did a pretty nice painting! I was feeling like it was done, ah….no such luck. If you let it sit a day or two and return to it, or if you show it with the photo reference to a friend with a sharp eye, they’ll be sure to catch something ‘off’ with it. If you’re a conscientious artist, you’ll be bothered by it until you fix it and you probably already knew it was wrong to begin with but wanted to ignore it! Well lets just say my boyfriend has a good eye, sigh, well now he ‘did’ pick me didn’t he? We both agreed the beak wasn’t right, I pointed it out to him then when he agreed it was back to the easel with it. I can’t believe how much I was able to amend the beak being that this is watercolor after all. People are afraid of watercolor because they think it’s unforgiving, wait until you see the changes I made.
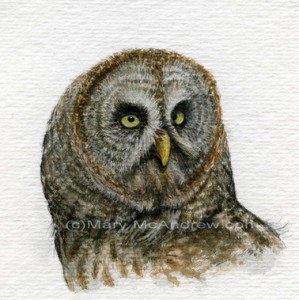
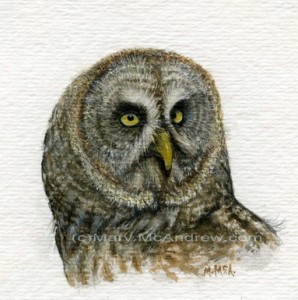
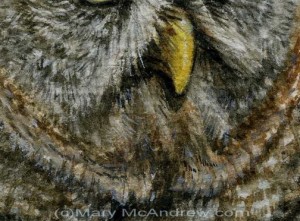
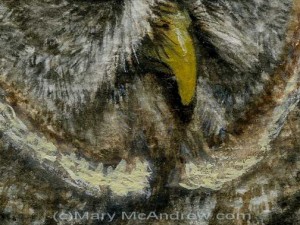
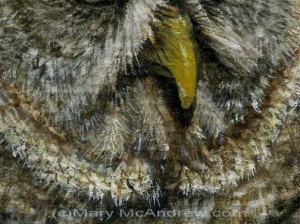
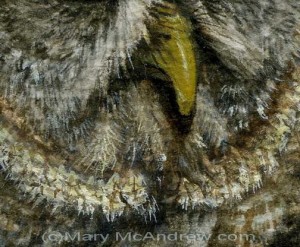
Stage 4 shows the beak changed, I totally moved the angle of it and lengthened it! (see the enlargements below of these final stages too) If you take a damp brush and gently re-wet an area, and only the area you want to fix, you can then repeatedly rub it gently with a damp brush tip, blot it with a clean paper towel (I prefer Viva!) then clean your brush, wipe it off and repeat. Do this over and over, you’ll be amazed at how much you can lift. When I repainted the beak I thought like an oil painter, I laid down a more opaque yellow layer to clean and brighten the beak, then I kept putting washes over this dry layer to affect the color. It ended up with an unusual translucent look like a real beak would have.
As I did this, of course I started to notice other areas I wanted to improve upon. Sigh…such is the plight of an artist with a picky eye! Notice the area of light tan below his beak, I needed to bring out the lightness of it so I added white watercolor to some cad.yellow, and browns to create a tint for an underlayer. Another note about this painting, next time I will pick a much smoother paper, working with this much detail you need to keep your paper super smooth with no distracting texture.
Stage 5 shows how I painted detail on top of the tan area under the beak and the beak has more details added. The owl has an overall lighter look, this is because I kept stroking on little feathers with a tint of whitish blue grey to add detail. Now I thought I was done here, but remember that boyfriend of mine with the good eye? Well he helped me notice I had painted out the nostril! SIGH….yes, when I was adding the little hairs by the beak I must have done that so back to the easel. The picture at the beginning of the post is the final stage, fixed and finished!
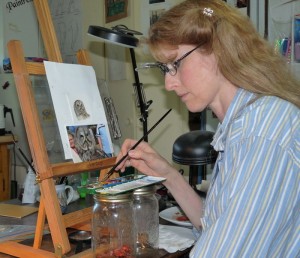
This is me working with my reading glasses on and a little set of clip on magnifier lenses. In the photo I have the magnifying lenses lifted up so I can look at the paints in front of me, if they were down I’d need to get much closer to see what I was doing. So I would lift the lenses up when I would sit back a bit and take a look at the ‘whole’ painting and the photo, looking for areas that need attention. Then I’d flip them back down and get close for the detail painting. I wouldn’t use them for the initial stages of painting, you don’t want to focus on details at that point.
Also you notice here my setup is different than before, I have another pan of watercolors and have them set up on some jars so they are closer to my painting. Working with a tiny brush ( 10/0 liner) it dries out super fast and keeping my pallet nearer seemed to help. The nice thing about working on a miniature painting was being able to mix small amounts of color right in the pan lid. (the brush in the picture is not my liner brush)
The pictures below are so you can look at one section close up to see the changes I made to the beak and area around it.
I hope you’ve enjoyed my post about my painting. I looked forward to showing you my mistakes and how I fixed things as I painted because this is how it goes, it’s a process and doesn’t always go as easy as it looks. I like to encourage my students and others to keep looking at their paintings for more detail but most of all a good beginning drawing is crucial. As you can see here, I missed the beak angle and had to fix it later, but the more you paint and draw the better you’ll be at catching these things in your work. That’s my two cents! Please leave me some comments and if you are interested in note card or prints please let me know.
For the fun of it, here’s some Utube links with owls!
http://www.youtube.com/watch?v=HErZ6Xp8CcQ&NR=1
http://www.youtube.com/watch?v=gKH_IQr1hAI&NR=1
http://www.youtube.com/watch?v=x_-dkr2AOhY&feature=related
This next one is Excellent! Great footage of a Great Grey Owl!
http://www.youtube.com/watch?v=ekrfclBAjEY
Great job on the owl Mary. Birds with intricate feather patterns always seem to require extra patience in working in miniature. Nice idea with your palette too! That would help solve some of the problems of paint drying on the brush too fast. Unfortunately I have one of those larger palettes so I end up making a wet dab of paint on the edge of my board.
Thanks Wes, Great to have you stop by! As you know miniature painting is new to me so I’m pretty happy with how this came out. I didn’t get to show it but I also ended up putting a small plastic film canister (remember those!?) on my little paint palette, I stuck it there with Sticky Tack (or blue tack).That way when I needed to wet the brush and not clean it, it was right there where I needed it quick. Just have to be careful not to bump it…ahmm as I did! haha.
Mary : You have wonderful gift, your paintings are stunningly close the actual images of these critters and birds. Congratulations.
PS : Thank you for adding my blog to your links page. You had asked for a linkback, which is quite normal, however you would have noticed that neither do I have a links page on my blog nor is my blogroll on my main blog. Hence I have not been able to fulfill the numerous linkback requests that I get.
Have a wonderful weekend
Hi Thomas,
Thank you for the compliments, I just love painting beautiful things, birds, landscapes, women (mostly mythology). That’s ok about the link, I enjoy offering a good selection of links for my readers, and I want to add so much more! I had to create a separate page, you may find some interesting nature links there. If you become a follower on the little google box you may get more people visiting your blog. Keep in touch, and keep shooting those pictures!
VERY cool demo, Mary, and just astounding work. Thank you for sharing this, it’s beautiful!
Thanks Cathy,
I’m happy with how he came out, I hope I get to revisit this owl (Aspen) when I return to England. I enjoyed doing the post as a teaching lesson too.
Hi Mary. Thank you for visit my blog and for the compliment.
I really like your painings, especially strix nebulosa. I don’t know what to say.It’s amazing!
Greetings from Poland 🙂
Hi Marta! Thanks for coming back and leaving a comment. I’m guessing Strix Nebulosa is my Great Grey Owl? 🙂 I saw a hawk photo you took also, reminded me of our Cooper’s Hawk, it had red bars on it’s breast, what kind of hawk was that? I do loves birds, but especially birds of prey, and I want to do more paintings soon. I hope you saw my owl things for sale on Zazzle? mugs, notecards, t-shirts? It’d be great if you looked and maybe send the link to some friends? http://www.zazzle.com/marymcandrew/gifts?cg=196634663473883913
take care, write any time!
Can ne1 tell me how much a painting by Thomas J Allen known as The Birds of Prey Series Natures World in print “Screech Owl” OTUS ASIO 1974 it has the authentic certificate n seal of approval stamped on the certificate…NE help would b greatly appreciated!!
Hi Crystal, I’m really not sure how you would go about that but start with Googling his name and title of print. You can contact any number of online fine art auction houses, if you send them an email with a picture of it, title etc I’m sure they can help you.
Have you seen my Owl prints and note cards in my shop? Be sure to have a look: http://www.zazzle.com/marymcandrew/gifts?cg=196549703362479635 Lots of hawks and owls here!
it is a pleasure for me visit your blog.