|
|
Now I’ll freely admit, I’m WAY behind on my blog posting! I was doing so well at sketching all the time in my journal this summer and getting out for walks in my fields then sharing it with you, but life has been so busy this winter. I’ve been in Northumberland England the past few months and though I didn’t get as many paintings and sketches done as I would have liked, I do still have sketches and photos to share here. So I’ll try to post them even though they’re a little ‘old’!
This one is about a short walk to the ‘local’ castle, church and a spider in my front yard.
") Stone steps into the churchyard, access for people but not for sheep! Just down the road there’s a Church, St. John the Baptist, built in the 11c, and sometimes I go have a walk around the churchyard. My boyfriend doesn’t know why I think this is interesting but I’m just amazed at how old the gravestones are. I read the names and dates and think of the real people who lived long ago in this village.
 (450x338)") Gate latch at the church I love looking at old gates and this one is especially cool, the metal clasp lifts up so you can swing the gate open. Think of all the people over hundreds of years that have walked this path, maybe not the same gate but it’s been around awhile!
Oct 9 gravestone 1") Meet Me There carving on gravestone This is a popular carving theme on stones, the finger pointing upwards; I just love drawing banners too so I had to sketch it. It’s permanent ink pen, the date on this stone was 1900.
") Gate to the castle This picture was taken just next to the church, the gate on the left goes down a grassy lane to the castle in the distance, the one on the right goes into the farmers field, we won’t go that way! You can see an old viaduct in the distance, that used to be for a small railway that ran through this little town, I wish it was still here. The hills you see in the distance I climbed up with Gary, right to the top and oh what a view! Then we walked all the way back down and came over that viaduct and back to where I shot this picture. That was a looong walk for me!
 (450x338)") Edlingham Castle There’s the castle, not far now. This is Edlingham Castle built in the 12th c. On either side of the grassy path there are usually sheep or cows, remember the red cows I sketched not long ago? Here’s a link to Wikipedia about Edlingham Castle.
 (450x338)") Edlingham castle ruins You can walk all around this castle ruins for free, I like trying to imagine the original layout of it. You can see the viaduct in the background and the crags on the hill above that.
") Spider in the garden So I knew you’d be wondering, what about that spider you mentioned? Well when I got back from my stroll I discovered a spider in the front yard clinging to an old leaf and stem. Now I had to squat down and lean in really close to take this picture, I hope you appreciate how close I got to this spider to take it’s picture! I think spiders are really interesting but I still get scared of them and don’t want to touch them! shudder….
Oct 9 spider poem") Spider sketch and poem It had a web woven attached to it. I did a tiny sketch while crouched down to look at it, and I wrote the poem in bed one night after. I thought his web was like window panes in the air. Here’s the poem:
“Spider in the Garden”
Spider in the garden
What do you see?
A world through a web
Where we are all free.
Through your silver floss
Little windows in the air,
You watch us ignoring you
As if we didn’t care.
Mary McAndrew
October, 11, 2011
") Blackbird eating berries I’ll leave you with one more picture, a Blackbird (female) eating berries in the tree.
I know it’s already November and I’m way behind! I have more trouble getting online and having time to edit photos since I’ve been here in England. But I’m trying to go with the flow and keep up with posting my sketches and photos. I’m also using a tiny new laptop and my usual photo program isn’t on here, so I’m getting used to editing pictures with something new (sorry if they look small etc). I’ve also felt really down since my dad passed away and it’s hard to feel creative, as many of you probably know how that is.
But here’s a few cows to start off with! It’s what I see most of around where I’m staying so they’ve gotten my attention. I just love the velvety look of their fur in fall. The days have been very cold, damp and windy but I did these sketches standing along the field in the wind! Brrrr.
 Red Cattle in the Field, Oct 1 I wrote a poem as I watched them, just put a few words down then later I changed two words to make it better. I’ll retype it here:
“September ends…October is here,
The little Robin sings, Winter is near!
The red cattle in the field look so nice,
Fur like rust velvet, ready for Winter’s chill and ice.”
(c)Mary McAndrew 10-1-11
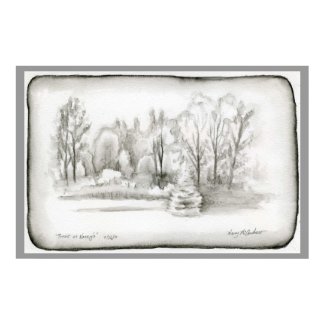
 Overthwarts on the Hill, watercolor The page above I did on October 2nd, it was windier, colder and wetter still than the day before! I wrote a note on the page about how hard it was to draw, of course I was wearing my fingerless mittens too and they are hard to paint in! There’s a farm called Overthwarts up on that hill as I looked from where I stood near Edlingham castle.
 Cows at rest and an Angle Shade moth, ink. The same day I walked a ways up the lane where it got even windier, I found some cows to sketch and sat down along the lane where I could see them through a break in the hedge. Getting down low really got me out of the worst of the wind.
Then another day an Angle Shade moth paid us a visit by coming inside, I guess it’s hibernation time! He didn’t want to leave. I put some sugar water in a little jar lid and he sucked it all up and grew very fat! Anything to help a little hungry wanderer. It hung around a few days just sitting there then disappeared, so I don’t know if he’s hiding out in the house or went back outside.
 The furry red cow eyed me warily Here’s one of the bovine beauties watching me, I tried to walk slowly and talk quietly to her but they are so skiddish, she turned away and made a retreat as I approached.
Well I hope you enjoyed my outdoor sketches, more to come, slowly but surely!
I had some fun creating note cards with cow (and sheep) photos I took in England, have a look in my shop!
 Sketch at dawn in watercolor pencils Today I stepped outside quite early, before the sun was up in fact. I took my sketch journal, waterbrush, watercolor pencils and ink pen and left the camera behind (but not Ginger of course). I sat on the edge of a very damp and cold picnic table that wobbles from age, and used watercolor pencils to quickly record what I could see.
This was easier than watercolors because I could just sketch across the paper quickly trying to guess at how it’ll look once I wet it. I laid down as much of the color as I could before adding water, once you wet it you can’t just scribble color on. Once it’s wet you can add color in two ways, using the tip of your brush to pick up color from the pencil tip, painting with it like watercolors or you can draw directly on the damp paper but the color will be intense and hard to blend or lift off. This is what I planned on to put the darker trees at the bottom, I wanted some of their branches to stay as drawing and fuzz out around it to look like foliage and mist.
The thing about plein air painting a sunrise is it changes so fast. Try to work as quickly as you can then either don’t look any more or peek for ideas to check colors and see cloud shapes etc. I try to avoid one problem that I run into, that’s adding yellow to the clouds then having blue sky wash over it or mix with it….and as you learned in elementary school…yellow and blue makes green! So…a bit of green tint sometimes appears in my sky! Try to blot up mistakes or intense color right away with paper towel and re-wet and blot as you need to.
I wrote the words before I did the drawing, just words of what I could hear, not a poem but kind of a way to get into the moment. If you don’t think you can write poetry or something clever, just write what you can hear. In case it’s hard to read, here’s my words on my painting above typed out:
“Sept. 19, 2011 – There is dawn. There are bird songs.
There are cars and trucks from morning traffic.
There are birds.
I look out over the fields, wet with dew.
Feel the cold dampness on my hands + face.
Dawn gets pinker.
The cloak of mist starts to lift off the field.
Blue Jay, Crow, Song Sparrow song.
Robin call + Yellow Throat makes it click call.
My day starts in peace.”
Well my day started in peace and ended with some stress I guess, my laptop died again and this time I think it’s permanent. I’m having burial services soon, in the meantime I got a Netbook…tiny little thing! We’ll see how we do with it. I had to get something portable as I’ll be leaving very soon for ENGLAND!!! YAYYY!! Please tune in to my blog page (you can subscribe to posts in the right column) and see what I find on my adventures. I’ll be studying nature and taking pictures and we’ll see what else. Eventually I’ll be doing some classes and if you want to come to England to do some sketching, I’ll be doing a tour or two this coming summer there. More on that later, if your interested in that idea email me so I get a feel for what people might like.
That’s all folks! Hope you enjoyed my post today. I have lots of new caterpillar discoveries to share soon, I just have to organize all the photos I shot to go with the paintings I did.
I headed out to the back fields today, before the day got too hot. As I picked up my straw hat and plopped it on my head Ginger got all excited, her eyes riveted to my every move. Her whole body tensed and ready to run out the door, as she knows this means we’re going out. Now…when I have my sketch bag in hand and pick up my camera and sling it over my shoulder she knows we’re in for it! The ‘Big Walk’ hahaha…well it means we’re leaving the yard and going out to the ‘wilds’ of the fields and lanes. Yes, if I was a dog I’d be acting just like her!
 Ginger waits expectantly! As I walked I was VERY mindful of watching out for the huge yellow garden spiders that I discovered in my overgrown field, I didn’t want to walk through one of their webs! I’ll show you pictures in another post! Every step I took about three grasshoppers or more would fly up and over the grass for a short bit then land again. As I studied them I laughed to see when they landed, many times they did a sort of “moonwalk” backwards down the stalk they were clinging to.
grasshopper 7 (3)") Red Legged Grasshopper I think If you stop to study them close, using the zoom lens on a camera is a great way, you’ll notice how many different varieties there are. I am guessing some of the many types may just be different ages of the same grasshopper, or males and females, all were really interesting.
fat yellow grasshopper (5)") Fat Yellow Grasshopper Most had some kind of interesting pattern and colors that I’d like to do some studies of someday. First I need to start identifying them better, my field guide to insects is woefully lacking in species of many insects, grasshoppers included.
 Nat. Wildlife Fed. Field Guide to Insects and Spiders of North America Though it’s not a bad all round guide to start with, I find now I need much more species to choose from.
Long Lane Farm in August") Long Lane Farm in August - watercolor Well as I got out into the field a ways, I paused and looked back and this is what I saw. The Purple Loosestrife was blooming, clouds billowing, wildflowers dotting the field. I did this small watercolor using one waterbrush and my pan of colors, while standing in some very hot sun. It was really hard to find any shade and it made me a little ‘snow blind’ looking at my page.
7-13-11 Eastern Tailed-Blue (9)") A tiny Eastern Tailed-Blue butterfly After that Ginger and I made for the lane for a bit more shade. I’ve been noticing this tiny butterfly now sometimes when I walk on the lane. It first caught my attention flitting around the grasses and I thought it was one of those tiny white moths I always see. (It’s only as big as the end of my thumb!) There was something about it though, it seemed to have a bluish look too. So I followed it with my eyes to see where it landed then zoomed in with my camera and there you go! Ahha! A butterfly. Just one of my little discoveries this summer.
7-13-11 Eastern Tailed-Blue (10)") He shows a peek of blue wing They don’t give up much, this tiny, tiny butterfly hardly ever opens it’s wings to show off it’s gorgeous blue!
P1230732") Hummingbird Moth feeding on Teasel I couldn’t resist slipping this picture in to share. I have a great big area behind my barn that’s overgrown now with Teasel. I found the Monarch and Viceroy butterflies, and to my delight Hummingbird moths, loved feeding on them. I would encourage everyone to grow some for them to feed on and for their beauty of form.
 Teasel drawn with permanent pen I love drawing Teasel and long into winter you can enjoy their elegant forms. This is a drawing I did years ago in the fall, (sorry I don’t have it scanned large enough to enlarge much) can you see how much fun you could have looking at it’s bristly but graceful form?
I hope you enjoyed our little walk on Long Lane Farm. I always see or find something new when I stop and look for awhile. I want to point out that I have been adding great links for identifying things on my “Nature Links” page, please have a look. I use these links often when I need to identify bugs or blooms. I’m adding links all the time so everyone can use it, please let me know if you have a favorite you want to share!
Below are a few note cards I created in my shop from my sketches or photos, I hope you enjoy them!
My watercolor sketch
Hummingbird Moth
Awww, who could resist that face?!
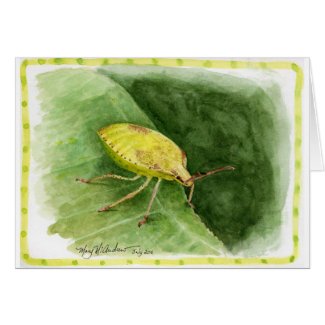
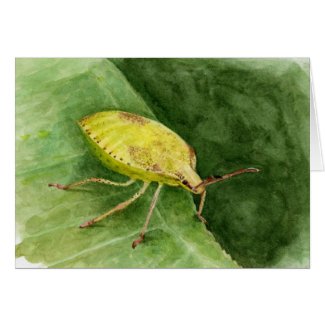
lt green Stink Bug") (Light Green) Stink Bug watercolor (click the picture to see it in my shop where you can see ZOOM view by holding your curser over it)
This is a painting of (another) Stink Bug, though I’m not sure what the exact species is, a friend in England suggested maybe it was a ‘baby’ with this coloring. I really enjoyed painting this, the colors, the leaf and then the detail on the bug itself….love those dots on the legs! It’s a page in my journal so I added a little fun border with my brush and watercolors.
 Almost there! Here’s my set up; I found that using a large bobby pin to hold my photo in place worked out really well. I keep a little piece of paper nearby to test dabs of color. You can see at this stage I’ve got a lot done, but don’t have the deeper shadows or finer details in yet.
 Close up of my progress Here’s a closer look, though the color is not right (because of my camera shot) you can see how pale the whole thing looks. Adding more shadow under the bug and rich color to the leaf really helped it. I also took a damp brush and rubbed the edge of the leaf, above the bug, to make it softer. Something else I did, though it’s not in my photo, I added just a bit of cast shadow from his feet. This really made it look more 3 dimensional and realistic!
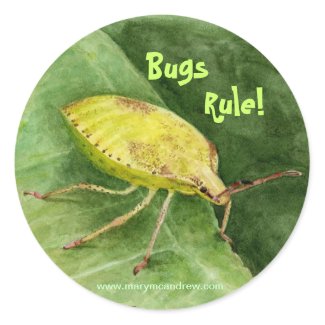
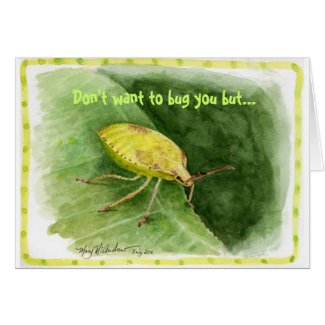
Well I’ve had a lot of fun making some attractive products with this painting in my shop, please click any below and have a look!
Science teachers would love this! You can put whatever words you want on it.
I love this tee-shirt! I ordered one for myself on the ‘value tee’, it was printed huge on the whole front! WOW, so much fun to wear! I know some Science teachers who’d love this! You can put whatever words you want on it.
Glossy stickers, you can change the words if you like.
A great card when you need to ‘gently’ remind someone of something!
Hope you enjoyed my being “buggy”…love to hear from you, leave me some comments, shop in my store, but definitely have a great day!
trees at Nancy's") Trees at Nancy's - Inktense 'Ink Black' watercolor pencil (Please click on the pictures to see them clearer, use the back button to return)
I had a chance to visit with my friend Nancy the other day and we sat on her back deck to do some sketching. We had a nice view; just behind her place is a small pond with trees on the other side. I was showing her how to do something simple by just using one watercolor pencil, the Inktense “Ink Black” by Derwent Pencils. I keep one in my kit always because sometimes it’s nice to just do a sketch with a waterbrush using this one pencil. The nice thing is you can go back over your black and white study with color after, the Inktense pencils will not lift off like watercolor can. It IS a VERY intense pencil, go very lightly at first and see what it does when you wet it. I started with the simple border as kind of a warm up, just draw a line around your page then use your waterbrush to wet it. To get it to look like mine, keep your brush ‘inside’ the line with the tip always touching and rubbing the line, letting the color run into the wetness left behind from the brush.
Sketch your scene lightly, trying to do most of it before you wet it. Once you wet the paper you’ll have a hard time adding more lines because they will be very dark and intense! If you need to just touch your waterbrush to the tip of the pencil to pick up more ink, then use your brush to add it to the sketch. Test how dark it is on a piece of scrap paper before you touch your sketch, this will help you avoid mistakes. I really like the look of this, sort of like an old antique picture.
S of Cullernose Point") Sketch of Cullernose Point from the south Here’s a sketch I did in England last year, along the coast of Northumberland, of Cullernose Point as viewed from the south. I had my sketch journal with me (OF COURSE!!) and because we wanted to keep walking, just sitting a bit and doing a sketch with no color worked well. I used my waterbrush and especially like how the clouds came out.
 Alnmouth, Northumberland -water soluble graphite Now I thought I’d add this one too just to show how nice it can be to do non color studies. This was done with water soluble graphite, not the colored type, just plain old graphite color! We were at Alnmouth, Northumberland England; a beautiful coastal spot! I did it in my tiny sketch journal which was so much fun to use! It was a wonderful experience to stand on the hill at the coast and capture the scene forever in my memory. Please read my post about it here to see the wonderful photos I took that day! I loved being there and can’t wait to go back for more! I love, love, love England!
I hope you enjoyed my little ‘non color’ sketches, as I said they’re a great way to capture a scene without the worry and time of adding color. And thanks to my friend Nancy for a nice visit! (ps. I photographed lots of dragonflies at her place and two of them were new for me!) I created a really nice print and greeting cards in my shop, see the links below! I love the dark grey background with it.
 Make your own card at Zazzle
When you see this print in my shop (below) don’t be scared by the price! It shows you the huggest size but can be ordered as a 16×11 for only $11.20 too!
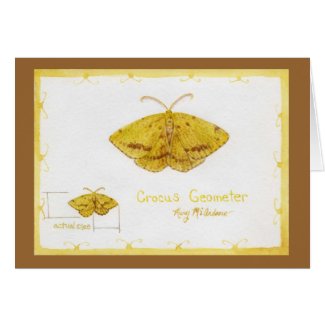
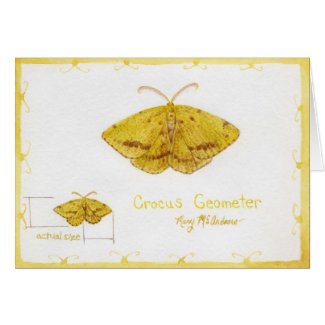
Crocus Geometer") Crocus Geometer Moth full page from my sketchbook journal In the morning when I let Ginger (my dog) out the back door for her morning wee, I always survey the screen porch to see if any visitors of the mothy type, have overstayed their visit. I used to leave the screen door open so I could be lazy and Ginger would just run right out, but stopped when too many flies were coming in! But I did get all kinds of moths in there! Well even with the door shut, some do sneak in and that’s how I found this little guy. Well sad to tell you it wasn’t alive, but laying on the floor in perfect condition. So I gently, gently picked it up and put it in my “Crisco” container for study.
Above is a full sketchpage from my journal, I did a life size study in the lower left corner and an enlarged size in the middle. I had fun with the border by just using my waterbrush with a matching color and added little ‘butterfly’ heads.
 My set up when I sketched the moth You can see in my picture that I lay the moth on the lid of the “Crisco” container and that way I was able to move it around as I worked. My watercolor pan is under it and the sketchbook is on my little table top easel box. (you can see my last page from the lady bug post!)
 small painting sketch") Drawing a study at the same size first Now here I’m showing how nice it was to sketch the same size study by having the moth on the plastic lid. Using my pencil I did comparative measurements to compare the width to the height of the moth. Do you see those lines on the page? I put them just as a teaching tool, to show you that I found the measurement from inside wing to outside tip was the same measurement as the bottom of the wing to the top, his head I think it was. I always use comparative measurements when drawing!
 Crocus Geometer 1") Such a gorgeous colored subject! Isn’t this a beautiful moth? His antennae were really elegant and graceful, very hard for me to paint with watercolor! The more I studied him under a magnifying glass the more I saw and appreciated it’s beauty.
 This is how my larger sketch looked at first. (Above) Now I’ll show you the steps I took to do the large painting of this Crocus Geometer Moth, mostly how I drew it. Do you see how boring and technical it looks? I know, but if you don’t start with a clear drawing done in PROPER PROPORTION it will never look right! Sorry, I”m not shouting, but it is REALLY important! If you do anything, learn how to draw well!
So I used my pencil to compare the width of the wings tip to tip to the measurement of the moth top to bottom. I put light lines on the paper then drew an arc as close to the shape of the ‘real’ moth subject as I could. Then I decided where the wings ended in the centre, keeping in mind that they overlap.
 The second stage is lightly sketching the placement of shapes, wings, body, head. Above you see a lot more drawn here; I drew an arc lightly for the bottom wings too, then decided where the two wings met and overlapped then drew them. I found the wing tips were half way between the head (top) and bottom wing edge, can you see how there’s a little ‘t’ at the tips?; that’s centre from top to bottom.
It’s really fun when you get into a drawing and start to find things that are the same measurement so you can check other parts of your drawing by comparing them! That’s why it’s called Comparative Measurements! (This is something I teach my students first!)
 Then I clean up the lines and decide how the outline will look. Look back and forth at the subject and drawing, look for areas that might be out of line and fix it now. After you feel your measurements are right, you clean up the light lines and decide on the lines you leave. Keep your final line clean and neat. Use your kneaded rubber eraser now to dab repeatedly at the line to lighten it as much as you can, just enough so you can still see it but you can do watercolor over it and not have it show.
Crocus Geometer - lg wc") Laying in some washes with watercolor and adding some details. Here I put the first washes of color on and then started to add where the dark markings are and light wing ‘ruffles’.
Crocus Geometer cr") Larger study of the moth finished. And here it is finished! I just kept adding the tiny spots and built up the larger dark markings. Sometimes it dries and just doesn’t look as colorful because watercolor can look lighter and duller after it dries. So I go back and add some light washes when needed to perk it up, I added bright yellow and more browns on this one. (ps. I did have trouble with the antennae! I need to practice how to do such tiny detail with watercolor!)
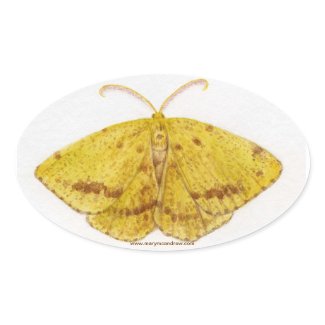
I’ve created some really pretty note cards and other things in my shop using this page from my journal, please have a look! Please forward my shop (or this post) to your friends to help me spread the word.
I love this tee shirt!
I’m showing you the page from my journal first, then I’ll tell you a little story about a ‘bug discovery’ I had. You’ll see on the right my studies from the lady beetle I found, bottom left is studies of lady bug ‘faces’ so you can see at a glance how this is a handy way to identify them. It’s not really their face but the pronotum which is the part just behind the head on beetles. Then I have a quote by Paul Cezanne and had some fun adding a old style border. (Please click on pictures for a BIG clear image!)
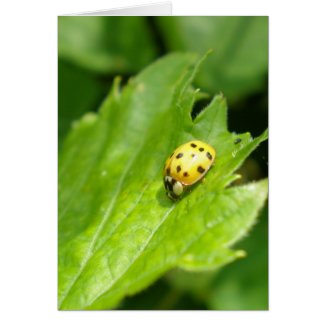
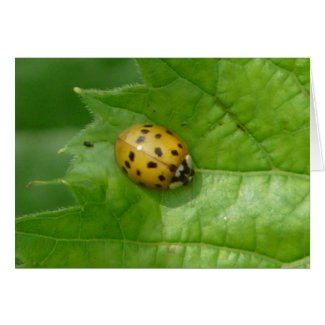
MC Lady Beetle") Multi-Colored Asian Lady Beetle studies You can read my note that the one leaf I actually traced to get the exact size on my paper. That’s a great thing to do when you’re making ‘scientific’ type notes and it saves time for studying other things about your subject.
Ok…now to get on with my bug story. Now this is really exciting, well for someone who’s interest in bugs has really peeked this summer it is!
 Multicolored Asian Lady Beetle pupa When I went out to get the mail I find myself looking down at the weeds in my front ditch near the driveway. I’m getting more used to spotting insects and today was no different.
 Multicolored Asian Lady Beetle pupa 2 I thought it was some kind of small bug but I didn’t have my (reading) glasses on so I didn’t really see what I was looking at as clearly. 😉
 Multicolored Asian Lady Beetle pupa 3 Well after taking pictures of it I gently set it down by some weeds in my yard, but when I looked at the enlarged pictures on my computer I realized what it was! I double checked in my Field Guide and yup, it’s a Lady Bug pupa. It’s a pupa just like butterflies come out of!
 Multicolored Asian Lady Beetle pupa 4 It was when I saw this picture that I realized it was hatching right now! Yikes!
 Newly hatched Lady bug So I ran back out into the yard and found where I had put it, brought it inside and put it in my plastic “Crisco” container you’ve seen me use before. He/she slept in this overnight (yes in my living room!) and the next morning there it was, all fresh and yellow, a brand new Lady Beetle! How cool is that?
 Newly hatched with wings still very tender Can you see the clear ‘spots’ on it’s yellow wing covers? I had a suspicion that these spots would turn into black spots we all are familiar with. And I think just like butterflies do when first emerged, I think it was letting it’s wings ‘develop’ and firm up…they looked quite tender at this point.
 Newly hatched lady beetle It looks like a little lemon seed, I love it!
 Multicolored Asian Lady Beetle with it's spots developed Well what did I tell you? The very same Lady Bug now with it’s spots all developed. I released it as soon as possible onto the same weeds I found the pupa on. What a wonderful experience it was to see this Lady bug go through these changes!
My eyes are getting better at noticing little things on the weeds and plants around my yard and land. I find that I’m seeing many more bugs, interesting eggs and pupas. If you take your kids out on a bug hunt, tell them to pretend that they have “Eagle Eyes” or “Superman Vision” and they need to stand still, zoom in on leaves and watch for little things. It’s a wonderful hobby to get kids interested in, especially if you loan them a small camera like I use, and get them photographing them.
This little beetle is definitely waiting patiently on my list of things to be painted! Below are some note cards I created using the “Multi Colored Asian Lady Beetle” pictures.
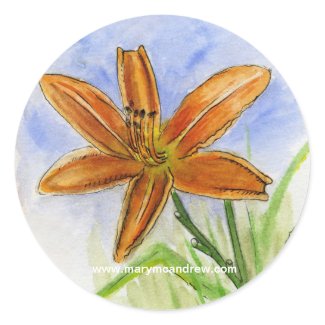
Day Lily 7-15-11") Day Lily in watercolor and metallic watercolor This will be one of the shortest blog posts I’ve done in ages! I just did this little sketch the other day to test out some paper and new kit supplies. I stood to paint in front of the row of Day Lilies and it wasn’t easy. The ‘no see’ums and the ‘see um’s’ were all biting me and started to make me miserable! Oh the joys of painting outdoors! Anyhow, the paper proved to be too thin and cheap so that won’t be going into my sketch journal.
After I got as much done as I could, I retreated to the shade and just outlined with a permanent ink pen to tidy it up. It looked a LOT better after doing this! Then later that night I saw my little kit of metallic watercolor paints and thought, ‘what the heck?’ so I brushed some on and it looked nice. The border is just the permanent ink pen then I loosely brushed on some metallic paint.
Well folks that’s it! Told you it was a short post, haha. More bug sketches and paintings coming real soon! Enjoy the links below to my shop!
Two new beetle studies to share, the Milkweed Borer Beetle and the Rhubarb Curculio. Sometimes I print out 4×6″ photos of my bugs and then as I have time I can sit and do studies in my sketch journals. I’ve been working on lots of bug studies as you’ve noticed lately, but plan to work on a series of small insect paintings soon.
Milkweed Borer") Milkweed Borer Beetle I love the Milkweed Beetle because of it’s black and red coloring and nice black curved antennae. With the black legs it looks rather coordinated in a fashion sense of the word! I’ve always been partial to red and black clothes or designs!
Milkweed Borer_Rhub Cur") Milkweed Borer Beetle and Rhubarb Curculio Then just below I decided to add a little study of the Rhubarb Curculio Beetle. I photographed it in my garden in early spring, it wasn’t ‘on’ my Rhubarb but I bet it was soon to be! I liked the rusty, powdery appearance of it and it’s unusual ‘snout’, typical of a weevil type insect.
second step leaf 2") My set up while painting I tried to take some pictures, with my tiny camera, of some of the stages while I painted the Milkweed Beetle. I like to try and show the steps a bit because there are so many ways to approach how to do a painting.
(side note- you see on the page a bunch of dots of color, I was playing around with color mixing with my watercolor crayons and it had nothing to do with these bug paintings)
second step leaf 4") Laying green 'spots' on top of first light green layer I missed taking a picture of the first stage but here (above) you can see that I put a very light green wash all over the leaf around the beetle first. I did this before I painted any of the bug, I used a bigger brush and just washed it on quickly but still tried to stay neat around the bug outline.
Then I started to paint the beetle; I used a water brush to wet the paper only where I was going to paint. The water brush was very handy to use instead of dipping my brush in water and wiping. I tested the red out on a piece of scrap paper then added a little at a time. The dampened paper was a nice way to keep the shading soft. Start with the overall color or the ‘background’ color first, then the darker values of red will be layered over it after it dries. I was careful not to paint red to the edges because it would ruin the 3d effect and also he had a powdery look that I wanted to imitate.
To make the leaf veined pattern, I thought I’d try just adding these little green ‘spots’ in a sort of organized pattern. By organized I mean that I would put them next to my pencil lines that indicated where a light vein would be, just arranging them along it was enough to indicate a vein.
second step finished 2") Green 'spots' layer is finished I’ve finished the green spots layer and you can see now how the bugs legs don’t look as dark? That’s relative to the new value of color around it and now will need to be darkened some more. That’s usually the way as you work on a detailed watercolor, it’s many layers to push things darker and bring out detail.
finished Milkweed Borer 1") My set up today on an easel to give my neck relief! Here’s a picture just showing you my set up as I worked at this stage. Before I had it flat on the table but that starts to hurt your neck after awhile, so best to prop it up somehow, this is a basic wooden paint box that you use on the table and the lid serves as an easel. I just stick the photo to it with “Blue Tack” or “Sticky Tack” and then I put my field palette of watercolors on a small box in front of it (so it’s raised up closer). This table easel a great little box because I keep ALL of my color pencils in it, separated by colors with rubberbands. I used to always use color pencil on my watercolors to add details at the end, but find I haven’t done that in ages!
Milkweed Borer 2 ed") Milkweed Borer Beetle finished and edited I took a wet brush and gently wet the spots and rubbed very lightly to blend them a bit, then I washed some blue faintly over areas of the leaf to tone down the yellow green a bit. The picture above is of the Milkweed Borer Beetle all finished and cleaned up (the edges) on the computer so I could use it in my shop on note cards. (if you click on it, it will take you to see Note Cards in my shop). Now I wanted to comment here that if I was making this as a finished painting to frame and sell I would have worked on it more. I would have washed over more of the pattern here to ‘push it back’ and not make it so spotty looking, though I don’t mind it much. And the area right in front of his face I would have tidied up a bit more but that’s it for now, I consider him a good study for a better painting someday!
Here’s some more items with this painting on it:
Thanks for stopping by, leave me a comment if you like, I LOVE reading them and replying! And I hope I encouraged you to stop and look a little closer at the bugs in your garden, you may be surprised at how interesting they are! If I could encourage one more thing, it would be to get you to leave some areas of your yard go wild with local weeds and wildflowers. I have some huge Bull Thistles growing now and have discovered many interesting bugs living on them all summer. It’s like a highrise building in a city, some live at the bottom, some at the top and they climb up and down the main stem all day long! The other day I saw a Ruby Throated Hummingbird stop at the huge pink bloom of the thistle and soon the Goldfinches will be using the down from it for nesting and in fall they will eat the seeds.
There are many other ‘weeds’ growing around my yard besides the thistle, more because I have trouble keeping it neat with my neck and back giving me trouble. BUT I have also noticed new bugs almost every single time I walk around the perimeter of my yard and STOP to look. If you stop, stand still and just watch awhile, you’ll see so much. Here’s a little rhyming quote from me:
“When you stop, study and sketch, a fine image you will catch. Study even longer, your drawing will be stronger!” Mary McAndrew
OK, go have some fun now looking for bugs! (and please get your children to look with you!)
|
Welcome to my Blog! The most up to date information about my artwork, nature sketching adventures, or step by step demonstrations. Search using Categories or Tags, or use the search box in the left column.
Please sign up below to get notified when I post new articles.
|
")
Oct 9 gravestone 1")
")
Oct 9 spider poem")
")


grasshopper 7 (3)")
fat yellow grasshopper (5)")

Long Lane Farm in August")
7-13-11 Eastern Tailed-Blue (9)")
7-13-11 Eastern Tailed-Blue (10)")
P1230732")


trees at Nancy's")
S of Cullernose Point")

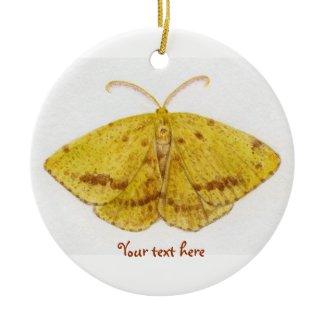
Crocus Geometer")

 small painting sketch")
 Crocus Geometer 1")


Crocus Geometer - lg wc")
Crocus Geometer cr")

MC Lady Beetle")


Day Lily 7-15-11")

Milkweed Borer")
Milkweed Borer_Rhub Cur")
second step leaf 2")
second step leaf 4")
second step finished 2")
finished Milkweed Borer 1")