(click the picture to see it in my shop where you can see ZOOM view by holding your curser over it)
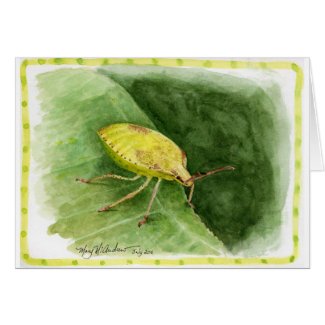
This is a painting of (another) Stink Bug, though I’m not sure what the exact species is, a friend in England suggested maybe it was a ‘baby’ with this coloring. I really enjoyed painting this, the colors, the leaf and then the detail on the bug itself….love those dots on the legs! It’s a page in my journal so I added a little fun border with my brush and watercolors.
Almost there!
Here’s my set up; I found that using a large bobby pin to hold my photo in place worked out really well. I keep a little piece of paper nearby to test dabs of color. You can see at this stage I’ve got a lot done, but don’t have the deeper shadows or finer details in yet.
Close up of my progress
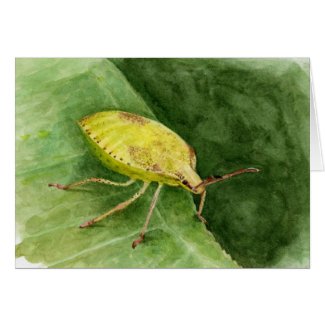
Here’s a closer look, though the color is not right (because of my camera shot) you can see how pale the whole thing looks. Adding more shadow under the bug and rich color to the leaf really helped it. I also took a damp brush and rubbed the edge of the leaf, above the bug, to make it softer. Something else I did, though it’s not in my photo, I added just a bit of cast shadow from his feet. This really made it look more 3 dimensional and realistic!
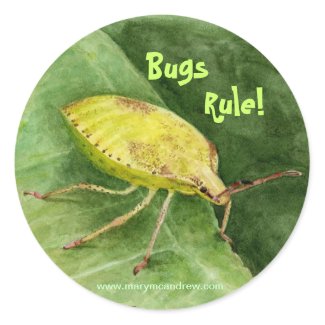
Well I’ve had a lot of fun making some attractive products with this painting in my shop, please click any below and have a look!
I love this tee-shirt! I ordered one for myself on the ‘value tee’, it was printed huge on the whole front! WOW, so much fun to wear! I know some Science teachers who’d love this! You can put whatever words you want on it.
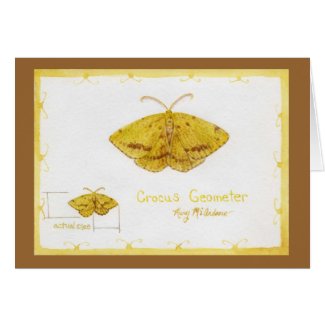
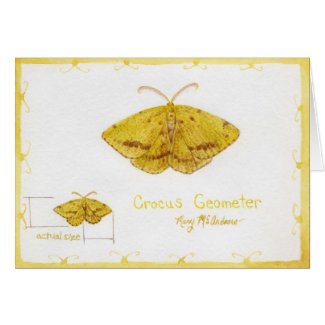
Crocus Geometer Moth full page from my sketchbook journal
In the morning when I let Ginger (my dog) out the back door for her morning wee, I always survey the screen porch to see if any visitors of the mothy type, have overstayed their visit. I used to leave the screen door open so I could be lazy and Ginger would just run right out, but stopped when too many flies were coming in! But I did get all kinds of moths in there! Well even with the door shut, some do sneak in and that’s how I found this little guy. Well sad to tell you it wasn’t alive, but laying on the floor in perfect condition. So I gently, gently picked it up and put it in my “Crisco” container for study.
Above is a full sketchpage from my journal, I did a life size study in the lower left corner and an enlarged size in the middle. I had fun with the border by just using my waterbrush with a matching color and added little ‘butterfly’ heads.
My set up when I sketched the moth
You can see in my picture that I lay the moth on the lid of the “Crisco” container and that way I was able to move it around as I worked. My watercolor pan is under it and the sketchbook is on my little table top easel box. (you can see my last page from the lady bug post!)
Drawing a study at the same size first
Now here I’m showing how nice it was to sketch the same size study by having the moth on the plastic lid. Using my pencil I did comparative measurements to compare the width to the height of the moth. Do you see those lines on the page? I put them just as a teaching tool, to show you that I found the measurement from inside wing to outside tip was the same measurement as the bottom of the wing to the top, his head I think it was. I always use comparative measurements when drawing!
Such a gorgeous colored subject!
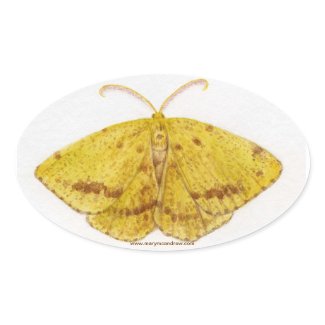
Isn’t this a beautiful moth? His antennae were really elegant and graceful, very hard for me to paint with watercolor! The more I studied him under a magnifying glass the more I saw and appreciated it’s beauty.
This is how my larger sketch looked at first.
(Above) Now I’ll show you the steps I took to do the large painting of this Crocus Geometer Moth, mostly how I drew it. Do you see how boring and technical it looks? I know, but if you don’t start with a clear drawing done in PROPER PROPORTION it will never look right! Sorry, I”m not shouting, but it is REALLY important! If you do anything, learn how to draw well!
So I used my pencil to compare the width of the wings tip to tip to the measurement of the moth top to bottom. I put light lines on the paper then drew an arc as close to the shape of the ‘real’ moth subject as I could. Then I decided where the wings ended in the centre, keeping in mind that they overlap.
The second stage is lightly sketching the placement of shapes, wings, body, head.
Above you see a lot more drawn here; I drew an arc lightly for the bottom wings too, then decided where the two wings met and overlapped then drew them. I found the wing tips were half way between the head (top) and bottom wing edge, can you see how there’s a little ‘t’ at the tips?; that’s centre from top to bottom.
It’s really fun when you get into a drawing and start to find things that are the same measurement so you can check other parts of your drawing by comparing them! That’s why it’s called Comparative Measurements! (This is something I teach my students first!)
Then I clean up the lines and decide how the outline will look.
Look back and forth at the subject and drawing, look for areas that might be out of line and fix it now. After you feel your measurements are right, you clean up the light lines and decide on the lines you leave. Keep your final line clean and neat. Use your kneaded rubber eraser now to dab repeatedly at the line to lighten it as much as you can, just enough so you can still see it but you can do watercolor over it and not have it show.
Laying in some washes with watercolor and adding some details.
Here I put the first washes of color on and then started to add where the dark markings are and light wing ‘ruffles’.
Larger study of the moth finished.
And here it is finished! I just kept adding the tiny spots and built up the larger dark markings. Sometimes it dries and just doesn’t look as colorful because watercolor can look lighter and duller after it dries. So I go back and add some light washes when needed to perk it up, I added bright yellow and more browns on this one. (ps. I did have trouble with the antennae! I need to practice how to do such tiny detail with watercolor!)
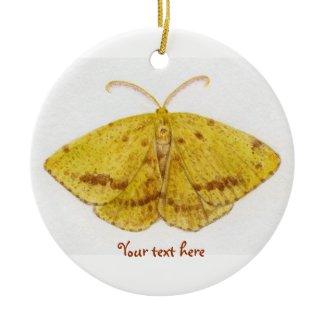
I’ve created some really pretty note cards and other things in my shop using this page from my journal, please have a look! Please forward my shop (or this post) to your friends to help me spread the word.
Today I went for another walk on Long Lane Farm with my 4 legged companion Ginger. Below I have a page from my sketchbook journal where I show a fun technique of using a frame as a design element. If you keep a few ‘frame’ templates in your field kit you can have some fun tracing them. Some template ideas could be a post it note, an index card, maybe the lens cap from your camera (I thought of this one while sitting and drawing today) and what I used here was a simple refrigerator magnet that has the center that pops out. I think if you take more time to play with this you can really do some nice designs!
field-study-flowers
Clockwise from the top left you can see a Daisey in the grass, then the male Oriole popping his head through the oak leaves at the top of a VERY high old oak. Above that a yellow wildflower that I think is ‘King Devil’ a type of Hawkweed, then ‘Fleabane’, the little pink flower underneath the Oriole. The bottom right is a very pretty wildflower that I found in the Maze..anyone help me with this one? (I have photos of these wildflowers coming up.) In the frame are ‘Common’ or ‘Tall Buttercups’ and around the frame I listed the names of birds I saw or heard today.
field-study-grasses
On the second page I just used the micron permanent pen and drew some grasses. On the right are ‘Soft Rushes’, their pliable stems are what would be used to weave mats or baskets and next to it some type of sedge. The rushes are more closely related to lilies than grasses, my field guide says and I know the stem is round. It’s neat to follow the stem to the top with your fingers and feel how absolutely perfect a point it comes to. The sketch next to it is of some type of sedge, honestly I can’t find it in my guide. They had a most interesting design in their growth, three leaves jutting out from the top in different directions and the clustered seed pods looking like spikey critters! It had a triangular stem which reminds me of the saying…”Sedges have edges”.
tree-swallow-youngster
I snapped this shot as I was leaving the yard, just after his mom or dad had visited the hole. What a face! haha!
fleabane
And here’s the pretty pink ‘Daisy Fleabane’, people used to hang it in their houses to keep away the fleas…not sure if it worked! I have a big clump of these sprouted up in my front flower bed and they are really pretty. Many people would have yanked it thinking ‘weed’, but well, it has lots of company with all the other weeds!
white-flower
This is the mystery flower, can anyone help me identify it? I love the fine fuzz on it, as I look at a close up picture, it catches the sun. They were growing together in a patch in the middle of the Maze.
King Devil-Hawkweed
I think this is called King Devil a type of Hawkweed; I found it growing at ‘Aspen Hall’ a shady area along the lane just before the Maze. It has fine bristly hairs all over it and the flowers were all confined to just the top of one long stem. I had to move grasses to find the leaves, which were tucked low at ground level.
white-moth
This white moth was interesting to study. I spotted him when Ginger and I were returning along ‘Oak Lane’, it was flitting eratically along the path, as butterflies do. I kept following it to try and get a picture and I’m sure it knew it was being followed. I thought about how strange it is for a WHITE butterfly to be amonst so much green! It stands out like a sore thumb, well I have a feeling this photo will teach you something. When it landed instead of staying on top of the leaf and closing it’s wings, it very quickly flipped under the leaf and laid it’s wings out. Now you’d think oh I’ll still see the white, but no, the green leaf reflected on it’s wings and it now looked green! How cool is that? If you ask questions as you stand and watch the bugs and critters around you, you’ll start to notice details you never thought of before.
oriole-male
Here is the gloriously beautiful male Baltimore Oriole! I love seeing them, such an intense orange and yellow breast set off by deep black like velvet! He’s way up in an oak tree looking down at me, can you tell? I love this picture of him. This was along Oak Lane and I ended up standing still here for quite a long time. I kept hearing several different birds give their warning chirp like they had babies near.
oriole-nest
I’m glad I stood as long as I did, I caught sight of what I guessed was a female Oriole and studied where she disappeared to. Aha! They have a nest way up in the oak tree, hanging out over the path! It’s amazing that birds can actually weave a basket nest like this in the tree and it supports the eggs and adult, later all growing into heavier fledglings. If you look close you can just see the female through the leaves, leaning down into the nest to feed the babies.
green-bug
I think this little green guy who came to visit me while I was eating and painting was really neat! I haven’t found him yet in my field guide, I think I need another bug guide to cross reference.
black-beetle
And last we have a very black, very shiney beetle…no I don’t think it’s this beetle but I’d love to hear some suggestions? Closest I’ve come is either a ‘Ground Beetle’, or ‘Red Legged Ham Beetle’ or a ‘Blue Milkweed Beetle’.
I hope you enjoyed the walk with me today, so much was seen and discovered in what looks just like an ordinary field and woodland edge. Take time to stand or sit still and just watch what the creatures around you do. And you’ll see so much more if you look a bit closer at the ground, grasses or flowers as there is always something living there.
Please post a comment if you like and if you may know what my bugs or flowers are, please lets have a stab at it!
Here’s the books I referenced after my hike today:
Reader's Digest Wildflowers Guide
Nat.Wildlife Fed. Field Guide to Insects and Spiders of N. America
After a long night time drive from Muncaster, I arrived at Rydal Water and settled into my room at Cote How Bed and Breakfast. I had only one day to explore as I spent an extra day under Muncaster’s spell. I spent the entire day hiking, taking photos, sketching, talking to people and video taping. Every few steps I had to stop and exclain “wow”…”oh!”…”beautiful!”…I couldn’t stop taking pictures. I wish I had a week so I could really go out to draw and paint. I’ll do work from the photos in the studio and try to return there perhaps to teach a class as we hike around the lake?
After a wonderful breakfast at the Cote How b+b, I came down a path and this is the view of the lake as I approached. The day had a promise of rain; I had my rain gear in my backpack, some snacks bought on the way to Rydal, bottle of water, and extra art supplies. My video camera was hanging from my waist in handy reach, 35mm around my neck, and my art kit hanging from my waist also. Umm…I felt a little like a pack horse but believe me I tried to keep it light! I always try to not carry too much, my back just can’t take it.
Sometimes the path veers away from the lake but always followes along through woods and over hills. Every gate I came to was set in a different scene, mood and lighting. I saw wooden gates and metal, all attached to ancient stone walls with lush green moss on anthing that wasn’t moving!
Once I got out and walked next to the lake, I did a really quick sketch looking across to the other side. I put color notes on the sketch and wrote about some nice walkers I met along the way.
Another gate, this one is for the cows who are lazily lounging along the lake. I put a video clip at the end of this post that shows this view with the wall. Can you see the other side across the water? That’s where I’m eventually headed, this hike today will take me around the entire Rydal Water lake.
Ok…no one said the hike was super easy! This is one part of my walk that took me up the mountain on the other side of the lake. Sometimes I was following a dry creek bed for a path.
After that part of the hike I smartly decided to sit and have lunch, maybe it was a cover so when people walked by they wouldn’t notice my heavy breathing! haha…I sat and did a micron pen sketch of the gate on the path. I added notes about color and things so I could remember later if I do a painting. Just as I finished the sketch my favorite little European Robin landed on the gate! I had to sketch him in.
I’m on the other side of the lake now…looking back and down the valley at the sheep in the fields. They were everywhere, wandering about even on the paths were I was walking.
Along the way I met all kinds of nice people, this is a group of photographers from Scotland. I knew they’d be friendly if I chatted with them, I have friends in Buffalo who go shooting and they love talking shop. As we talked standing along the valley stone wall, a friendly European Robin came and started looking for handouts. One of the group put some crumbs out and we became instant friends with the little bird! Here’s a picture taken with my tiny camera on zoom, not so great for clarity, but it works!
I love when you’re hiking along and if you keep your eyes open, really take notice of what you see, you may see something almost underfoot, literally! I was chatting with an older gentleman while up on the far side of the mountain, a good thing to do to catch your breath. I pointed out a dung beetle crawling along on the ground. I took lots of photos…it’s just great to look at later and notice all the cool things you don’t see at the time. His feet had long ‘toe’ parts, his antennae were a beautiful color with several parts to it, his legs a gorgeous deep purple. When I looked at him from above he was just like the ancient scarabs the Egyptians used in their jewelry. Ok..yes, he’s still a dung beetle, as I studied him…he crawled directly across the path and found..umm…dung! I spared you the picture of that!
This I did while up at the highest point, looking down at the b+b I came from. I stradled a cold, damp stone wall and tried to sit on my coat. I had to hang one leg over the side towards the valley, it was a pretty big drop off. People passed by and I just tried to do my best with my small set of oil pastels, smearing the clouds as the weather changed and mist came in.
This quick sketch was done on the fly…the weather was changing and I was a little worried about how long it would take me to finish my hike. I did take pictures so I could do a little color study later, if I can I’ll post it.
And this is the last page of my sketchbook for today that I wrote while at the Badger Pub. After my hike I freshened up at the b+b then walked the back path to cross over the bridge to the pub. The dinner was excellent and when 9pm rolled around, we were invited to go out back of the pub to watch the badgers get fed! I counted at least nine of them! It was really cool, my only experience with badgers was when I was a zookeeper, his name was Boris! You had to keep a shovel between you and him to keep from being nipped!
I hope you enjoy the video clip below of the lake from my hike. It was a fantastic walk that has filled my memory with wonderful things. I hope you come along with me on the rest of my journey in England!
This is a continuation of my weekend at the Allegany Nature Pilgrimage at the end of May. This post I have some pictures of fungus, lichens and moss from the non flowering plants hike I took led by Alice Brown. This is a fungus I’ve seen growing on my land in Clarence Center NY, in the Adirondack mtns. and at Allegany. It’s a fungus I identified as Trametes Versicolor, the common name is Turkey Tail, so named because of the variable bands of color. I’ve seen it in all seasons which makes it kind of fun to look for, check dead trees and branches on the ground etc. I read on a website that a tea can be made from it and that it’s used to fight cancer and hiv. Don’t quote me on that but it’s what I read, I do know that mushrooms can be very good for you. I wouldn’t recommed going out and eating these though…my mushroom book (Simon and Schuster’s Guide to Mushrooms- Excellent Book!) says that it’s inedible because of texture. This is a flat fern type of moss, I don’t know my mosses yet so if someone can help me out here. I have to look for a good field guide, you know…tall, dark, handsome! haha…no really, the kind with pages is fine! This is a picture of mosses on the side (type?) and in the center is a type of lichen, foliose type I think. I’ve always liked the cool color of lichens..like the green patina copper gets when it’s out in the elements. Then there was the night I was headed to bed, enhausted from all the hikes and early mornings, but saw this show-stopping Luna Moth! Wayne Gall had a simple white sheet up each night with a really bright light to attract all kinds of bugs. I never imagined I’d ever see a Luna Moth and there it was! Wow! It caused quite a bit of excitment. I definitley have to do a painting with one of those in it. Notice the antennae…so large. This is a page from my sketchbook, just some quick sketches of the dragonfly talk led by Jeremy Martin. Below is a picture of a dragonfly that just came out of the ‘Exuvia’, or shed skin. That’s what I did the small sketch of above. I have written in my sketchbook that I took a picture of a Springtime Darner…maybe that’s the type below. Well as I said, not too many drawings on this Nature Pilgrimage…I needed the whole following week to stay there and digest all that I learned, and go back and sketch things. Be sure to check my post about Thunder Rocks coming up!
Today I wanted to get outside without spending too much time thinking about it. Sometimes you can waste time just planning and packing so I kept it super simple. I took a gallon ziplock bag, my 6×8″ sketchbook, a tortillion, a small stiff brush, one small set of charcoal pencils (already in a clear pouch so I could grab them), and something new to me a set of “Cretacolor” leads or sticks with a lead holder. I have a bigger picture of them laying on my sketchbook pictured. The set comes with a 4b graphite stick, a white chalk, two shades of brown chalk, and sanguin? stick that is like a color pencil and doesn’t smear or blend easily. I should have brought a simple pen for writing, hard to write with charcoal! oops! Next time. I wore these work gloves because they offered a bit of protection but they let me use my hands better than my heave work gloves! I use these when I do oil landscapes in the fall or spring when it’s still chilly.
Something I’ve mentioned before, it’s when you really stop and be still for a time that you start to notice little things you might have missed before. Today I was setting my ziplock bag in the snow as I worked on drawing standing up. When I crouched down to retrieve something from my bag, I noticed a tiny, tiny bug on my bag. Then I noticed there were more tiny bugs on the snow under the dead Zinnias I was drawing. Then as I looked around, no kidding, they were all across the snow everywhere! Yikes, glad they were tiny, but it’s a sign of spring. I’m not sure what they were.
Welcome to my Blog!
The most up to date information about my artwork, nature sketching adventures, or step by step demonstrations. Search using Categories or Tags, or use the search box in the left column.
Please sign up below to get notified when I post new articles.
lt green Stink Bug")


Crocus Geometer")

 small painting sketch")
 Crocus Geometer 1")


Crocus Geometer - lg wc")
Crocus Geometer cr")