Support This Site

If you like what I do please support me on Ko-fi

Old Mossy Stump and New Fungi Guide!

(Click on any picture to see it enlarged)

I did this study back at the end of December, the sketch was done outside and I painted it near the woodstove heat at night! I’ve included lots of pictures to show some stages of painting and other fungi I found.

My view of the stump and rocks covered by moss.

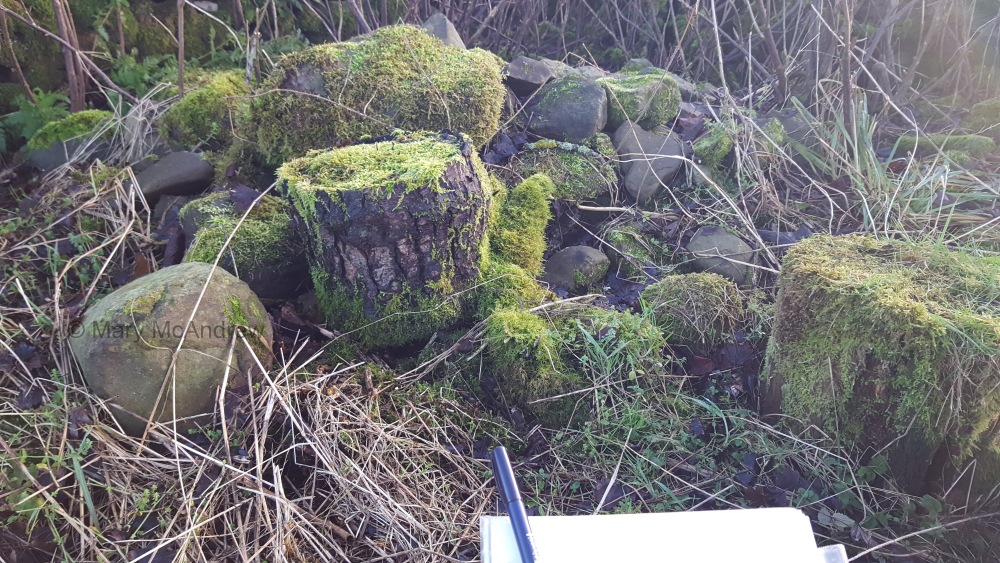
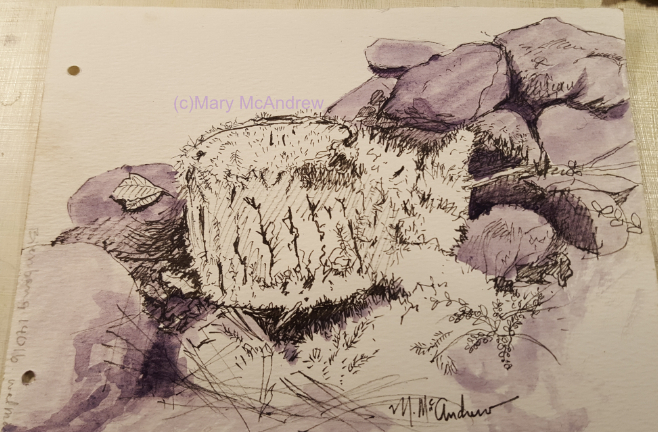
This is the view I had from my place on the damp, cold ground. It’s just a pile of rocks and old stumps but I’m drawn to the deep cracks and crevices the connect them all like a puzzle. When I draw this kind of subject, I usually get a bit lost with all the crevices and rocks, but being that it’s a natural subject, you can just adjust it as needed so it looks ok.

My sketch in progress.

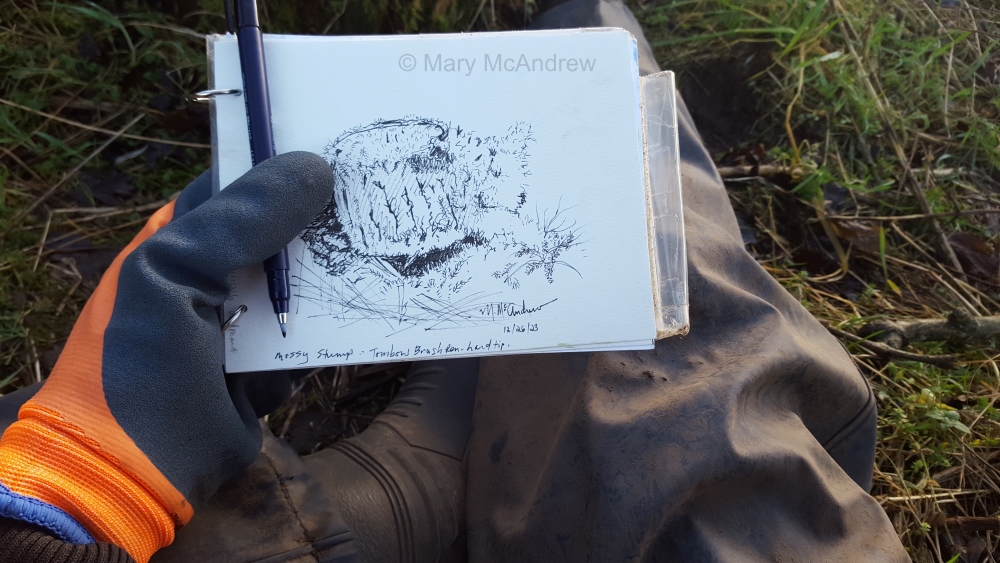
Above shows the size of my sketchpad and the thick thermal gloves I wore. I also had my rubber gardening pants and Wellies on because it was so cold and wet on the ground.

Deadman’s Fingers on the old stump.

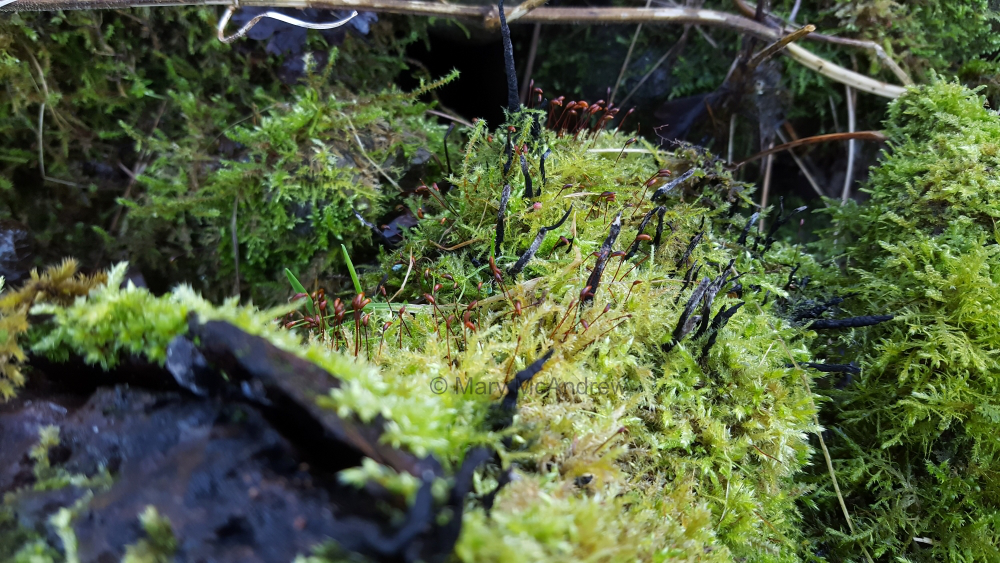
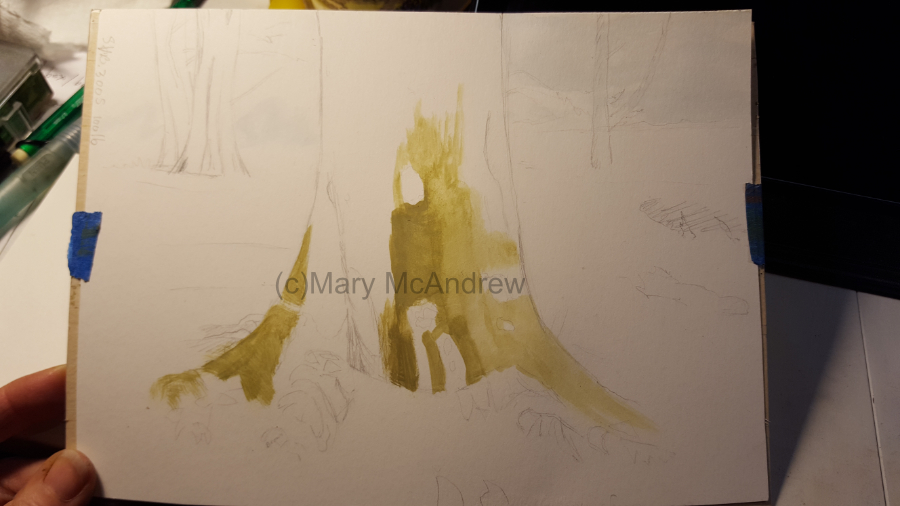
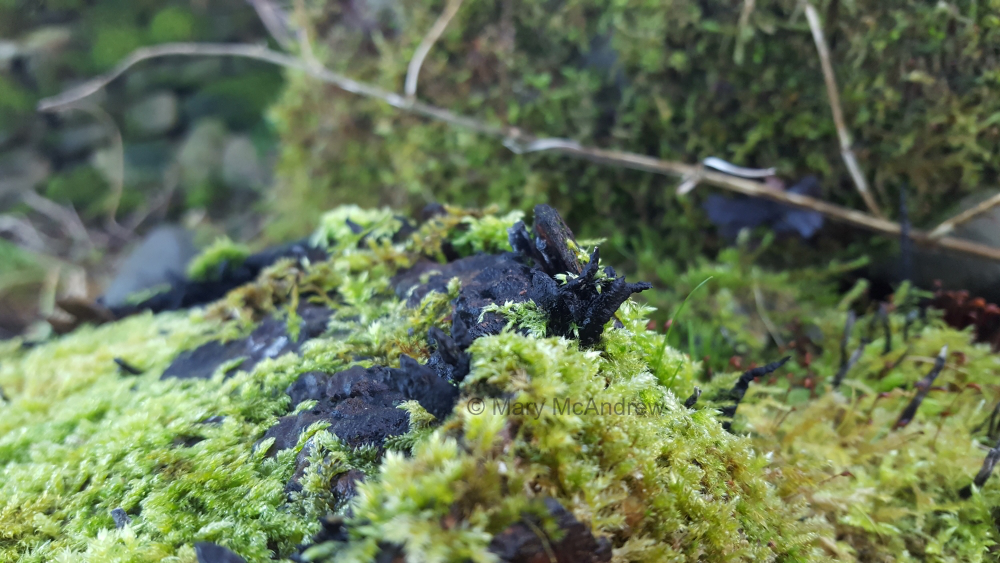
The pictures above and below show the interesting fungi that grows out of the stump. The fungi is either Xylaria polymorpha (Deadman’s Fingers, what a name eh?) or Xylaria longpipes. The guide says Xylaria, “look for: hard, tough, usually dark brown to black, clustered finger-like fruit body on dead wood.” Well the black fungi on this stump is much skinnier than what the book shows, but maybe it’s because it swells up at a certain time of year?

Another view of the fungi, Deadman’s Fingers, and lots of soft moss.
Mossy old stump with many interesting fungi growing on it.

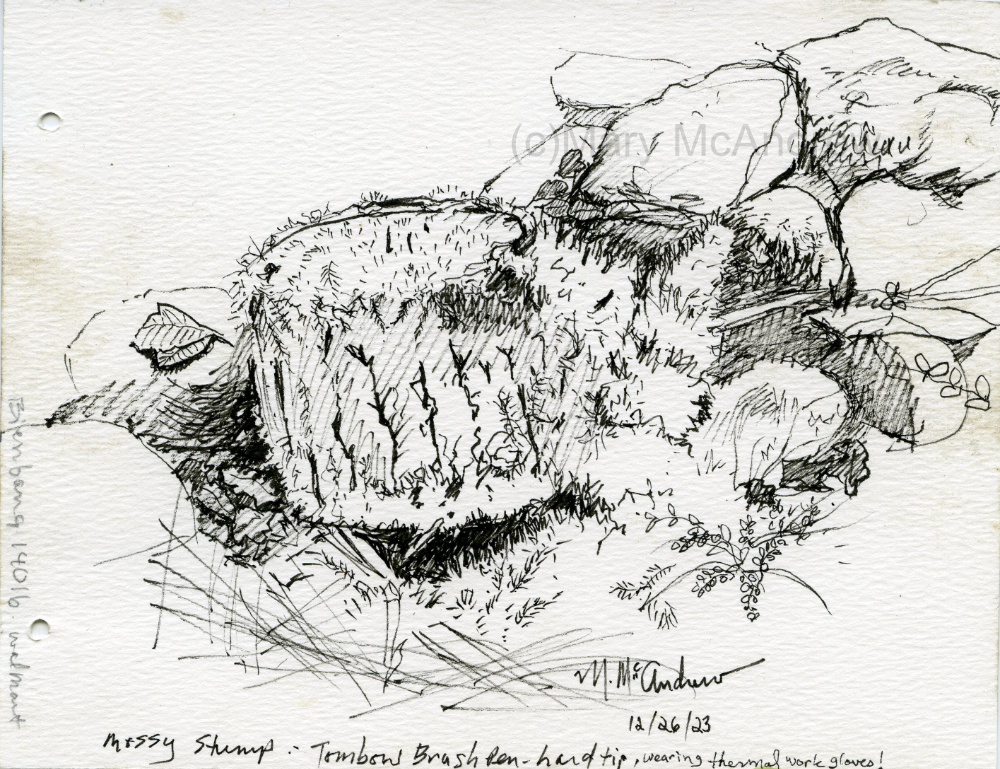
This is the sketch I did outside in my small field sketchbook. As it says on the bottom of the drawing, I wore thick, thermal work gloves while drawing, a difficult task! And I used a new pen I’ve not tried yet, “Tombow Brush Pen”, hard tip, I thought it would be better for making quick marks in the cold. I also bought the softer tip, which is in my field bag to experiment with also.

Painting at night from photo reference, using my new Van Gogh watercolors.

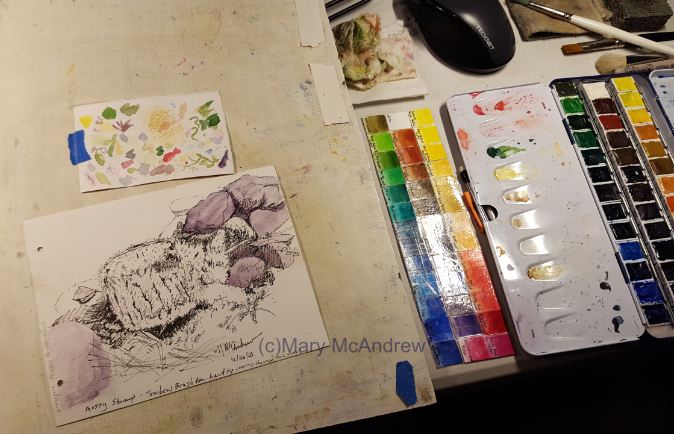
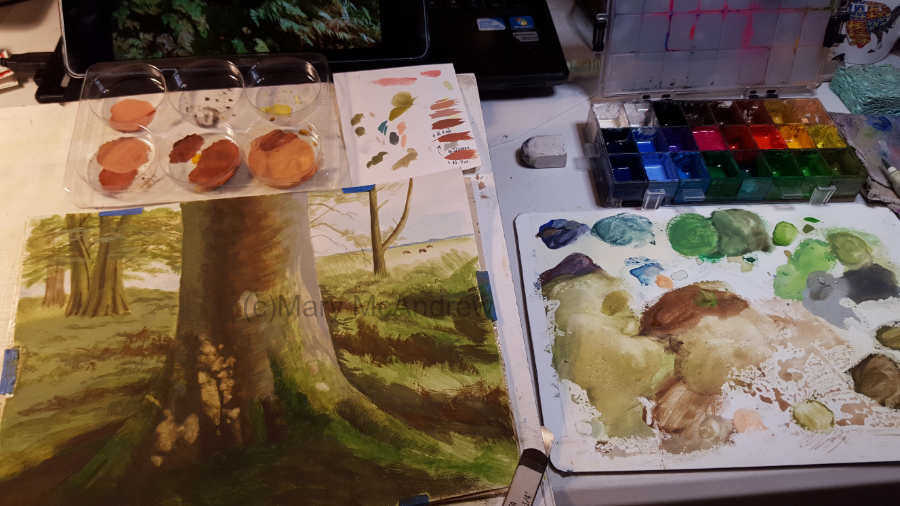
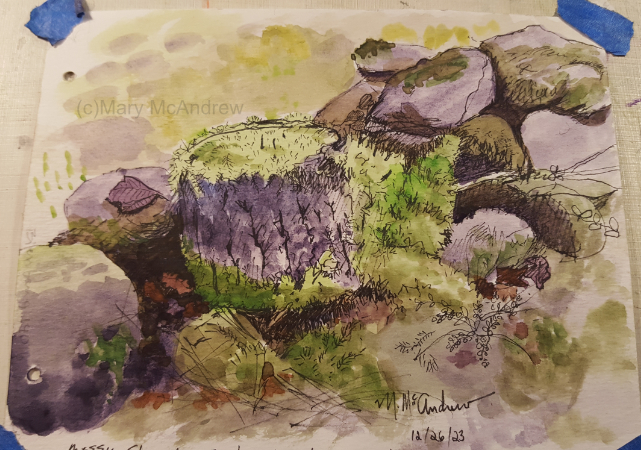
Above shows my Van Gogh watercolor set, the color chart I did of each paint and the sketch on my board. I always keep a small bit of watercolor paper for testing colors nearby.

First layer of watercolor.

I used a color called “Moonglow” by Daniel Smith. It’s a dull purple color I’ve used before for underpainting rocks and like experimenting with it.

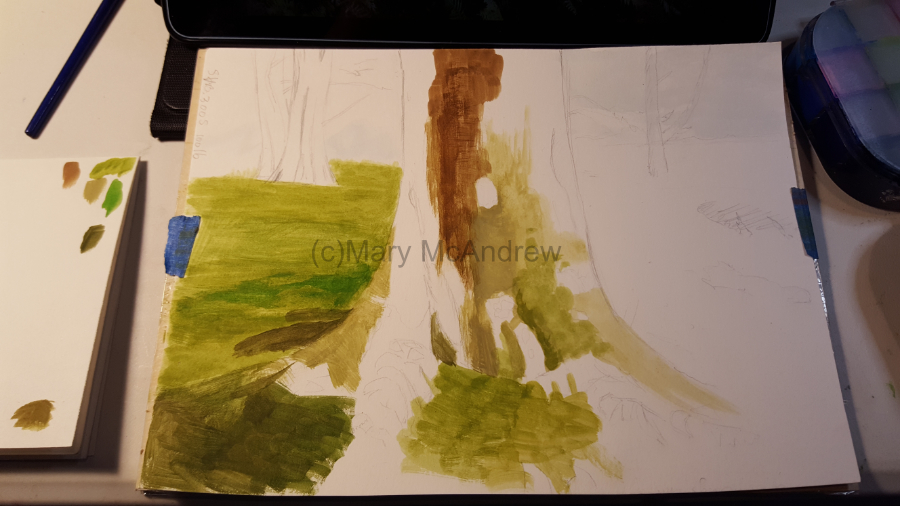
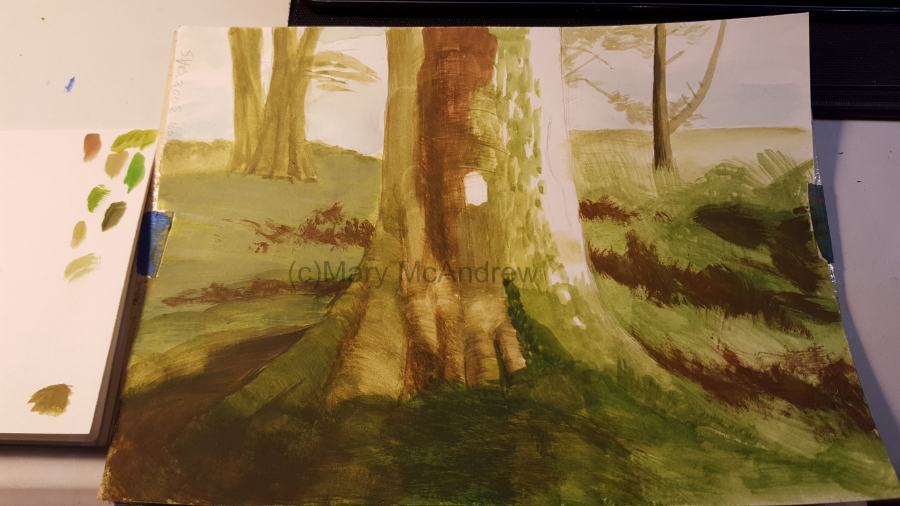
Above shows more layers of watercolors to build up colors.

Adding gouache for the mosses.

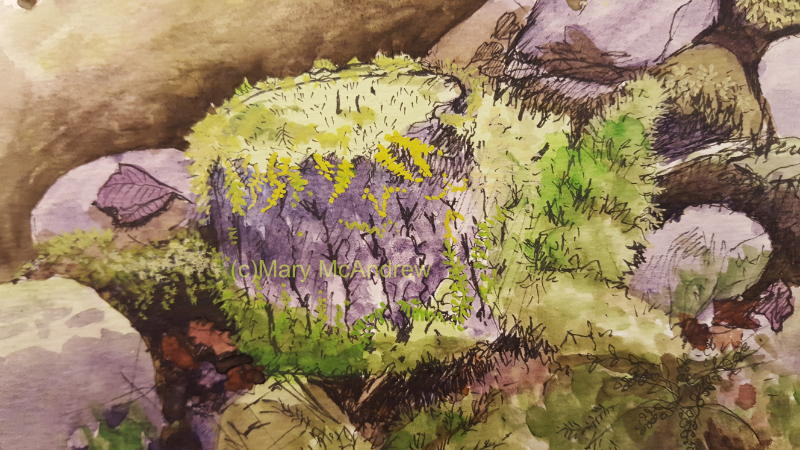
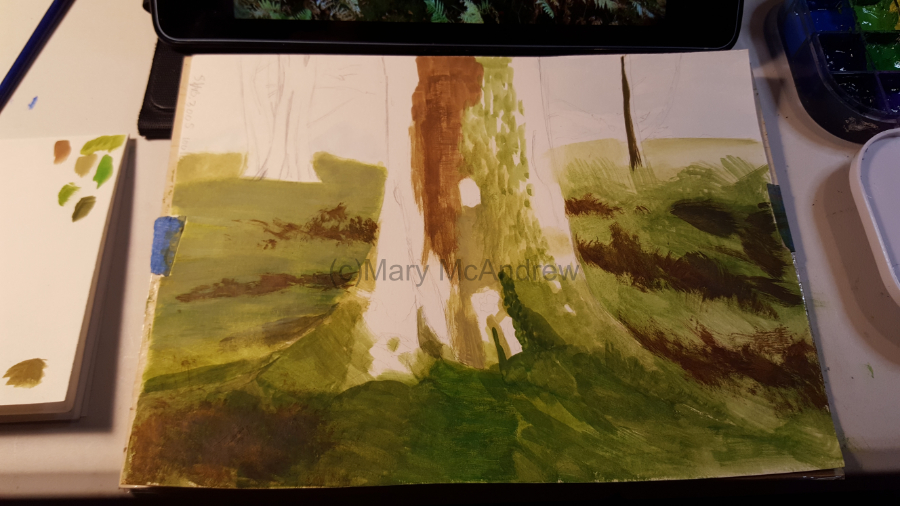
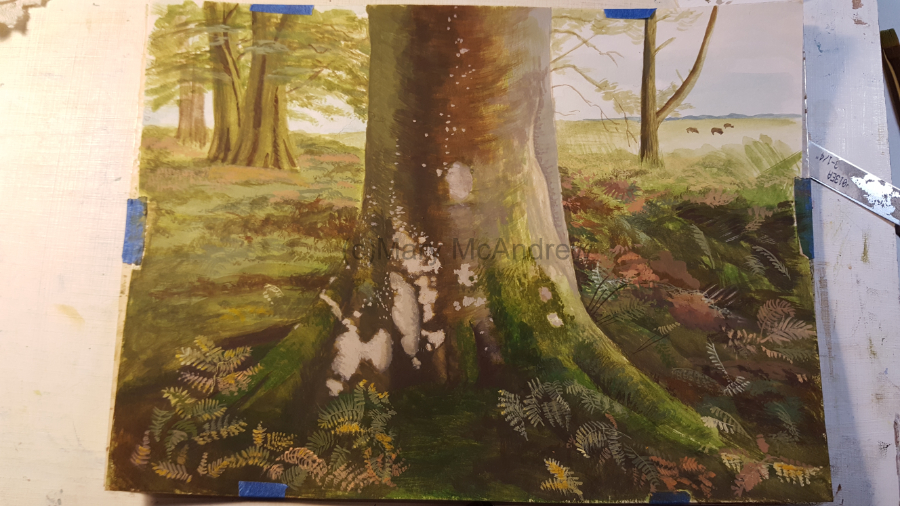
Now that the watercolor layers are on I start to add gouache, which is opaque and is great for building up the texture of the moss. If you plan ahead, the gouache can really stand out nicely, especially on dark areas.

Finished study.

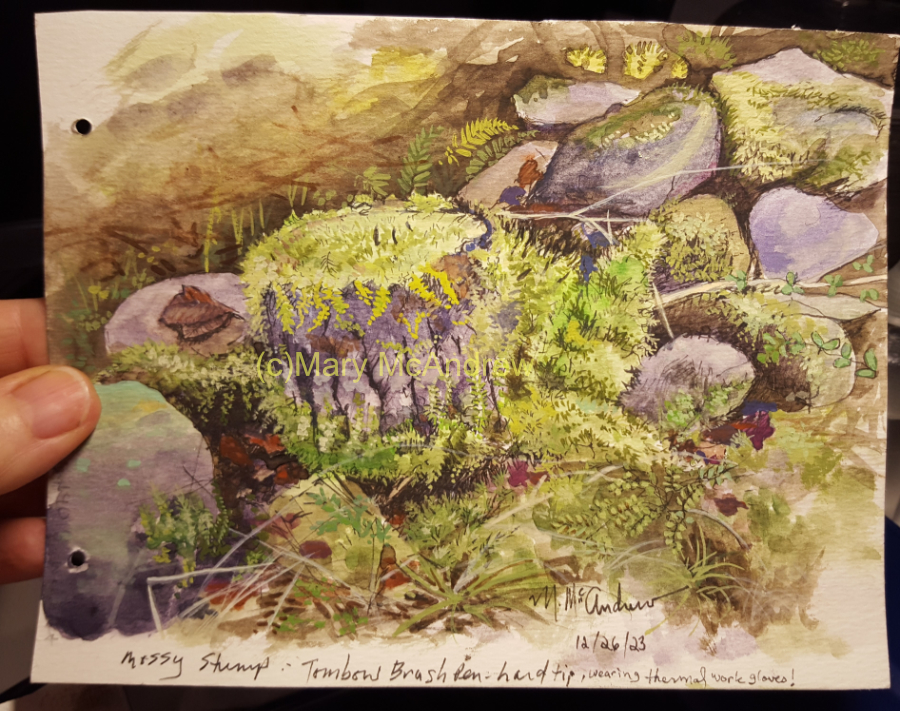
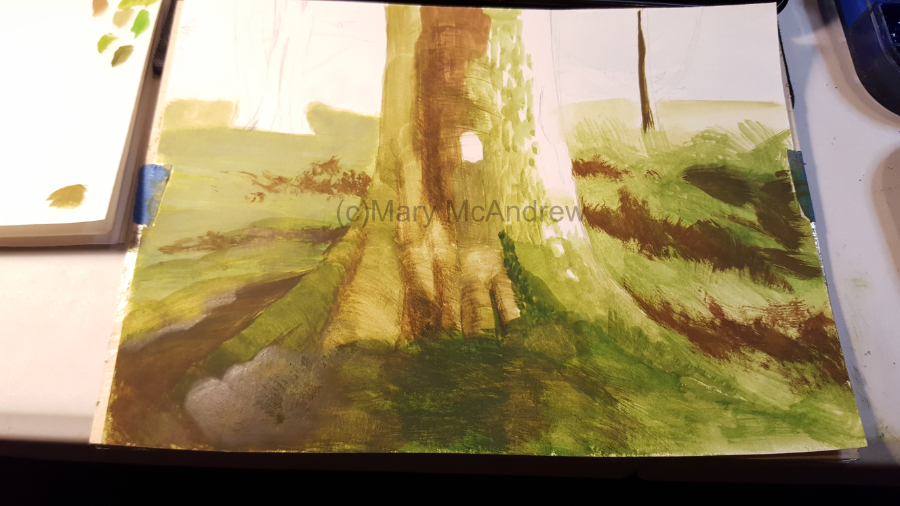
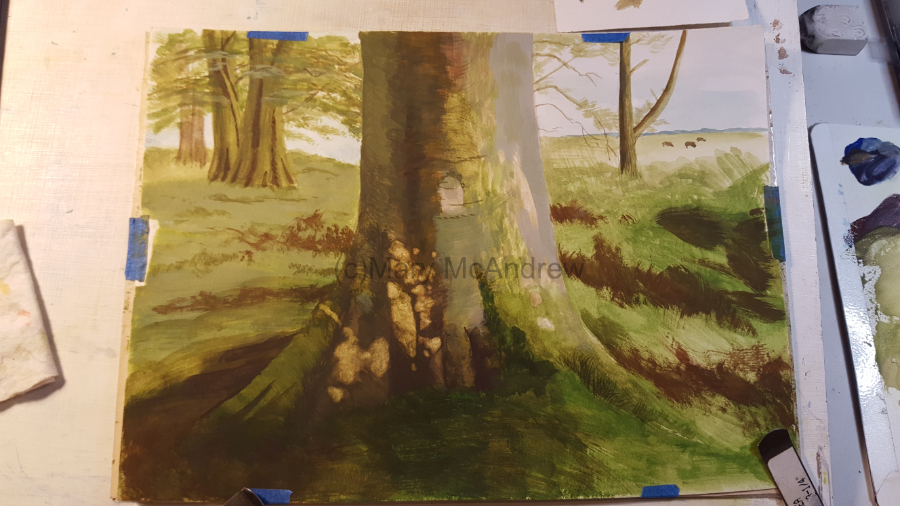
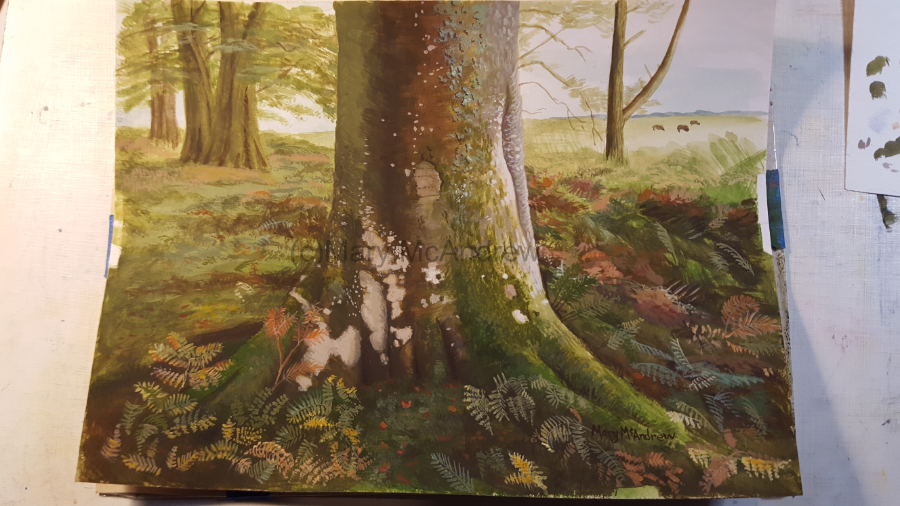
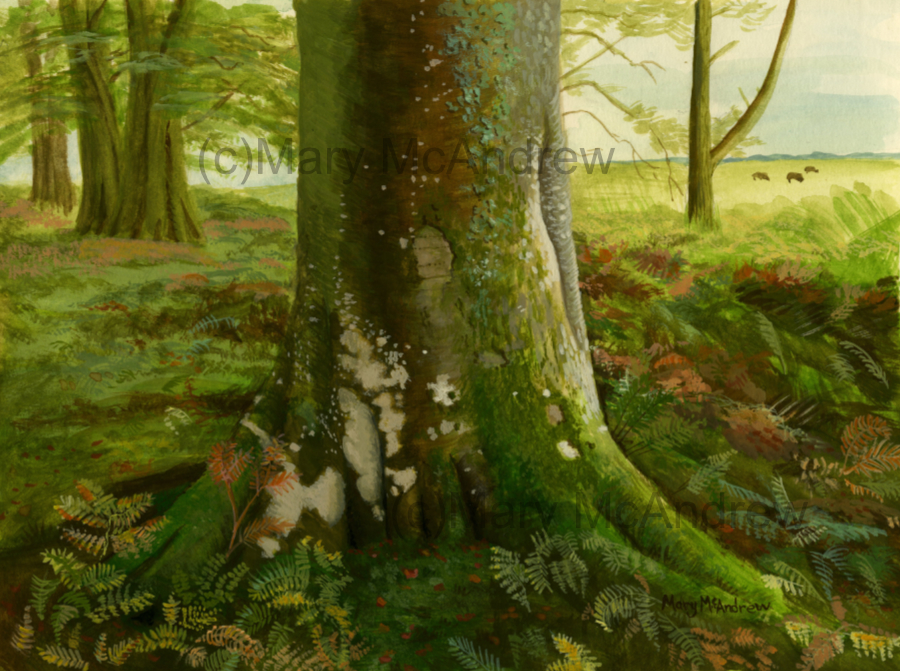
This is the study finished, I took this with my cell phone camera at night in regular lamp light, but the warm hue is pretty close to the original.

Scarlet Elfcup – Sarcoscypha austriaca, beautiful little red cups hiding in the grass.

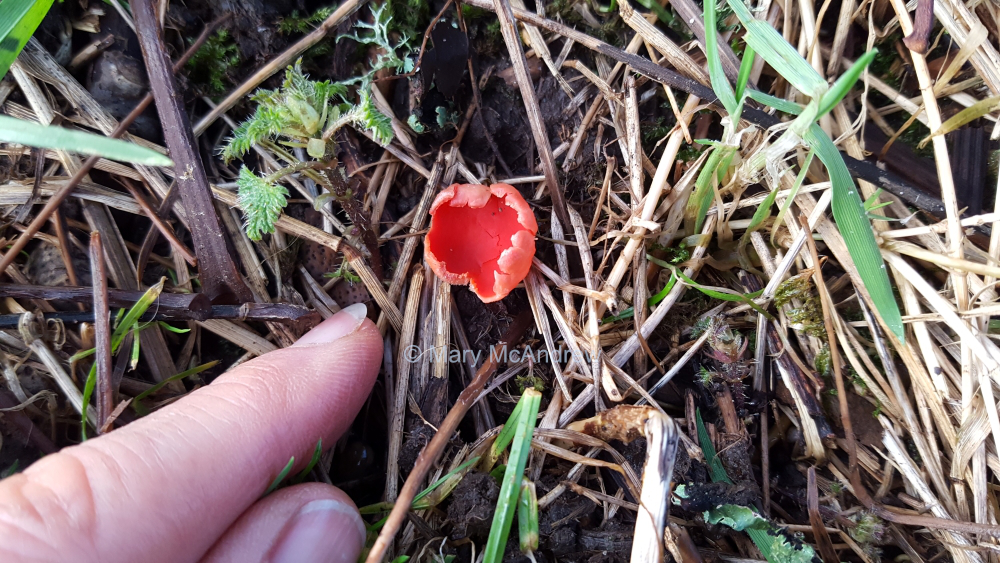
Every year, since we’ve moved to our property in the Scottish Borders, I’ve spotted this tiny Scarlet Elfcup growing. It springs up in Autumn under the huge ancient Ash tree in our paddock, but so small I have to be careful not to step on it. I pick up a few sticks and place them to form a square around it, just to help me see it and not step on it.

A second Scarlet Elfcup!

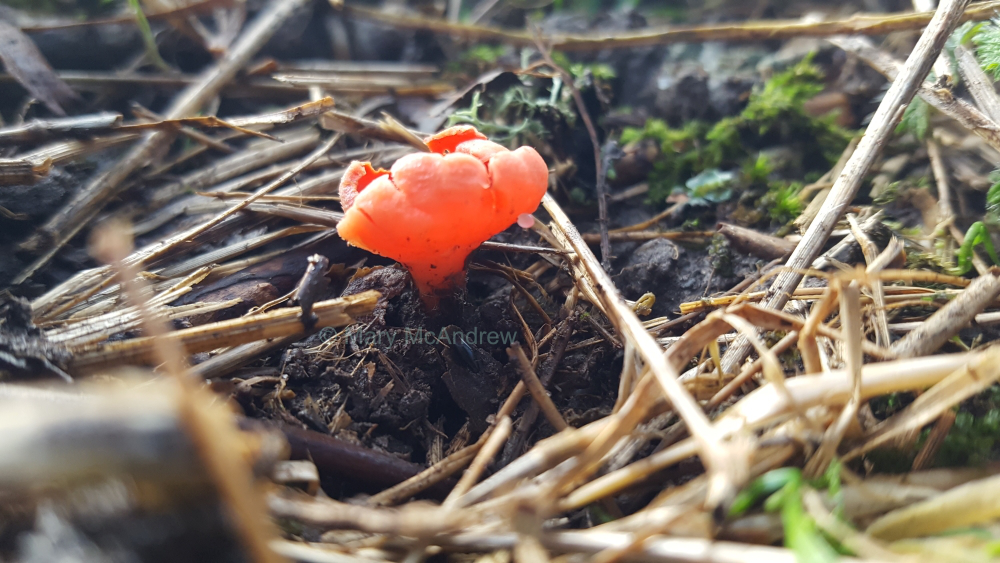
This year I was lucky and found yet another little Scarlet Elfcup. I’m hoping it spreads more every year.

Mushroom growing on dead Hawthorn branch.

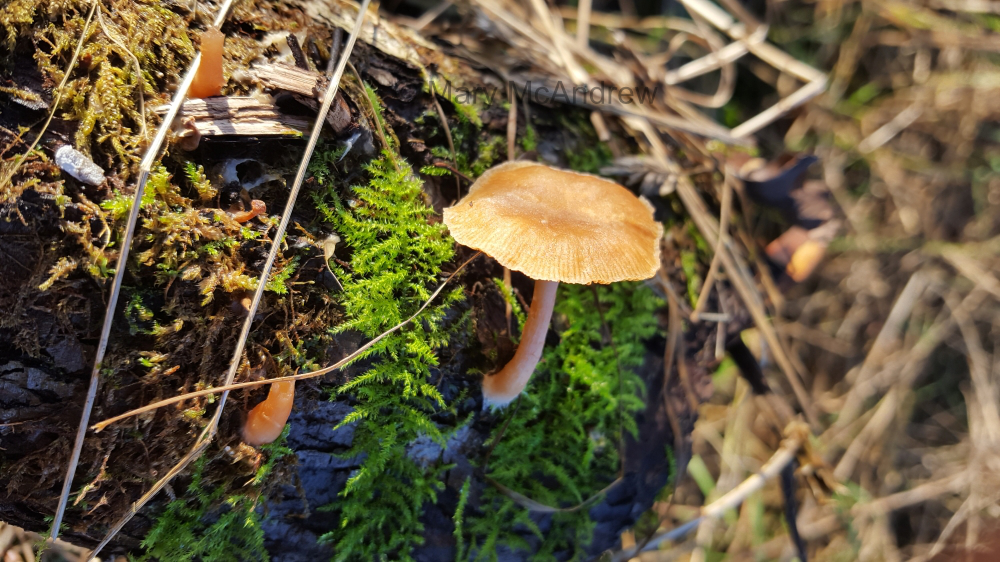
I don’t know what kind of mushroom this is on a fallen dead Hawthorn branch. You can see several stalks from others that broke off, they are quite small and delicate.

Underneath the tiny mushroom.

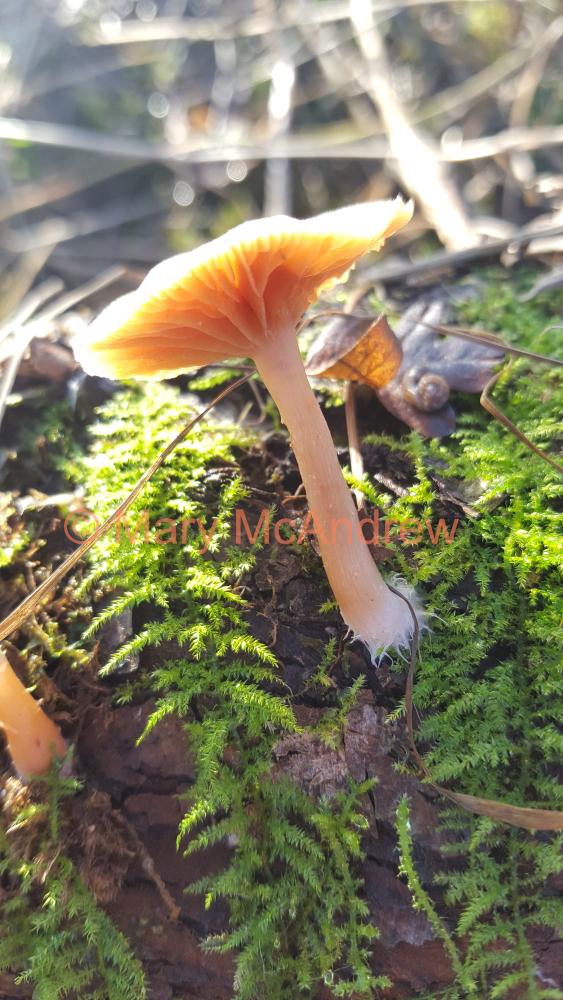
Here is a view from underneath the mushroom, showing the gills. I love the fine, soft looking white threads around it’s base, I’m not sure what they are.

The best Christmas present ever!

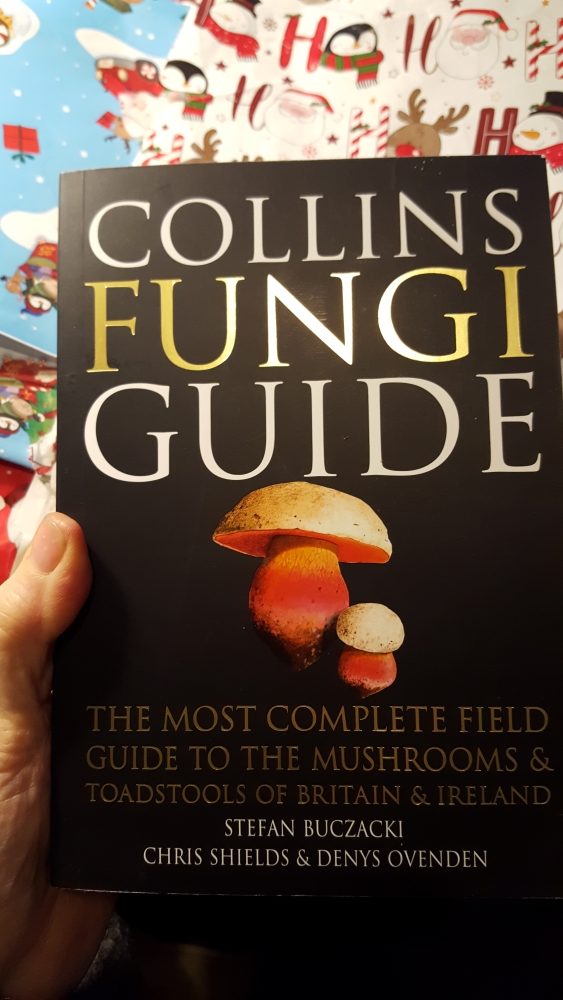
This was my favorite present from my husband this Christmas, over the new clothes, treats and bath powders etc, I was so excited about getting this book! Does that make me a ‘Nature Nerd’?

It’s full of clear illustrations.

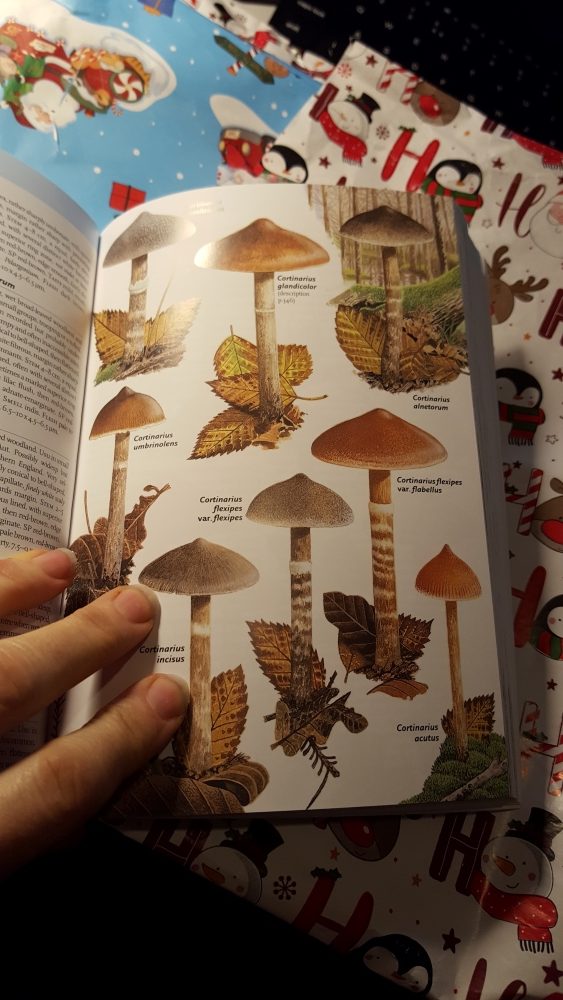
The book is full of clear, well painted illustrations. The introduction is full of clear diagrams and information about fungi in general and it’s a great place to study to learn more about them. Though the book is well illustrated, I still find it very difficult to positively identify each mushroom I find. I belong to a group or two on Facebook for mushroom and fungi identification in the UK, I don’t know what I’d do without them!

Gorgeous lichens on fallen branch.

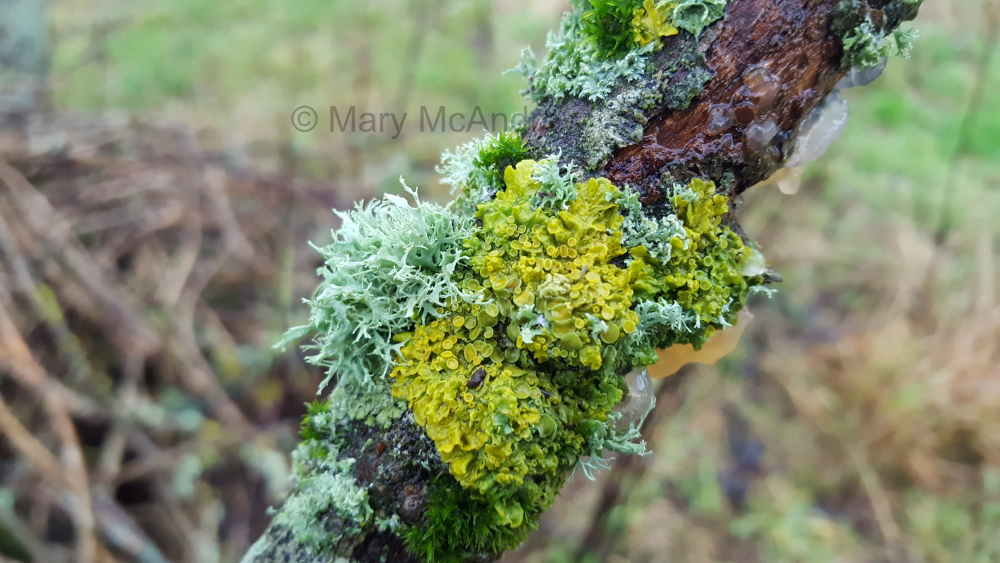
This is a branch I picked up under the old Ash tree, covered with lichens. I’m learning more about lichens as they really are fascinating and beautiful, BUT I admit it’s super hard to identify different ones unless I share it on the Facebook lichens group where the experts can tell me what it is! I know there are different groups of lichens like Foliose, Crustose and Fruticose. I should’ve shared these pictures on the Facebook group to find out what kind these were, I will sometime. But as an artist the first thing I’m drawn to are the colors, the textures and form. I’m just fascinated as I look closer, at all the little cups and branches!

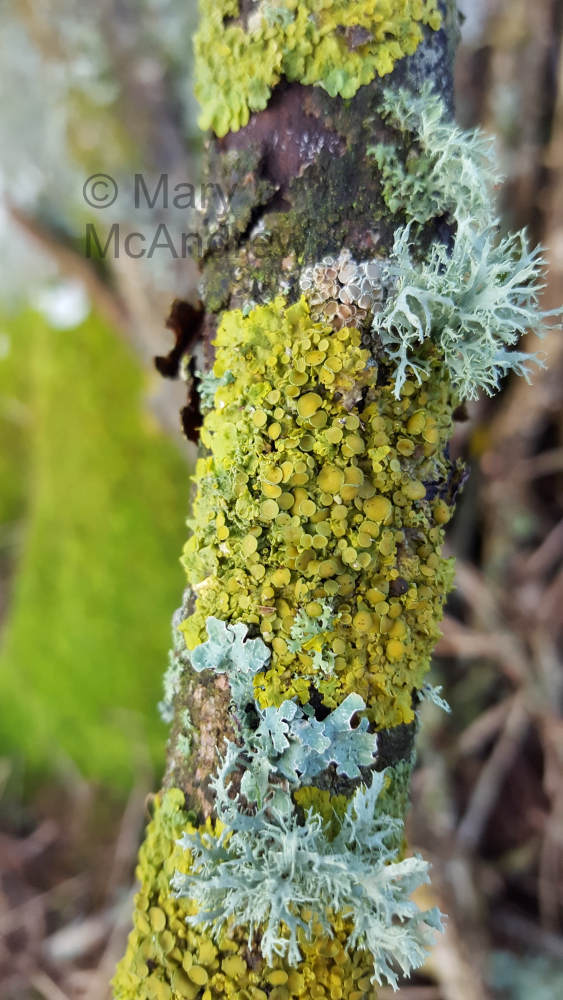
I mean look at all the tiny little round ‘plates’ on this lichen and then the difference in their colors. The I love the limey green yellow color of the crusty one and the pale mint green of the branched foliose one. If I do some painting studies of lichens then I’ll find out the names of them too and share them. I bought a book on Lichens by Frank S. Dobson, but really it’s still waaaay over my head! I never knew there were so many kinds.

Well I guess that’s enough pictures and talk about mushrooms and lichens! Even though I don’t post updates a lot, I am working very hard on finishing up the first draft of my first Children’s Book. It’s all new to me so it’s taking much longer than it probably should! I’m also messing around with updating and changing things on my website and adding a proper shop, but these things take time when you do it all yourself. It’s frustrating when all I want to do is paint and admittedly work in the garden!

Please leave comments or ask questions, I love reading the comments from all over the world.

Old Beech Tree at Beanly Moor, Northumberland

(Click photos to see enlarged view)

This post has a lot of photos showing as many stages of painting as I could. I’m taking the pictures using my cell phone, sorry they are not perfect! I’m using a photo I took a few years ago in Northumberland, on a walk with Gary at Beanly Moor. Some of the most beautiful old Beech trees are there, the tall stately ‘ladies of the wood’ these trees can be known as. Many times we find a long row of very mature trees and know that once they were part of a farmers hedge and left to grow because they were forgotten and went wild. I love that.

Above, first I did a light pencil drawing but didn’t add too many details. Then I started to add some color that I see on the tree, I’m using gouache paint.

Here I start to put the greens of the ground down and a bit of burnt sienna mixed with burnt umber on the tree. I used a big filbert to brush the tree and used strokes that followed the rounded contour of the trunk. This left ‘streaks’ in the paint that I liked and I used the same brush later to add more tree color. The strokes it made I left and they really look great even at the end with other textures layered on top.

Here I did quite a few things, I toned down the green in the background on the left by putting a more opaque light green on top. I scumbled in more of the foreground greens and values then I added the dark browns you see using the big filbert brush. These are important dark areas because I’ll be putting light grasses and bracken on top and this will make them look more three dimensional.

I also made some brush strokes on the tree for the lichens and moss that I rather liked the texture of. When you see lichens on trees like this, it almost looks like fur. So as I continue I try to keep that texture on the tree.

I used a very light wash of color brushed on the left side of the tree, I’m trying to get rid of areas that are not as light in value as the right side of the tree and the background. I used the big filbert brush again to stroke with the round trunk.

The background trees get brushed in. Whoever said trees have brown trunks? Most tree trunks I see are green and grey in color!

Here you can see I’ve added grey on the right side of the tree. Then because gouache paint can be lifted quite a bit if you wet it, I was able to carefully lift the dark color off where I plan to put light patches of paint. I could probably have painted right on top of the dark, but this way I figured it had less chance of mixing and getting muddy. It was a good way to ‘sketch’ out exactly where I wanted to put the light patches.

I’ve also added more opaque color to the tree on the left which is giving it so much more ‘solidness’. And I added leaves/branches to the background trees and don’t forget the wee cows!

This is showing how I had it set up on my table, plastic palette on the right, gouache paints above that in a resealable palette. Just above my painting you see a clear plastic tray with round depressions, that was some packing material from battery tealights, it makes a great mixing area for paints! The colors in there were for painting the light bracken and finding the right color and value drove me crazy!

A lot has happened here, the light patches going onto the trunk and some very light speckles, bracken fronds all over, more texture on the ground in the back.

Here I worked on that grey area on the right side of the trunk, more texture and some sharpening of the dark edge to show the tree goes in there, like an old wound maybe?

Now I know the color of this picture is hugely different from the pictures of the stages of painting, this is the scan of the painting. You can really see the vibrancy of the greens, whereas the other pictures are all taken with my cell phone under lamps and some with cool natural light.

Once I get set up with a printer again, I’ll definitely be making prints and note cards of this one; I love the colors and textures! I hope you liked seeing all the steps of painting as I worked, please leave me a comment if you like. Please share my website with your friends! You can also follow me on Instagram to see more updates on my projects, look for Mary_McAndrew_Artist.

“Allegany Nature Pilgrimage” (moss, lichens, fungus, dragonflies and moths) 5-31-08

This is a continuation of my weekend at the Allegany Nature Pilgrimage at the end of May. This post I have some pictures of fungus, lichens and moss from the non flowering plants hike I took led by Alice Brown.
This is a fungus I’ve seen growing on my land in Clarence Center NY, in the Adirondack mtns. and at Allegany. It’s a fungus I identified as Trametes Versicolor, the common name is Turkey Tail, so named because of the variable bands of color. I’ve seen it in all seasons which makes it kind of fun to look for, check dead trees and branches on the ground etc. I read on a website that a tea can be made from it and that it’s used to fight cancer and hiv. Don’t quote me on that but it’s what I read, I do know that mushrooms can be very good for you. I wouldn’t recommed going out and eating these though…my mushroom book (Simon and Schuster’s Guide to Mushrooms- Excellent Book!) says that it’s inedible because of texture.
This is a flat fern type of moss, I don’t know my mosses yet so if someone can help me out here. I have to look for a good field guide, you know…tall, dark, handsome! haha…no really, the kind with pages is fine!
This is a picture of mosses on the side (type?) and in the center is a type of lichen, foliose type I think. I’ve always liked the cool color of lichens..like the green patina copper gets when it’s out in the elements.
Then there was the night I was headed to bed, enhausted from all the hikes and early mornings, but saw this show-stopping Luna Moth! Wayne Gall had a simple white sheet up each night with a really bright light to attract all kinds of bugs. I never imagined I’d ever see a Luna Moth and there it was! Wow! It caused quite a bit of excitment. I definitley have to do a painting with one of those in it. Notice the antennae…so large.
This is a page from my sketchbook, just some quick sketches of the dragonfly talk led by Jeremy Martin. Below is a picture of a dragonfly that just came out of the ‘Exuvia’, or shed skin. That’s what I did the small sketch of above. I have written in my sketchbook that I took a picture of a Springtime Darner…maybe that’s the type below.
Well as I said, not too many drawings on this Nature Pilgrimage…I needed the whole following week to stay there and digest all that I learned, and go back and sketch things. Be sure to check my post about Thunder Rocks coming up!