Support This Site

If you like what I do please support me on Ko-fi

Oil Field Study on New Years Eve, 2010

Here's my field on a dreary New Year's Day

(Please click each picture to see it enlarged)

It is a cold and dreary day here in Western New York, I guess it is in many places around the world. But the drippy dreariness also shows me spring is coming; snow melting on soggy but still frozen ground, dripping of ice from the trees and an almost silent occasional gurgle of air from under the ice as I worked quietly.

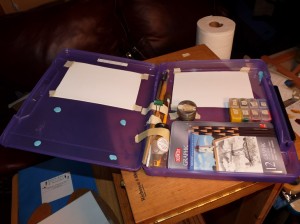
Oil sketch field kit, ready to be tested.

I created this lightweight kit to take outside with me, just for oil painting sketches. I mostly want to focus on practicing mixing colors for landscapes from the real thing.  I’m not concerned about finished paintings, though as the weather is warmer I may work longer on them.

It’s a plastic box that I bought at an office supply store.  I used a metal pencil box for my paint and as a palette; it’s held on with blue sticky tack. I also have a pill box that has colors in it, though I want to buy a long one so it will fit better. I have canvas paper cut to standard sizes and tape it in and also created a place for brushes with loops of masking tape.

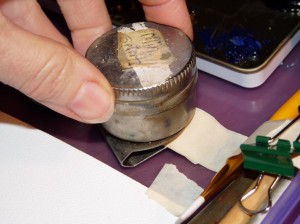
My mineral spirits container slots over a strap I made out of masking tape.

I had a tiny plastic bottle of mineral spirits with me but didn’t need to pull it out, I had a tiny bit in this metal medium cup. It’s got a screw on lid and I created a strap with masking tape that it could slip over to hold it in place. Then I stuck a blob of blue sticky tack behind it to keep it from slipping off. (Just love that sticky tack!)

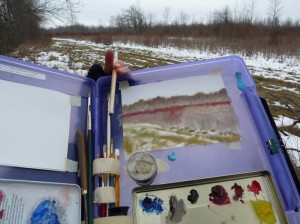
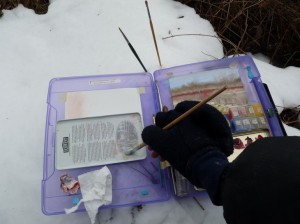
Here's how I held the kit and painted while standing.

It was very lightweight as I worked. As all tests should do, it helped me find what was ‘not’ working great; I need to make a little holder for dirty brushes on the left and both need a holder with some kind of bottom, like a pouch.  My brushes were sliding out the bottom too easily and may get dropped.

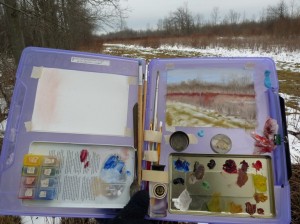
A view of the painting and the subject.

Here’s the whole thing in progress. Note the paper towel with red paint all over it!! Ok, I admit it, the very first thing, when I lifted the lid of the metal pan (with my very cumbersome mittens on) I inadvertently got Cadmium Red paint on my mitten thumb, WITHOUT KNOWING IT! It suddenly showed up in three to four places, probably on my face too and I didn’t know it! Ok, those who paint with oils know that sometimes this just happens, oil paint likes to migrate. Cad Red is one of the worse to get on stuff! You see traces of where I had to scrub off the second canvas paper there, sigh. Nobody’s perfect.

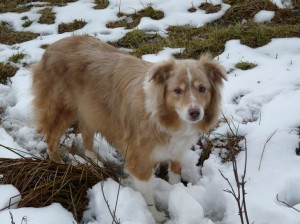
Ginger is waiting patiently, telling me her tootsies are cold!

Ginger loves to go out on walks, but gets bored when I stop to paint or sketch. Today was worse because her feet were cold! But a good sign, when I was ready to leave, she didn’t turn towards home, she wanted to go further.

Cleaning my brushes, stand them up in the snow as you go.

When I’m done, I set the kit on the snow and stuck my dirty brushes in the snow (bottom down) and just dipped the tip of each one in mineral spirits and pushed on the lid/palette to work much of the paint out. Wipe it really well on paper towel, it won’t be clean but well enough to travel home for cleaning. Most of my brushes I used were bristle brushes for scumbly strokes and one small, flat, soft but firm nylon brush for the thin line strokes.

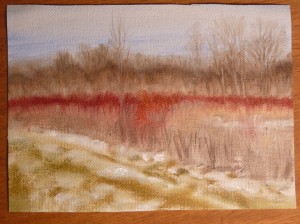
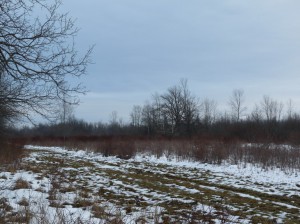
The field study for today.

Here’s the quicky field sketch fresh from the icy field.  I know my colors look brighter than the photo, but that’s the beauty of painting from life, the colors were more vivid and beautiful to my eyes, a photo will lose a lot of true color and atmosphere.  If I want I can let this dry and work more on it or do it while it’s still wet. Ideally, touch up what you want right when you return and it’s fresh in your mind. I don’t want to fuss too much over these sketches unless I do one that I feel is worthy of fussing. My main goal is to just get out and get quick color studies and not complicate things too much.

Hope you enjoyed, I’ll be trying out my field kit more and will keep you ‘posted’ as they say! haha.

Happy New Year everyone! I’m looking forward to a year filled with tons of new paintings by me and look forward to getting back to England for more adventures!  Please share my blog with those you think would enjoy it.
“Oil Painting in Coquetdale, Northumberland”

(This post is done AFTER returning home to NY…gosh I miss my Northumberland!)

Come along with me as I do a small oil painting in a very gorgeous location in the Coquetdale (River Coquet Valley) area of Northumberland, England. I think of all the areas I’ve traveled around in Northumberland, the Coquetdale is one of the most beautiful and always catches me by surprise when we drive along it’s long winding path through the valley. It has quite a few meanders before reaching the North Sea which makes it that much more picturesque to an artist, it’s curves reflected in the sun as a shimmering snake in a green velvet valley.

Painting at Harehaugh over River Coquet

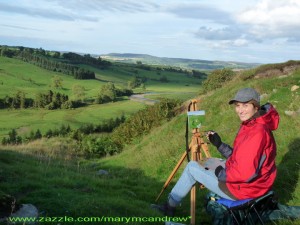
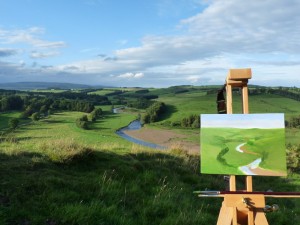
Painting while looking over the River Coquet

There I am! We hiked up this great high hill and entered the Bronze Age Celtic ring fort at the top. It’s surrounded by a deep ditch, as was the practice for all ring forts, though I guess a few thousand years ago it would have been deeper and very impressive.  After exploring the fort and ditch I settled down inside a ditch with my back to the VERY brisk wind!  While I painted I had my hood up to keep the wind off and you notice I’m wearing fingerless gloves, a must for outdoor painting!

For my set up, my favorite wooden field easel and a backpack with attached stool. This is a popular one found in many art supply catalogs but I altered it (as usual!), I took the backrest off by hammering on it until it came away. With the backrest off, I can now sit on it in any direction I like, sometimes the bars of the seat hurt the back of my legs and I feel less attachments equals less weight. I’m put a camping inflatable pillow on the seat, makes it a bit better.  All in all, I don’t usually sit when painting outdoors, I find it tiresome to my back; usually I stand up and feel freer with my painting and you can move around to keep warm.

My View Over Coquetdale from Harehaugh

My View Over Coquetdale

Here’s a view of what I saw, you may wonder how my masonite board is staying up so magically on the easel? The wonders of Blue Sticky Tack never cease!! I use it all the time, I have some little dots of it on the easel to hold small boards like this, just where I want them. With a small board, I don’t like the wood of the easel’s clamp to get in the way.

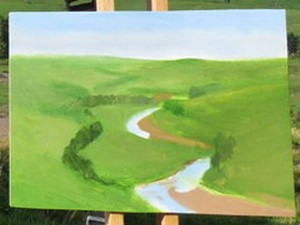
stage 1-View Over Coquetdale from Harehaugh

stage 1-View Over Coquetdale

When in the field I usually don’t pencil sketch the scene on the canvas, but use either Burnt Umber thinned with mineral spirits, or pick a color in the landscape and sketch directly with the brush. Just pay attention as you divide up your canvas with the horizon line placement and other important elements. If you get it wrong in the beginning, it’ll always be wrong! I go for blocking in big shapes in the ‘nearest’ color to it’s overall color.

When I started this one I blocked in some really bright green, later I decided I should have tried to match the color better to begin with. I just wanted to get it going, so I painted into the wet oil to adjust the color. You’ll notice my river color is quite light, just laying it in to mark it, I’ll adjust the color later.  I wanted to have a wet base to paint into. I painted the sky with an all over tone of blue with the gradation of dark to light, later I’ll add the clouds. I also started to establish where the dark areas are, the tree lines.

Stage 2- View Over Coquetdale from Harehaugh

Stage 2- View Over Coquetdale

Now I’m set up back at home and continue working from my laptop where I have photos of the scene. I’m sorry I missed a few stages with the photos as I got involved with the painting! I studied where the background mountains should go and toned down blueish green for them. I continued to study where the tree lines were and payed close attention to the light and dark areas of the hills and tree clumps. Don’t put too much detail in the distant trees, just let them describe the curve of the hills as their lines criss cross and disappear. I also started to tuck darks under  the tree lines and to the shadow side of them. You begin to notice the tree line on the left front is different than the ones on the right. They are different types of trees so the form and colors are different.

Stage 3- View Over Coquetdale from Harehaugh

Stage 3- View Over Coquetdale

Picking out a little more detail of the hills in the mid-ground, I add some lights to define the hills and more detail to the tree lines.  I lightly defined the little dirt road in the front left and a ‘hint’ of a fence, but kept it soft and also added more light to the left field. I put a small path that crossed the field in the middle but then later decided it was just too much of a distraction and took it out.  I also added some lights to the trees on the right, you can see they are more pointy than the other trees as they are pines.

Stage 4- View Over Coquetdale from Harehaugh

Stage 4- View Over Coquetdale

Above you can see I’ve added some darker (but still bright) blues to the river, taking care which direction I stroked it on. I added some yellow to the fields on the left to warm it up and cut down on the lightness. I added more bushes and detail to the front right side by the bank.

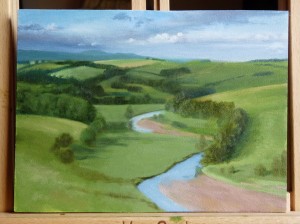
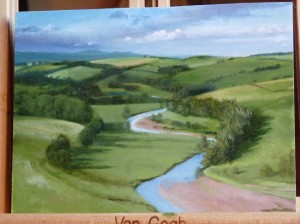
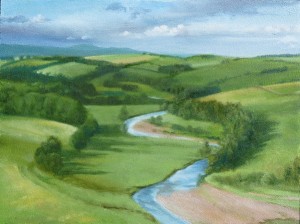
Completed "View from Harehaugh" 6x8" oil

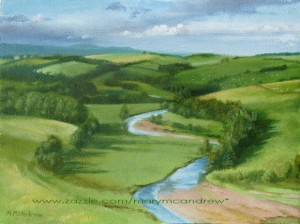
Completed "View over Coquetdale" 6x8" oil

The completed painting,6 x 8″ in oil, click it to view it larger in my Gallery of Landscapes. Here you can see I’ve added just a little more detail on the bank and sheep (whitish dots!) on the hills. One thing you notice when driving about the countryside of England are sheep just about everywhere! No hill would be complete without some of these white dots. Of course I didn’t just make blobs but made sure they had a bit of a long shape and slightly darker underneath, it’s just to ‘hint’ at a sheep, not to paint one in full detail at such a distance.

To view prints, note cards and more with this painting, click the links below to see them in my shop! (You can personalize any of them with your own text.)