Two new beetle studies to share, the Milkweed Borer Beetle and the Rhubarb Curculio. Sometimes I print out 4×6″ photos of my bugs and then as I have time I can sit and do studies in my sketch journals. I’ve been working on lots of bug studies as you’ve noticed lately, but plan to work on a series of small insect paintings soon.
Milkweed Borer")
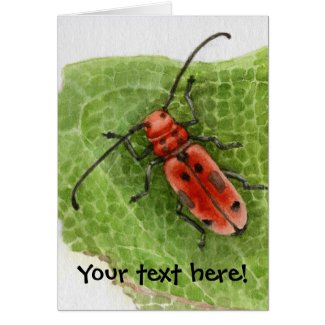
Milkweed Borer Beetle
I love the Milkweed Beetle because of it’s black and red coloring and nice black curved antennae. With the black legs it looks rather coordinated in a fashion sense of the word! I’ve always been partial to red and black clothes or designs!
Milkweed Borer_Rhub Cur")
Milkweed Borer Beetle and Rhubarb Curculio
Then just below I decided to add a little study of the Rhubarb Curculio Beetle. I photographed it in my garden in early spring, it wasn’t ‘on’ my Rhubarb but I bet it was soon to be! I liked the rusty, powdery appearance of it and it’s unusual ‘snout’, typical of a weevil type insect.
second step leaf 2")
My set up while painting
I tried to take some pictures, with my tiny camera, of some of the stages while I painted the Milkweed Beetle. I like to try and show the steps a bit because there are so many ways to approach how to do a painting.
(side note- you see on the page a bunch of dots of color, I was playing around with color mixing with my watercolor crayons and it had nothing to do with these bug paintings)
second step leaf 4")
Laying green 'spots' on top of first light green layer
I missed taking a picture of the first stage but here (above) you can see that I put a very light green wash all over the leaf around the beetle first. I did this before I painted any of the bug, I used a bigger brush and just washed it on quickly but still tried to stay neat around the bug outline.
Then I started to paint the beetle; I used a water brush to wet the paper only where I was going to paint. The water brush was very handy to use instead of dipping my brush in water and wiping. I tested the red out on a piece of scrap paper then added a little at a time. The dampened paper was a nice way to keep the shading soft. Start with the overall color or the ‘background’ color first, then the darker values of red will be layered over it after it dries. I was careful not to paint red to the edges because it would ruin the 3d effect and also he had a powdery look that I wanted to imitate.
To make the leaf veined pattern, I thought I’d try just adding these little green ‘spots’ in a sort of organized pattern. By organized I mean that I would put them next to my pencil lines that indicated where a light vein would be, just arranging them along it was enough to indicate a vein.
second step finished 2")
Green 'spots' layer is finished
I’ve finished the green spots layer and you can see now how the bugs legs don’t look as dark? That’s relative to the new value of color around it and now will need to be darkened some more. That’s usually the way as you work on a detailed watercolor, it’s many layers to push things darker and bring out detail.
finished Milkweed Borer 1")
My set up today on an easel to give my neck relief!
Here’s a picture just showing you my set up as I worked at this stage. Before I had it flat on the table but that starts to hurt your neck after awhile, so best to prop it up somehow, this is a basic wooden paint box that you use on the table and the lid serves as an easel. I just stick the photo to it with “Blue Tack” or “Sticky Tack” and then I put my field palette of watercolors on a small box in front of it (so it’s raised up closer). This table easel a great little box because I keep ALL of my color pencils in it, separated by colors with rubberbands. I used to always use color pencil on my watercolors to add details at the end, but find I haven’t done that in ages!
Milkweed Borer 2 ed")
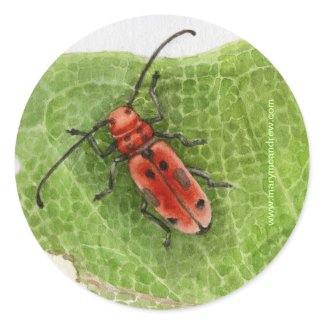
Milkweed Borer Beetle finished and edited
I took a wet brush and gently wet the spots and rubbed very lightly to blend them a bit, then I washed some blue faintly over areas of the leaf to tone down the yellow green a bit. The picture above is of the Milkweed Borer Beetle all finished and cleaned up (the edges) on the computer so I could use it in my shop on note cards. (if you click on it, it will take you to see Note Cards in my shop). Now I wanted to comment here that if I was making this as a finished painting to frame and sell I would have worked on it more. I would have washed over more of the pattern here to ‘push it back’ and not make it so spotty looking, though I don’t mind it much. And the area right in front of his face I would have tidied up a bit more but that’s it for now, I consider him a good study for a better painting someday!
Here’s some more items with this painting on it:

Thanks for stopping by, leave me a comment if you like, I LOVE reading them and replying! And I hope I encouraged you to stop and look a little closer at the bugs in your garden, you may be surprised at how interesting they are! If I could encourage one more thing, it would be to get you to leave some areas of your yard go wild with local weeds and wildflowers. I have some huge Bull Thistles growing now and have discovered many interesting bugs living on them all summer. It’s like a highrise building in a city, some live at the bottom, some at the top and they climb up and down the main stem all day long! The other day I saw a Ruby Throated Hummingbird stop at the huge pink bloom of the thistle and soon the Goldfinches will be using the down from it for nesting and in fall they will eat the seeds.
There are many other ‘weeds’ growing around my yard besides the thistle, more because I have trouble keeping it neat with my neck and back giving me trouble. BUT I have also noticed new bugs almost every single time I walk around the perimeter of my yard and STOP to look. If you stop, stand still and just watch awhile, you’ll see so much. Here’s a little rhyming quote from me:
“When you stop, study and sketch, a fine image you will catch. Study even longer, your drawing will be stronger!” Mary McAndrew
OK, go have some fun now looking for bugs! (and please get your children to look with you!)