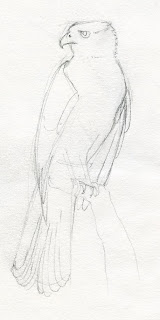
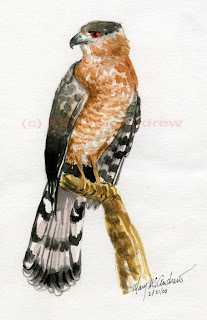
I was inspired on Tuesday (19th) to paint a Cooper’s Hawk when I saw one (or a Sharp Shinned Hawk) swoop over my bird feeder. I talked about it in my post on the 19th. So I did this small study from a field guide in my 5″x81/2 ” sketchbook.  First I did a “Gesture Sketch” then added some details when I felt the drawing was correct.
 I started first with black watercolor in various values to ‘draw’ more details in, feather markings, wing values and shape. Then I dabbled on with my fine pointed round brush, a light value of breast color. While it was wet I sprinkled on salt to see if it would help break it up, in a random way, I love the way salt does this. I also put in an orange red for the iris of his eye.
 In the third picture I have laid on more breast value, defining more of the 3d shape of the hawk’s breast and body. I put a pale wash of purply pink under his tail and touched it to his wing feathers and by his eye. I put a tiny bit of blue on the beak and behind the eye to shape his head more. I also colored the branch, legs and put some browns up onto wing feathers.
 The fourth picture I added some more colors here and there on the hawk, more color on the grey wing feathers and around eye. If you notice the longest tail feather in the last picture I rubbed out in this one. If you need to change something, wet it and repeatedly brush it and dab with a papertowel. I wanted to shorted in because it was making the whole tail look too rounded. I used my favorite little Chinese brush to make the pine needles in the background. I have a picture below about this.
 The final picture of my painting (above) shows another little Cooper’s Hawk study, this one done with Inktense watercolor pencils, Prismacolor watercolor pencils and one Graphitint water soluble pencil. You can see the difference between the transparent watercolor painting and the wc pencil painting. I like the grainy look of the wc pencils, it has a softness to it. On my sketchbook I’ve listed the actual colors for those who like to know! You can click any picture to see it larger.
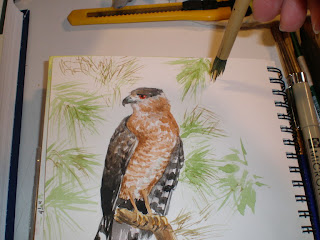
This photo shows how I used a plastic bag to block the birds breast so I could brush right from his breast out, without getting him green! It’s a little trick you can do to protect your areas you’ve painted. I would be holding it down with my fingers normally, but I had to hold the camera! (I need a camera man!)  Then I show how I use my little Chinese brush by splaying it out, to make pine needles, it works great! The next photo shows me putting the needles on with the brush tips.
 Now here’s a little tip that I just put to good use, you can see in the last photo I have two pencils in my hand. You can brush the tips of your wc pencils to get a limited amount of color for light washes. But this time I held two, an Antique White and Tangerine. I brushed the Tangerine then the White to make an opaque wash of orange. I used this very nicely on his eye as it had gotten a bit dark. Then I used the white alone to dab repeatedly to make a highlight on his eye. Besides the Chinese brush, I used the one small brush to do all of the painting on both, a round, cheapo brush from Walmart!
 I hope you enjoyed my painting today as much as I enjoyed doing it! Please leave me your comments if you like and you can sign up to receive email announcements when I do a new post!
Please have a fun visit to my Zazzle Shop where I have my bird paintings on glossy notecards, mugs, canvas bags and t-shirts! More coming all the time.

