Support This Site

If you like what I do please support me on Ko-fi

Time for Mushrooms!

(This post was written on November 19th, 2016, but I never got to post it. Since we’re at that time of year again I guess it’s ok to share it now, better late than never!)

It’s the time of year for mushrooms! Whether you like to forage to eat (not me) or just admire (me), they are popping up everywhere. Now that we’ve had some rains and the ground is getting cold and soggy…I’m seeing them so much more.

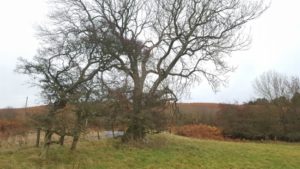
Huge old Sycamore (Maple) I admire.

Huge old Sycamore (Maple) I admire.

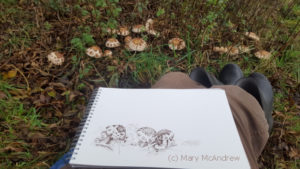
At the top of the lane I like to walk up most days, there’s an especially old huge Sycamore tree I admire. At it’s base are what I think are three different kinds of mushrooms. I tried to go up to draw them the other day but got side tracked with the Brown Trout painting adventure. So this time I went right to them and found a good seat on one of the huge roots.

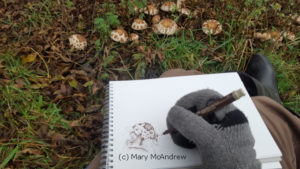
Drawing with mittens on!

Drawing with mittens on!

It was really cold just sitting there so I had to do the entire drawing wearing my mittens! I think I did pretty well with that in mind. Also to save time I did not do a pencil sketch first but drew directly with the permanent ink pen. That went ok too!

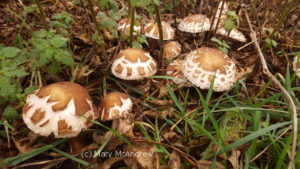
Look at all these lovely mushrooms!

Look at all these lovely mushrooms!

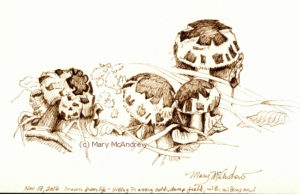
I love this new (to me) type of mushroom, I like imagining how the top split apart as it grew and expanded, kind of like how the continents split apart a long time ago! Each crispy looking brown shell part tops a bit of the mushroom flesh, making a great three dimensional subject to study.

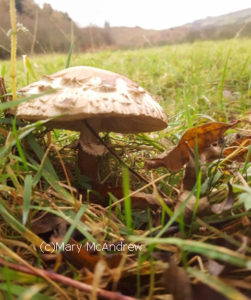
Side view of one mushroom.

Side view of one mushroom.

Above shows the side view of one mushroom, you can really see the texture on it’s cap and see it’s ring around the stem like a little collar!

Below you can see how I progressed along, feet getting colder all the time.

My drawing is getting there, just one more mushroom!

My drawing is getting there, just one more mushroom!

I was definitely feeling the cold chill by now, but I really wanted to add one more mushroom behind these.

Mushrooms, brown permanent ink

Mushrooms, brown permanent ink

This is how far I got in the field, I got that last mushroom in! Now when I have time, I’ll add some more details of leaves and grasses…digging into the dark areas a bit. Then I’d really like to add the reddish brown color of the mushrooms using watercolor. We’ll see if I get that far.

Beautiful, I'm guessing at "Shaggy pholiota?

Beautiful, I’m guessing at “Shaggy pholiota?

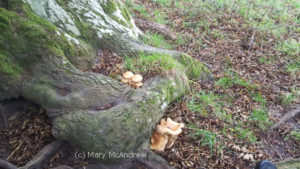
Above is a picture of another mushroom cluster growing under that tree, I’m guessing it’s “Shaggy pholiota” (totally guessing from my small field guide!). It was so wonderful looking in it’s neat little cluster that dispite being very chilled to the bone, I decided to do a quick pencil sketch.

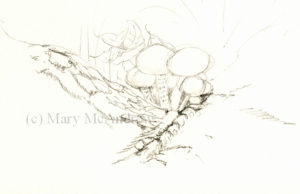
Very quick pencil sketch of mushrooms.

Very quick pencil sketch of mushrooms.

This also was done wearing mittens, it was really hard to do like that and to be very cold at the same time! But maybe I can find time to do up a little watercolor study with it? I loved the texture of these mushrooms, shaggy on top and stem.

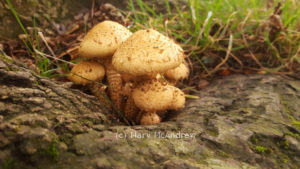
Here you can see them growing in the root area.

Here you can see them growing in the root area.

Here’s a picture of the cluster growing in the root area, and I believe those on the root below it are more mature individuals.

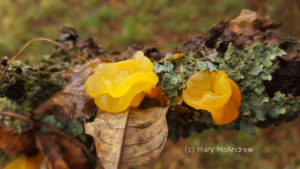
A bright "Yellow Brain Fungus"

A bright “Yellow Brain Fungus”, (Tremella mesenterica)

This Yellow Brain Fungus I found growing on a stick broken off of the tree. The branch was heavily damp and covered with lichens and dead leaves. When I turned the stick to look at all it’s sides, the fungus flopped about a bit; it was so cool! I laid it back down on the ground, hoping to observe it each time I come back.

Do you see any mushrooms growing where you live? Post me a comment about them and where you are located, you don’t have to know what kind they are, I usually don’t know them either!


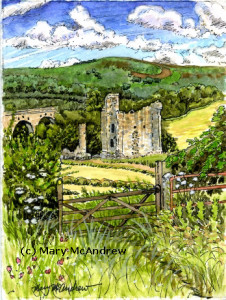
Watercolor of Edlingham Castle – July 2015

Here’s a post I wrote from July, never too late to enjoy a bit of sun I guess!?

July 16, 2015

Did I tell you how much I LOVE living here in Northumberland? I did? Well I won’t get tired of saying it or doing my sketches out in the field.

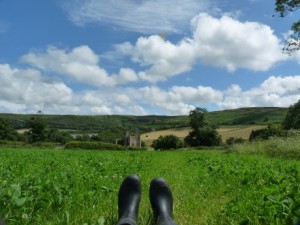
7-16-15 havin a rest (3) (460x345)

Taking a rest, enjoying the day, in my barn boots of course!

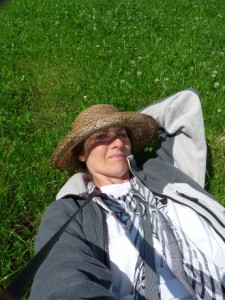
I went up in the field near Edlingham Castle, I had it all to myself, no sheep or cows about. It was just that kind of day that I sat on the ground to think, listen to the birds and enjoy just living. Then I just lay back and put my straw hat over my eyes and let time slip by, and it was ok.

7-16-15 havin a rest (4) (345x460)

Trying to take a selfie with a 35mm isn’t easy!

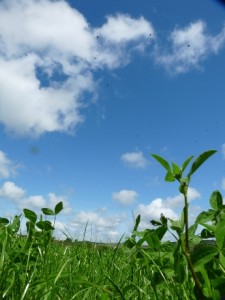
Laying down amongst the clovers, it made me feel like a kid again. Isn’t that funny? I should go lay in the grass more often! Maybe we could start a national “Lay in the Grass Day”! haha.

Below is a picture of what it looked like, my view from the grasses, the clouds were so beautiful.

7-16-15 mouse eye view (3) (345x460)

My view from the grass, my mouse eye view.

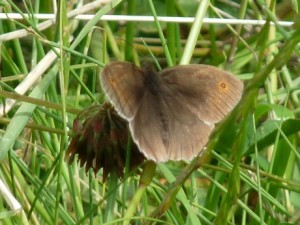
And below, this is what I saw near me, a Ringlet butterfly, a very common sight in the fields here in summer. I’m really enjoying learning the new butterflies and bugs here in the UK.

7-16-15 butterfly (3) (460x345)

A Ringlet butterfly on a clover head.

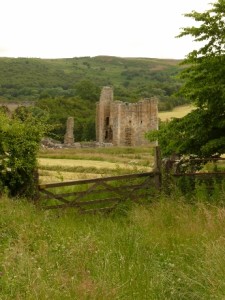
Well I didn’t just lay around all day, after a little while I went down the field, found a spot to stand and did a small painting. Below is a picture of Edlingham Castle, this was what I drew. You can see by the photo, the lighting never stays the same when you’re painting outside. My painting ended with nice blue skies and sunshine!

7-16-15 drawing the castle (7) (345x460)

Edlingham Castle view from field.

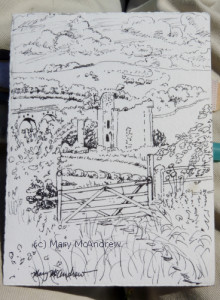
Below is the ink drawing I did first. Sometimes I do an ink drawing then paint with my watercolors, especially if I don’t think I’ll have time to paint it. The other way is to do a light pencil sketch and then paint, drawing with ink a little for details on the pencil before or after painting.

(c)7-16-15 drawing the castle (9)

Ink drawing of Edlingham castle, over the gate.

Below is my finished watercolor painting, only 4.5″ x 6″. You can see how bright the colors are, the day really was so bright, unlike the photo! The ink drawing makes it look more like an illustration than a painting to me. Kind of like all details are picked out at once, but that’s ok.

(c)Edlingham Castle wc

Edlingham Castle, Northumberland. Watercolor and Ink 4.5″ x 6″

I hope you enjoyed a little look back into summer! If you don’t want to miss any of my posts, just put your email in the box at the top right column. It’ll send you an email notice and you just respond then you’ll get my posts right in your inbox. Remember though, it’s best to click to come here and read the post, it lays out better on the page (and you can leave comments here).

Mystery Cocoon Hatched!

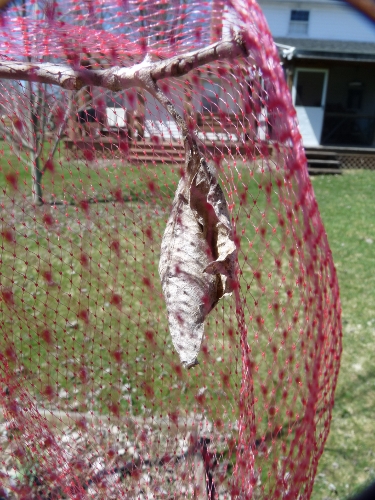
Do you remember my last post about the cocoon I was watching all winter long?

leaf cocoon 4-20-14 (1) (375x500)

Unhatched cocoon hanging in tree, April 20, 2014

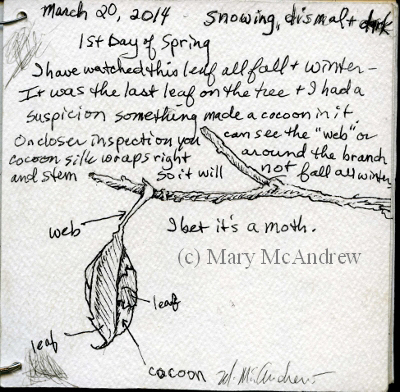
I did sketches of it on cold snowy days, while it hung in the tree, disguised as dead leaves.

(c)3-20-14 tiny sketchbook (400x392)

March 20, 2014 – first day of spring, snowing, dismal + dark!

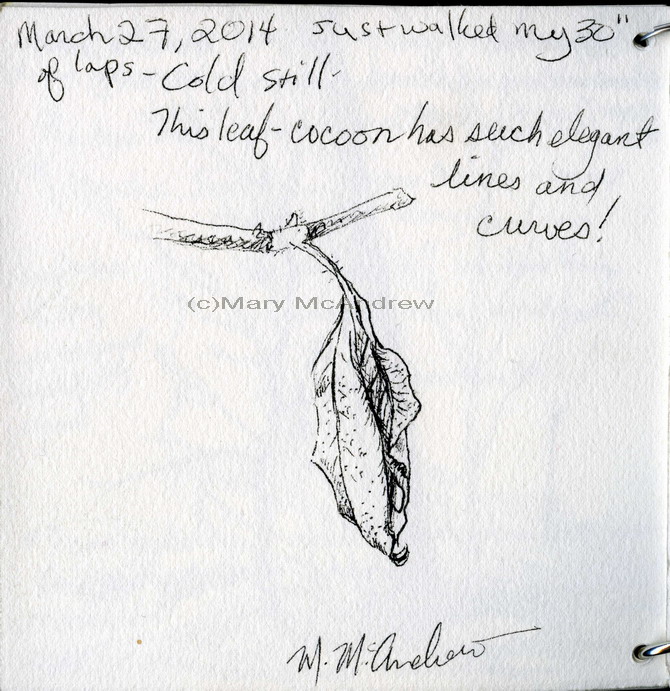
Another sketch of the 'leaf cocoon' after my walking was finished.

Another sketch of the ‘leaf cocoon’ after my walking was finished. (March 27, 2014)

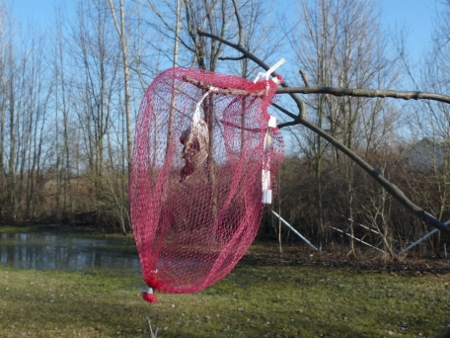
Then one day I got the bright idea of putting mesh around it so when the mystery bug hatched I may have a chance to see what it was. I also knew that I now took responsibility for this creatures’ welfare, I had to check it everyday so if it hatched I could release it! I fastened it with wire bread ties.

Plastic mesh onion bag I carefully put around the cocoon.

Plastic mesh onion bag I carefully put around the cocoon.

Well as the weeks dragged on into spring I sort of gave up hope; I observed a small hole at the top and thought maybe something got at it. Also a ‘bug friend’ told me that sometimes wasps will parasitize these cocoons and it may not live. Leaves from the tree were now poking out through the mesh and black ants were crawling around everywhere, where was my ‘creature’?

June 1st, still not hatched!

June 1st, still not hatched!

Well one morning while walking around the yard I spotted something big and dark in the mesh bag from way across the yard! I actually ran across the yard, I was so excited! (yes, I really did! lol)

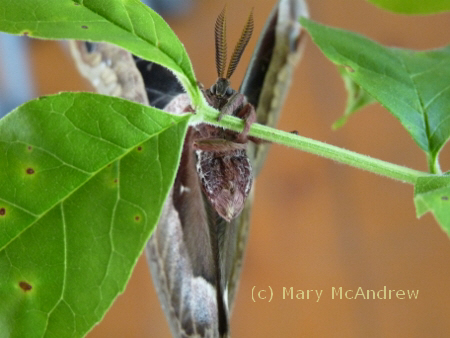
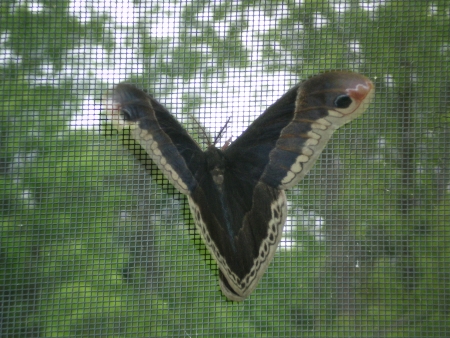
Much to my delight, not only did it hatch but it was HUGE! Introducing the “Promethea Silkmoth”! (Hatched June 4, 2014)

I love this photo, you can almost see his 'face' saying "Help, I can't hang on!"

I love this photo, you can almost see his ‘face’ saying “Help, I can’t hang on!”

I ran in the house and got my pruners and clipped the small branch it was on. I took it into my shady back porch and stood it up in a vase of water, then thought about how to sketch it quick so I could release it. Well it had that ‘ugly’ red plastic netting around it, but being that I was in my screen porch and it had only just hatched I decided to carefully cut away the netting. Lucky me, the moth still needed to hang out a bit to get stronger, so I took lots of photos then settled down to sketch.

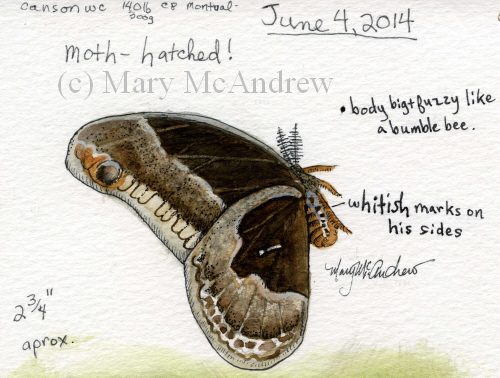
This watercolor was done from life as the moth rested.

I did this watercolor from life then later finished from my photos.

Like many moths, his beauty wasn’t in his bright colors but in the subtlety of his patterns and earthy colors, and boy was he beautiful! I also loved his fat, furry body, it was deep rusty color with interesting patterns on the sides. In the sketch above I used my permanent ink pen along with the watercolors for real definition.

I sketched this pose from life and started to paint, then later finished from my photos.

This one I avoided using the ink pen to see how it would look with just watercolors.

The sketch above I avoided using the ink pen just to see how it would be with just watercolors. It’s softer looking but I favor the other one, which I actually spent a lot more time on too. I traced around a card to create the box look, then just colored around it; a nice way to ‘decorate’ your sketches!

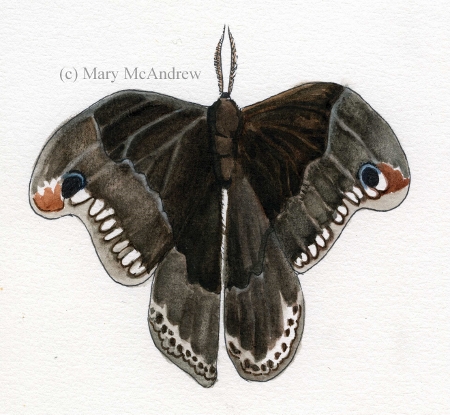
Promethea Silkmoth with his wings partly open.

Promethea Silkmoth with his wings partly open.

Then I painted this view from a photo, where he had his wings partly open. I loved the ‘teeth’ patterns on his wings, above and below. It was when he decided to fly around in my screen porch that I noticed when his wings are open, he looks like a fearsome beast with many big teeth!! Well imagine your small too, and want to eat this moth, suddenly you have all these teeth and eyes (two black with blue spots) looking at you! Another interesting thing with his behavior was he shook his wings, something I’ve seen other moths do when frightened. He wasn’t shaking in fear! He was making himself look fearful! How cool is that?!

Flying around in my screen porch.

Flying around in my screen porch.

Above, here he is on the screen, shaking or vibrating his wings at me.

A nice photo showing how beautiful his antennae and body are.

A nice photo showing how beautiful his antennae and body are.

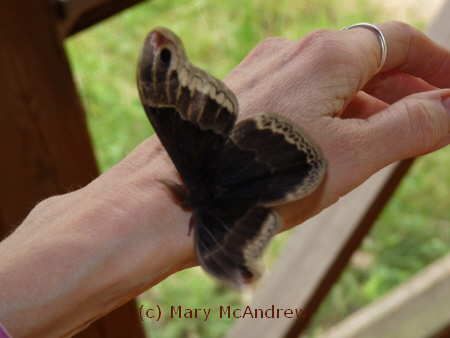
His little feet tickled my hand!

His little feet tickled my hand!

This photo above really shows the scale of how big he was. Now he was getting active, time to release him to the world!

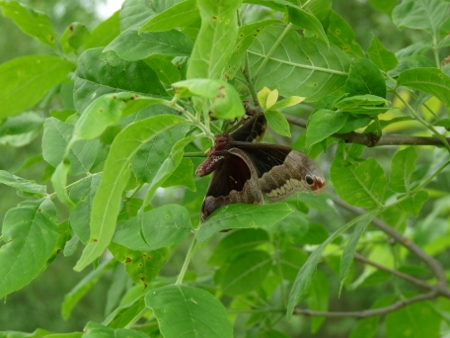
I put him back into the tree his cocoon was on.

I put him back into the tree his cocoon was on.

I put him back onto the tree his cocoon had hung in all winter. It didn’t take him long and he fluttered around then disappeared…off to find a mate I’m sure or find dark shelter for the day.

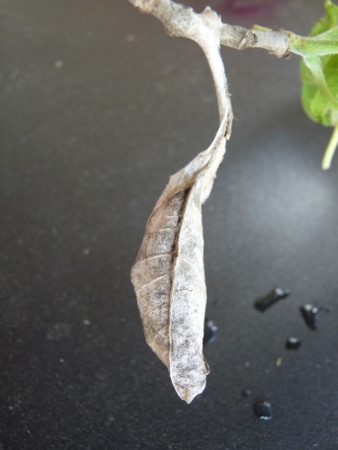
Now all that's left is the cocoon.

Now all that’s left is the cocoon.

I hope you enjoyed this excited discovery with me! I know I’m late posting about it but as many of you know my time is taken up lately with preparing for my big move. I do have some other interesting photos and sketches from my backyard adventures, I’ll try to post as I can.

Cheers!

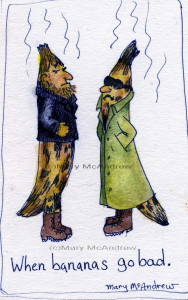
When Bananas Go Bad

A small chuckle for you today!

(c)color bananas re2

“When Bananas Go Bad” color

(Click for clearer view) I have to blame my Fiance for this silly thought, as we joked around about bananas going bad; then I jump right in and make it real by creating the characters! I scanned it right from my sketchbook and didn’t clean it up as I did below in the black and white.

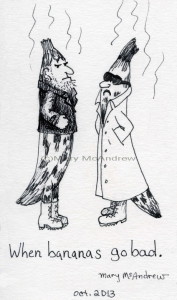
"When Bananas Go Bad"

“When Bananas Go Bad”

I think I prefer the black and white at this point, I think my colors got too muddy in the color. What do you think?

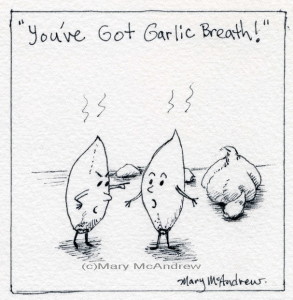
“Garlic Breath”

"You've got garlic breath!"

“You’ve got garlic breath!”

Just a little silliness! When I was cooking dinner yesterday this funny thought came to me, so I sketched it down.

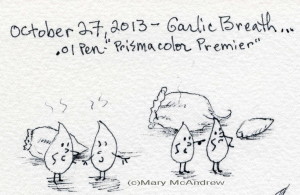
Thumbnail sketches for "Garlic Breath".

Thumbnail sketches for “Garlic Breath”.

These are some thumbnail sketches I did first; I could have made the ‘receiving’ clove of garlic do other body poses. Just my odd sense of humor, well it made me chuckle at least!

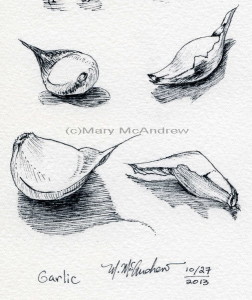
And to top it off studies of real garlic cloves.

Pen and Ink studies of garlic.

And to top it off, studies of real garlic cloves.  It was fun to end my silly cartooning with a real study, good practice.

Hope I made you smile today! 🙂

Mouse Family in Ink

Though I’m working on illustrating a story with Teddy Bears at the moment, I just can’t leave behind my love of nature. I haven’t had much time for my usual nature studies but what I have been doing is testing out different papers to use for illustration. Arches, Fabriano, Canson…cold press, hot press, dual sided even!, they are all getting tried. I was surprised to find the ones I thought I’d love I hated and the cold press was feeling pretty nice. Cold press paper is rougher and can show nice textures when working with watercolors, but not as nice if you’re doing fine detail.
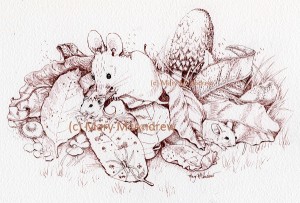
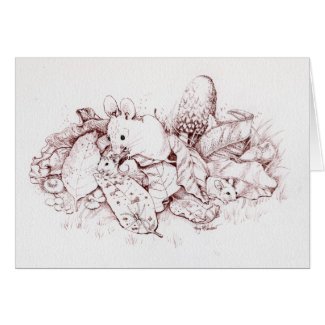
"The Mouse Family" in Windsor Newton Nut Brown Ink on Arches 140lb watercolor cold press paper.

(please click the pictures to see larger)

So I combined my experimenting with papers with wanting to draw some mice, my subject in many, many little children’s poems I’ve written. I want to keep a realism but cross the line into children’s illustration…make them a bit cute and giving them humanesque qualities.
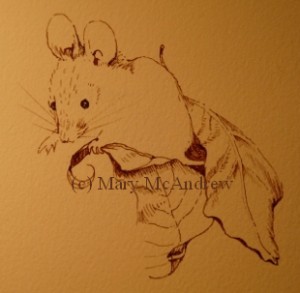
Just showing the start of my drawing; I did it without a pencil sketch first!

I started by drawing freehand in permanent ink (no pencil sketch) this mouse on Arches 140 lb cold press paper. I used Windsor Newton Nut Brown, a really nice brown ink. (Forgive the yellow picture quality, I snapped this with my camera at night-time so I could record the stages of drawing.)
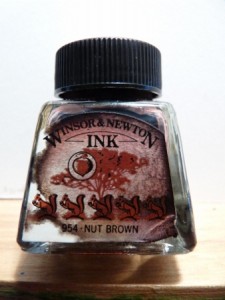
Windsor Newton Nut Brown Pernanent Ink

Then I went outside and grabbed up a bunch of leaves to add around it, and drew some of them.
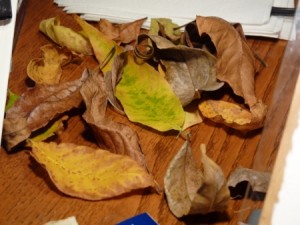
my pile of leaves I first brought in to sketch from

What started all this was a cute sketch in ink of the mouse (mother) but she had to have some leaves to be tucked into. I brought in a good variety from the yard, they looked more colorful than this in the beginning. They all curled and dried but that’s ok, I like keeping some dried leaves around in a small box, for sketching.
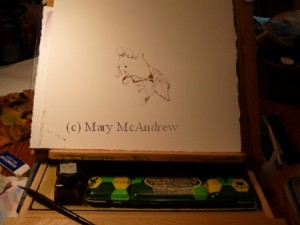
Here it is on the easel, you can see my dip nib pen and brown ink there.

This is my set up, a small table easel that has a little drawer you can slide out. I like to put my watercolors there and anything else I might be using to draw. You can see my bottle of ink and my small ‘dip nib pen’ laying there. I have my paper on a piece of plexiglas. This is great to use when you are tracing a sketch onto ‘good’ paper, just go over your sketch with dark ink, put good paper on top, stick a lamp behind and sketch lightly with pencil. I didn’t do that with this drawing, as I said, I just started in and the drawing grew.

Here’s a picture of my “dip nib pen”.
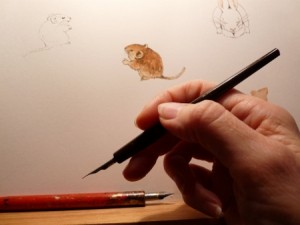
Small "dip nib pen" with a little study after Beatrix Potter's Dormouse in the background.

You can see my two favorite pens here, when I want to use loose dip ink that is. I just love the detail I can get with this little nib! There’s something nice about using loose ink. I decided I liked when it ran out of ink regularly, it gave me a pause to check my drawing and think before making marks!
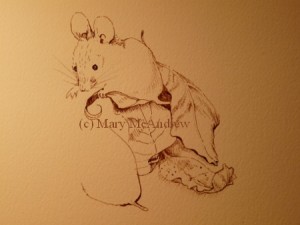
Just a little more drawn in...

As I drew the mouse I started to think maybe it could become a story, so I felt I needed to leave the area in front of it open to possibilities. *Very important when working with permanent ink to take your time and plan a bit!
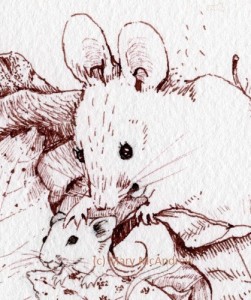
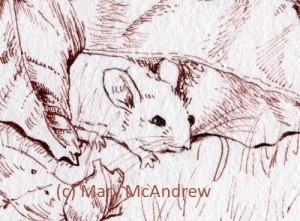
A little close up of the mother mouse and baby.

I was going to put a grasshopper in because they are everywhere in the grass right now, but I decided on a baby mouse. At this point I started sketching with pencil…the rest of the leaves, mushrooms and babies, because now it had become an actual illustration to NOT mess up! haha. You can see I changed the mouses face, added an open mouth, eyes a bit bigger with lashes, just a touch! I’m looking for my ‘mousy style’.
And a close up of the other little baby mouse!

And you know with mice…where there’s one there’s many!…so I added this baby on the right. It’s good for the composition because it leads your eye around the page. Keep this in mind too when arranging your leaves, all the curves, waves and curls can really be exciting to draw and look at as they lead your eye around the composition.

Below are a few photos of what inspired me to keep adding to my drawing.
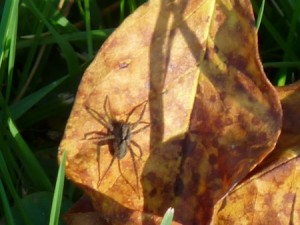
baby nursery web spider

I’m fascinated by the Nursery Web Spiders in my yard. In spring I see them living half under water and half above, then all summer they have their webs in the tall grasses on the lanes. Now as I walk through my yard in fall I see tiny baby spiders darting across the leaves everywhere!  I couldn’t wait to sneak them into an illustration!
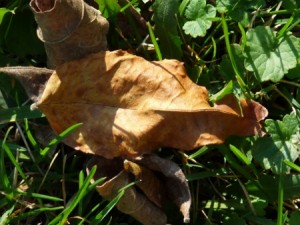
I liked the twist of this leaf so I used it in my drawing

Well these leaves aren’t colorful but I love the curve of the big one, and the other small one fit in nice. You can see them on the right side of my drawing. I used this photo on my computer screen when I drew these leaves.
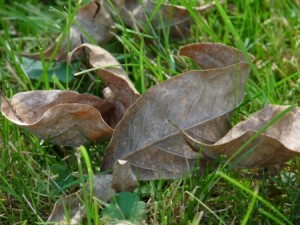
dead fall leaves in the grass

This is another one I added on the right side by the baby mouse. I tried not to go too heavy adding the shadows, since the leaves were all photographed at different angles in the sun. I also looked at this on my tiny computer screen while drawing, late into the night!
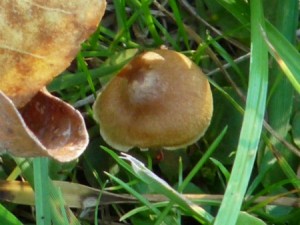
little golden mushrooms in the grass

One day when I was walking through the yard I spotted an area of mushrooms, each were about 2″ across at least. They blended in so well I almost didn’t notice them at first, but looking for “things in the grass” for my drawing they were a nice find. It wasn’t until the next day I went out to photograph them and they were all gone! I searched and searched and finally started noticing these tiny mushrooms around under blades of grass. NO, my lawn is NOT neatly mowed, I’m lucky when my son comes and gives it a cut, so I get all kinds of things growing and hiding in the long grass!
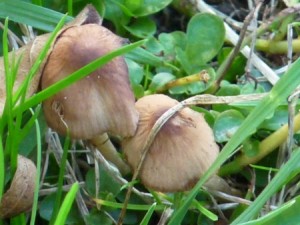
more tiny little golden mushrooms

I love looking at mushrooms, though I admit I don’t know too many species names. If anyone can tell me what these are I’d be grateful (Western NY-wet area)
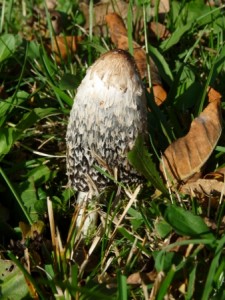
This is the small Ink Cap mushroom I used after the first one disappeared

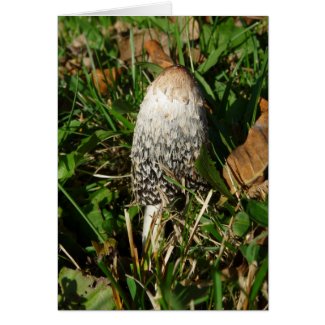
This one was the best find! It’s a Shaggy Ink Cap mushroom and I’ve never seen one here before, I’ve only ever seen them when I was in Ireland and England. One day I spotted a big one growing in the yard, I wasn’t able to get out to photograph it until the next day. To my great disappointment it had all but disappeared! I never saw one ‘roll up’ as fast as that! For those who have never seen this, the mushroom will start to roll up from the bottom, disappearing until just the top is left, surrounded by a black inky goo. It’s really quiet interesting and yuchy at the same time!

But lucky me, walking my laps around the yard the next day I spotted this small one growing not far from the other spot. So I grabbed my camera right away and got some good shots. I couldn’t wait to use it in my drawing and already knew it would be perfect as a backdrop.

"The Mouse Family" Ink on Arches watercolor paper.

So there you have it, all the parts together! Now that I’ve scanned it, I can play around with watercolors on it and we’ll see how that goes! Please visit my shop to see the Note Cards and Gifts I made using this and other photos in this post. I’ll add a few picture links you can click to visit it, please please share my shop links with friends once you get there! 🙂

Glossy Note Card with plain white background
Glossy Note Card with changeable text and brown background
Customizable Mug
Shaggy Ink Cap Glossy Note Cards
Hope you enjoyed my post! Please leave me comments and share on your Facebook or Pinterest pages!