Support This Site

If you like what I do please support me on Ko-fi

“Mother’s Day Field Sketching” 2011

What did you think I’d be doing on Mother’s Day? It was gorgeous outside and I had the day to myself until later when my son comes over, so off I went for a walk with my sketch journal!

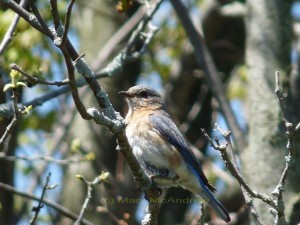
female bluebird I met along the way

Along the way I captured this shot of a female Bluebird, I’m so happy it came out. I didn’t use my long lens today, so the camera was actually easier to hand hold. (click to see as Note Card where you can see up close)

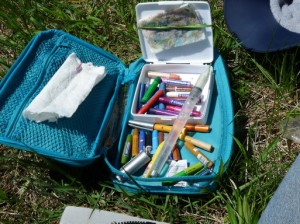
My watercolor crayons in a vinyl case so I can scatter them as I worked.

I was thrilled to find that the land on one side of the field was actually sort of dry. I mean I’ve been wading through water for weeks now, so any dry grass was pretty great. Before walking at all I decided to sit right down and have a go with my kit. I knew something would strike me. Above you can see something new I tried that worked great; I brought this empty vinyl case along and when I was ready just opened it and put it on the ground. I took my watercolor crayons and set the box right inside it, as I used colors I could just plop them in front and find them easier as I worked.  This would be good to use for the watercolor pencils too, as they get lost easily in the grass.

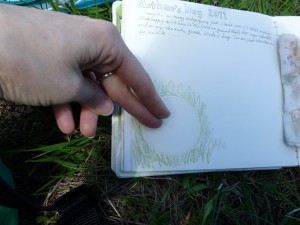
Putting color down around a round plastic shape.

I wrote some notes at the top of my paper as I sat, not even caring about painting, just enjoying the great weather. Then I decided I’d try to put a landscape but leave a circle in the foreground to fill with something. I have a piece of plastic I cut from a plastic milk carton and just filled in green watercolor crayon around it.

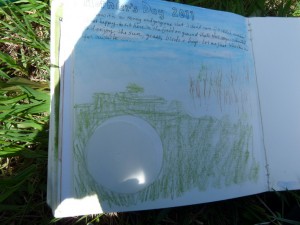
Blocking on more green for grass, sky has been painted a bit.

Blocking on more green for grass, sky has been painted a bit.

As I decided where my horizon line would be I colored blue in the sky, leaving the clouds just blank paper. (lately I’ve been doing them with white wax to ‘block’ them out using a resist method, this time it’s just bare paper)  I then brought the green up as far as I thought it should go, then wet my paper with the big brush to blend all and used a brown crayon to put trees in on the wet paper. I like how sharp the trees can look if you put them on wet paper; if you draw them dry first and then wet them, they can get fuzzy looking.

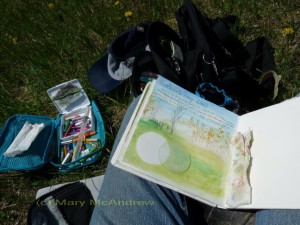
My set up on the grass, balancing my sketch journal on my knee.

Here’s my set up, as I sat on my piece of vinyl and kept everything in easy reach. I actually leaned on one elbow to do most of this sketch, and quite smartly tucked an empty sandwich bag under my elbow. By the time I was done, my elbow would have been soaked!

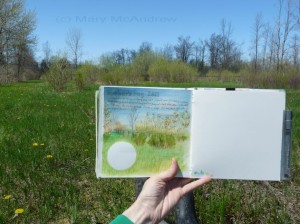
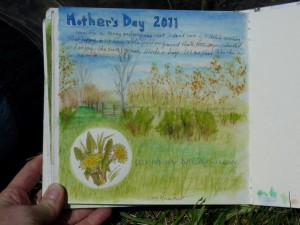
The real scene behind my sketchbook, the clouds have already floated by.

So here’s the sketch with the ‘real’ scene behind it, I don’t really like the greens of the watercolor crayons, but more practice will help. Sometimes I admit I could do a better job but when working in the field either the weather is too cold or my back hurts then I just want to hurry up. So I try to work fast, I can always touch up later if I want, or leave it as a study.

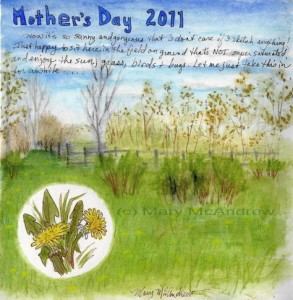
This is the page as I finished it in the field, dandelions and all.

This is the page as I finished it in the field, dandelions and all.

This is my study finished in the field, I decided to put dandelions in the small circle as they were everywhere. First I lightly sketched in pencil then went over it with a brown Windsor Newton Permanent ink with a dip nib pen. Then I colored them in by touching the brush tip (a finer one) to the crayons then painting. I colored the letters the same way using a blue crayon. I really want to go back and tone down that green on that grass! Yikes!

Field sketch after touching it up back at home.

Well here’s the sketch after I got home and touched up the greens and added the yellow dandelions.

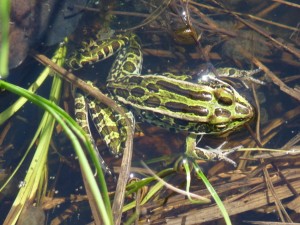
Leopard Frog

On our way after that sketch, I kept seeing Leopard Frogs. If I stood still I would start to pick them out of their hiding places.

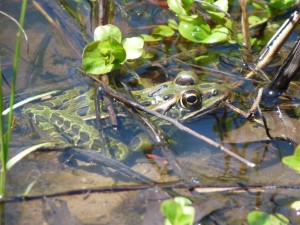
Leopard Frog

I was really getting good at it! As you walk by they get scared into the water…then if you stop a few steps away, they would seem to appear everywhere. I imagined a funny cartoon of a photographer stopping to look for frogs, the way in front of her clear, but behind her all these little heads popped up in the water! haha, well it’s me of course!

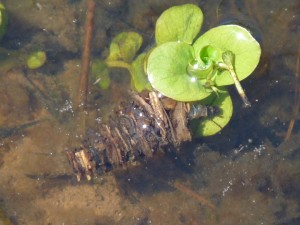
mystery water bug

This was really cool, I noticed as I stood watching for frogs without moving, a little something moving in the water below me. I swore they were just catkins from the tree floating along the bottom, but it’s a standing pool of water and instinct told me otherwise. I bent over and kept watching them and remembered reading about larvae that formed cases by ‘gluing’ stuff around them. I got this great shot of it actually poking out of the case a bit! I am not sure yet what it is, have to look it up.

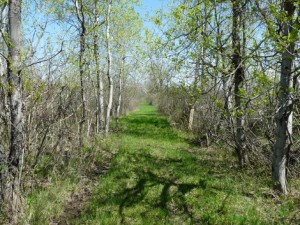
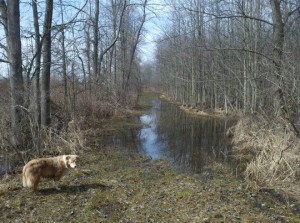
Long Lane green and lush.

Here’s Long Lane on the way back home. It’s green and lush in this very wet spring we’re having. It’s a bounty for the frogs but that means soon will come the mosquitoes too!

I hope you enjoyed this springtime walk with me and my sketching. I hope you go out and capture some nature the way I did, just stop and stand or sit still and you’ll be amazed at what you notice.
Watercolor Crayon / Lesson 1 – Color Charts

I thought I’d add a series of posts that introduce my new watercolor crayons, a few old ones, and how to start using them in hopes that some of what I do may help someone else.

When I first bought watercolor (or water soluble) crayons I tried them and didn’t like them at all! I thought the colors garish and harsh. I thought “what a lot of money for these little things and I’m not going to use them!”. Well I’ve only recently pulled them back out and have been playing with them. I’ve learned from using watercolor pencils, go lightly at first until you know just what your colors will do when you wet them.

Please click on pictures to see them bigger.

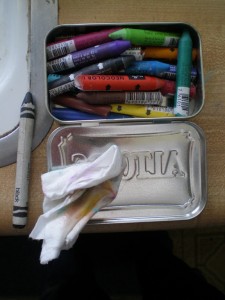
Water soluble crayons in a tin

Here’s the set of colors I started with, Caran D’Ache Neo colors and one or two Derwent Watercolor crayons.  I also show a “crayola wax crayon” and explained in another post (below) how I used it. I cut them in half (oh heavens yes I did!) to make them lighter to carry in my sketch bag and I could fit more; here I show them in an “Altoids” mint tin.  The other halves go into a baggy for later or to carry in another kit.

I took them out into the field and did some small landscape studies using these few crayons. There are links at the end of my post you can click on to read about them. After doing them I was feeling more enthused about my crayons, I think it’s time to look for more colors!

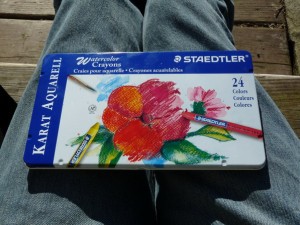
New Tin of Watercolor Crayons, Staedtler "Karat Aquarell" Neocolor II

More colors in other brands…landscape colors hopefully. I thought I’d try these Staedtler “Karat Aquarell” neo color II, they were reasonably priced online. Because I’ve been desperate for sunshine this spring, it was gorgeous that evening so I sat on my front steps to do my color charts.

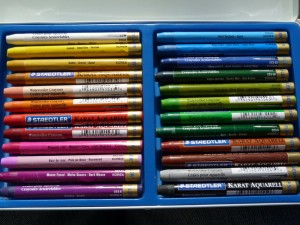
New Watercolor Crayons, wow look at all those colors!

Here’s the crayons! Woohoo….they look nice! I’m hopeful that some of those greens might be what I was looking for.

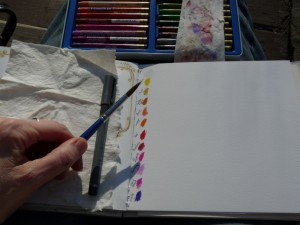
Getting ready to wet the colors and have some fun!

First I want to stress that before you do any paintings with ANY media, watercolors, color pencils, oils etc, you should ALWAYS do some color charts of all your colors. This will help you to get to know the colors as they really look on paper (or canvas) and get familiar with how to handle them.

In my sketch journal, I rubbed a small spot of color and wrote in permanent ink pen the colors name next to it. It helps to also put an initial for the name brand too or label it at the top as I did.  Prepare one row and do the wash before you color the next set of spots, just so you don’t run out of room. Keep it neat because you can refer back to these charts again and again as you get to know your colors.

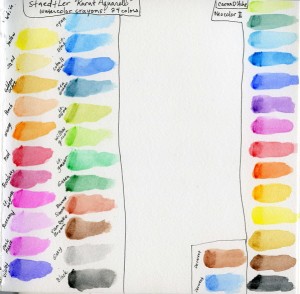
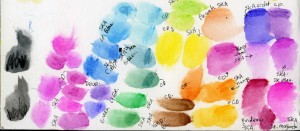
Color Charts of two brands of Watercolor Crayons

After you make your dry spots of color take a waterbrush or regular watercolor brush and water, wet the bristles and touch it to the color spot. Notice how as you ‘rub’ the color it releases and becomes like watercolor. If you rub a lot you can blend the spot right out for an even tone, but leave some intense color there, drag your brush as you rub back and forth, to one side to pull color away. Then lift your brush to stop, don’t rub too far out, keep ’em neat. Now your ready to put on any more spots you may need to and wet them; leave room for labeling them. After wetting a color rinse your brush and wipe or rub on a paper towel to make sure all color is cleaned off it.

As you can see, I did my new crayons on the left, my original crayons on the right so I can compare them.

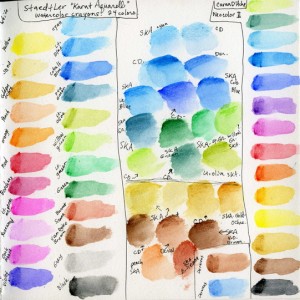
Color Charts with my comparing colors close together in the centre.

Now to have some more fun, it’s time to compare colors from different sets so I can decide which ones are too similar to carry around with me. This is a ‘getting to know you’ exercise now and VERY important! The more you play with your colors the better your choices will be when you’re painting. Sometimes when I haven’t painted in a certain media in awhile, I’ll go through and do color charts just like this.  So you can see the middle is a riot of colors!! I grouped the blues, then greens then browns and goldie colors, all good for landscapes. Label, label, label!!

( I really like how this page looks with all the color swatches, I decided to make note cards and t-shirts of it!! See the links at the end of this post 😉 )

More color play to further test some out.

Ok, then the page adjoining that one had to be used for more testing, wow, am I going to use all these pinks?

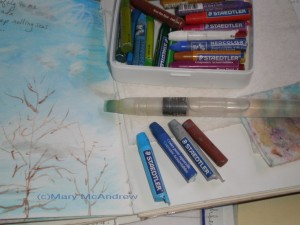
My Watercolor Crayons + Waterbrush

After all this playing I ended up with a pile of cut crayons (yes I cut my new crayons in half too! Yikes how awful!) So I searched through my favorite shelf of odds n ends, containers etc for my field kits, and found a plastic case from I think, a small first aid kit. I love that it’s plastic = lightweight! This is a picture from my previous blog post where I used the big flat water brush.

Here are the blog posts I’ve done so far using the crayons, in order of date posted:

And here are some links for FUN things with my color charts printed on them! (you can change text on them)

I hope showing you how I work helped you out! Please leave comments if you have any questions.

“Cloud Study with Water Soluble Crayons” 4-2-11

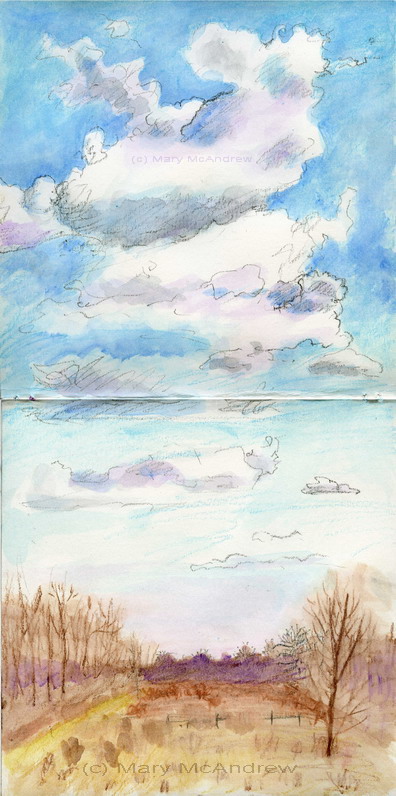
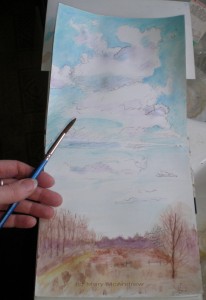
Well today there were the most beautiful high clouds, and the sun, making an appearance for the afternoon, gave nice shadows and light to them. I used my square format journal that I made and opened it fully to take advantage of the great sky-scape.

Cloud study done with water soluble crayons

This view is from my studio window, I stood by the old sink finding room near the coffee pot! I worked very quickly to sketch the clouds as they were moving fast with the wind. I used a plain old “Crayola” black crayon to sketch and very lightly put some lines in for the field below. Then I scumbled on the watersoluble crayon starting with the sky. This is only the second time I’ve used these crayons; when I first bought them I hated them! They were bright in color and garish to me. But I’m going lightly and trying some layering of colors to see how it looks.

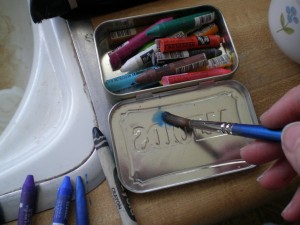
Water soluble crayons in a tin

Here’s my little black crayon and an “Altoids” tin filled with watersoluble crayons that I broke in half to fit them in. I keep a folded up piece of “Viva” paper towel in it with them.

Using the lid of the tin for watering down colors

Being that the colors ARE so vivid and strong I found it helpful to get my brush loaded with water then touch the tip of the crayon to pick up color and mix it into the wet brush on the lid. First I directly laid color on the paper and wet it, then I used this ‘brush to tip’ method (that’s what I call it!) to add more color.

Cloud studies and round brush I used

This is showing you the brush I used, just a simple round. (The sketch is unfinished here). I used it instead of the waterbrush because I wanted to get lots of water quickly and just scrub freely with the brush tip.

I’m still getting used to the crayons but I think I’m starting to like them more! I like how you can cover large areas quickly and when you wet them they really get juicy. I actually got some color on my hands (it got kind of messy!) so I was picking color up from my fingers with the brush! I think I’ll look for some other colors for landscapes in other name brands. Most of the crayons I have are Caran D’Ache.

Give them a try and let me know how you like them too!

“Step Outside Your Door Today”

(Please sign your email in my “Subscribe” box on the right, to receive my posts)

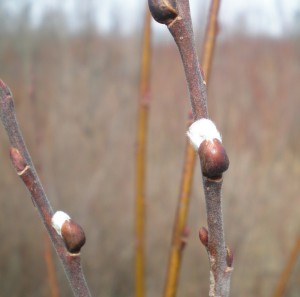
Spring Fuzzy Buds

Spring Fuzzy Buds on "Long Lane Farm"

Today is the “Equilux”, that is the day of the Equinox, where day is the same length as night. I heard that it’s also “World Storytelling Day“; now this interests me greatly as I love to tell stories and love to hear and read them. I’ll have to look into that further.  For me today was like a story of Spring coming. The sun was out, though the air was still very cold, and the birds are all vying for attention, not from me but they were certainly getting it! I did some sketches and wrote notes and a poem while I was walking so I’ll re-type what I penned on my pages for you to read.  So I tell a story today. (Please click pictures to see enlarged).

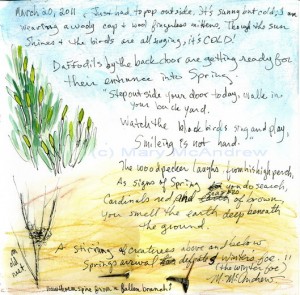
"Step Out Your Back Door" notes, poem and Hawthorn needle.

"Step Out Your Back Door" notes, poem and Hawthorn needle.

Journal: “March 20, 2011 Just had to pop outside. It’s sunny but cold; I am wearing a wooly cap + wool fingerless mittens. Though the sun shines + the birds are all singing, it’s COLD! Daffodils by the back door are getting ready for their entrance into Spring.”

Then I walked out into the pasture, totally flooded and squishy; so lucky I wore my ‘barn boots’ or Wellies as they call them in England.  Here’s a little poem I wrote while standing and listening to the birds:

Journal:

“Step Outside Your Door Today”

“Step outside your door today, walk in your backyard.

Watch the Blackbirds sing and play, smiling is not hard.

The woodpecker laughs from his high perch,

As signs of Spring you do search.

Cardinals red and grasses of brown,

You smell the earth deep beneath the ground.

A stirring of creatures above and below,

Spring’s arrival defeats Winter’s foe!”

Mary McAndrew

Hawthorne needle

Hawthorne needle

Then I walked on and around “Aspen Hall”, a favorite area of my land where the boys and I used to picnic, I found a branch from the Hawthorne tree on the ground. I plucked many of the long sharp spines off it, then poked one through my paper like a needle. This looks really cool if you click the picture to see it enlarged!

As I walked it was so cold I had to keep my hat and scarf on.  When I found a sunny spot in the “Maze”,  it actually felt better to sit down out of the breeze. I was able to pull my wooly hat off and stretch my legs out; I put a plastic kitchen garbage bag on the ground to keep the wet where it belonged! Just make sure you don’t put it on any pokey stubs of things, you’ll get a hole and be surprised later!

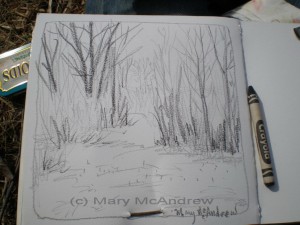
Black Crayola Crayon Sketch

Black Crayola Crayon Sketch

Here’s a page in my sketch journal that I worked on, a view of the path I had just walked on.  I started with a little border line around the edges to add a neat design element. Then sketched in black ‘Crayola’ wax crayon that I had sharpened with my knife. Using this crayon was SO MUCH FUN! I can’t wait to try it some more, I loved the feel of the crayon on the slightly rough paper, you could see the texture too. You can press harder for darker lines and very lightly to make it light of course.

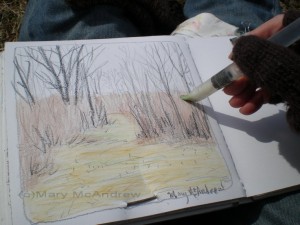
Using the flat tipped waterbrush to wet the watercolor crayons

Using the flat tipped waterbrush to wet the watercolor crayons

Then I tested my colors by making a tiny dot at the bottom of the next page and wet it. Make sure you test your colors before you scrawl all over a drawing, watercolor pencils and crayons can surprise you at how different they look wet!  I very lightly, using the side of the point of each crayon, added color to the areas. I saw the bushes and trees in front of me as more of a mass of value with some standing out in the foreground; so I massed it in as brownish reds then added heavier marks for trees and branches.  Experiment with adding lines onto your wet paper, they will be very distinct and bold; this is good for adding branches.

I’m using the flat waterbrush, I really like this brush for studies that need large washed areas and it’s great for making grass marks! PS. yes it was cold still, I did the sketch with the mittens on, the flipped back the finger cover to use my brush!

Sketch in the Maze done with watercolor crayons on black wax crayon

Sketch in the Maze done with watercolor crayons on black wax crayon

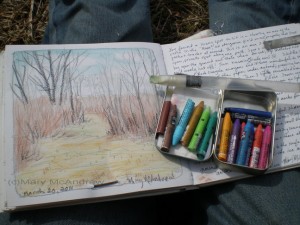
Here’s a picture of my crayons, (each is broken in half to make them fit and weigh less in my pack) I have them tucked into an “Altoids” tin with some paper towel. The ones in the lid on the left are what I used for this sketch. Another thing you can see is how in the foreground I used more lines from the crayons going back and forth to add texture. Then the flat waterbrush with tip sort of dry, it spreads apart and makes good grass type marks. Touch it to your crayon tip to get color and brush it on the paper. Click on the finished sketch below.

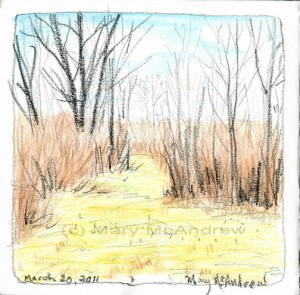
"Springtime Path in the Maze" watercolor crayon + wax crayon

"Springtime Path in the Maze" watercolor crayon + wax crayon

Here’s the finished sketch done in wax and water soluble crayons. I rather like it! Oh and the three bigger trees on the left are the “Sister Trees”, they are a group of huge trees I’ve painted before.

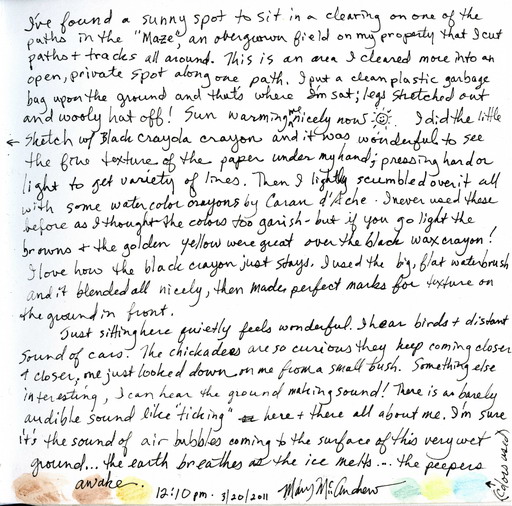
You may like to read my notes on this page that I wrote as I did the little painting. They are here at full size so you don’t have to click it and I typed out the notes below the picture!

Notes from my walk with colors for sketch at bottom.

Notes from my walk with colors for sketch at bottom.

Journal: “I’ve found a sunny spot to sit in a clearing on one of the paths in the “Maze”, an overgrown field on my property that I cut paths and tracks all around. This is an area I cleared more  into an open, private spot along one path. I put a clean plastic garbage bag upon the ground and that’s where I’m sat; legs stretched out and wooly hat off! Sun warming me nicely now! 🙂 I did the little sketch with Black Crayola crayon and it was wonderful to see the fine texture of the paper under my hand; pressing hard or light to get variety of lines. Then I lightly scumbled over it all with watercolor crayons by Caran d’ Ache. I never used these before as I thought the colors too garish- but if you go light the browns + the golden yellow were great over the black wax crayon! I love how the black crayon just stays. I used the big, flat waterbrush and it blended all nicely, then made perfect marks for texture on the ground in front.

Just sitting here quietly feels wonderful. I hear birds + distant sound of cars. The Chickadees are so curious they keep coming closer and closer. One just looked down on me from a small bush. Something else interesting, I can hear the ground making sound! There is a barely audible sound like “ticking” here and there all about me. I’m sure it’s the sound of air bubbles coming to the surface of this very wet ground…the earth breaths as the ice melts…the peepers awake.

12:10 pm 3/20/2011  Mary McAndrew”

Ginger on Long Lane, listening to the Peepers singing.

Ginger on Long Lane, listening to the Peepers singing.

Now, go get your dog, your children or just yourself, grab that sketchbook and some crayons and get out there!! Good days don’t wait for anyone, go enjoy what’s around you no matter where you live. I’d love to hear from you if you’ve been out and noticed signs of Spring, leave me some comments.

I started putting lots of my sketches on “Flickr” if you want to stop by and see them, I may use it as a place to show all my sketch pages? We’ll see. Don’t forget to stop by my ‘SHOP’ to see the new Easter and Spring cards.