I thought I’d add a series of posts that introduce my new watercolor crayons, a few old ones, and how to start using them in hopes that some of what I do may help someone else.
When I first bought watercolor (or water soluble) crayons I tried them and didn’t like them at all! I thought the colors garish and harsh. I thought “what a lot of money for these little things and I’m not going to use them!”. Well I’ve only recently pulled them back out and have been playing with them. I’ve learned from using watercolor pencils, go lightly at first until you know just what your colors will do when you wet them.
Please click on pictures to see them bigger.
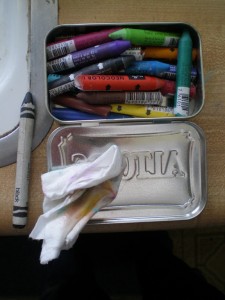
Here’s the set of colors I started with, Caran D’Ache Neo colors and one or two Derwent Watercolor crayons. I also show a “crayola wax crayon” and explained in another post (below) how I used it. I cut them in half (oh heavens yes I did!) to make them lighter to carry in my sketch bag and I could fit more; here I show them in an “Altoids” mint tin. The other halves go into a baggy for later or to carry in another kit.
I took them out into the field and did some small landscape studies using these few crayons. There are links at the end of my post you can click on to read about them. After doing them I was feeling more enthused about my crayons, I think it’s time to look for more colors!
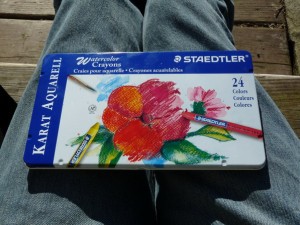
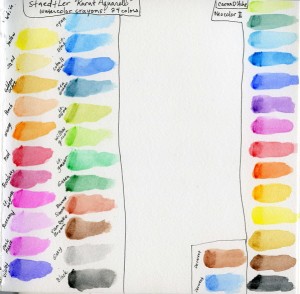
More colors in other brands…landscape colors hopefully. I thought I’d try these Staedtler “Karat Aquarell” neo color II, they were reasonably priced online. Because I’ve been desperate for sunshine this spring, it was gorgeous that evening so I sat on my front steps to do my color charts.
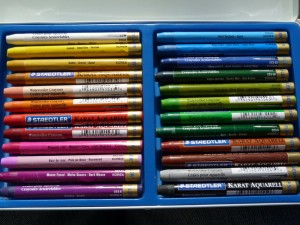
Here’s the crayons! Woohoo….they look nice! I’m hopeful that some of those greens might be what I was looking for.
First I want to stress that before you do any paintings with ANY media, watercolors, color pencils, oils etc, you should ALWAYS do some color charts of all your colors. This will help you to get to know the colors as they really look on paper (or canvas) and get familiar with how to handle them.
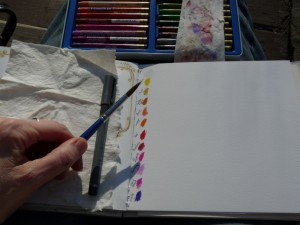
In my sketch journal, I rubbed a small spot of color and wrote in permanent ink pen the colors name next to it. It helps to also put an initial for the name brand too or label it at the top as I did. Prepare one row and do the wash before you color the next set of spots, just so you don’t run out of room. Keep it neat because you can refer back to these charts again and again as you get to know your colors.
After you make your dry spots of color take a waterbrush or regular watercolor brush and water, wet the bristles and touch it to the color spot. Notice how as you ‘rub’ the color it releases and becomes like watercolor. If you rub a lot you can blend the spot right out for an even tone, but leave some intense color there, drag your brush as you rub back and forth, to one side to pull color away. Then lift your brush to stop, don’t rub too far out, keep ’em neat. Now your ready to put on any more spots you may need to and wet them; leave room for labeling them. After wetting a color rinse your brush and wipe or rub on a paper towel to make sure all color is cleaned off it.
As you can see, I did my new crayons on the left, my original crayons on the right so I can compare them.
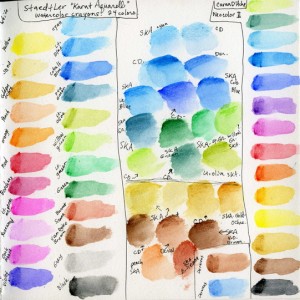
Now to have some more fun, it’s time to compare colors from different sets so I can decide which ones are too similar to carry around with me. This is a ‘getting to know you’ exercise now and VERY important! The more you play with your colors the better your choices will be when you’re painting. Sometimes when I haven’t painted in a certain media in awhile, I’ll go through and do color charts just like this. So you can see the middle is a riot of colors!! I grouped the blues, then greens then browns and goldie colors, all good for landscapes. Label, label, label!!
( I really like how this page looks with all the color swatches, I decided to make note cards and t-shirts of it!! See the links at the end of this post 😉 )
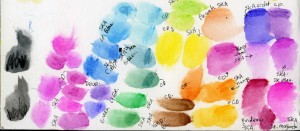
Ok, then the page adjoining that one had to be used for more testing, wow, am I going to use all these pinks?
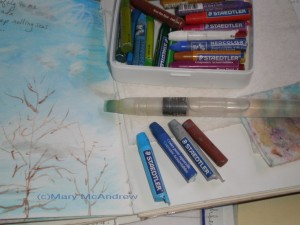
After all this playing I ended up with a pile of cut crayons (yes I cut my new crayons in half too! Yikes how awful!) So I searched through my favorite shelf of odds n ends, containers etc for my field kits, and found a plastic case from I think, a small first aid kit. I love that it’s plastic = lightweight! This is a picture from my previous blog post where I used the big flat water brush.
Here are the blog posts I’ve done so far using the crayons, in order of date posted:
- “Step Outside Your Door Today” (first time using the crayons, scroll down to see the landscape I did after the poem)
- “Cloud Study With Water Soluble Crayons” (Loved how this came out, getting to know the crayons better!)
- “Wind in the Willows – Clouds and Crayons” (I REALLY love this one!)
And here are some links for FUN things with my color charts printed on them! (you can change text on them)
- “Keep on Painting” T-shirt
- “Keep on Painting” Apron (for studio or kitchen)
- “Keep on Painting” Note Cards, very colorful and totally customizable.
- Color Chart Note Cards with full page color chart!
- Color Chart 2 Note Cards with full page color chart # 2!
I hope showing you how I work helped you out! Please leave comments if you have any questions.
