|
|
(This post is done AFTER returning home to NY…gosh I miss my Northumberland!)
Come along with me as I do a small oil painting in a very gorgeous location in the Coquetdale (River Coquet Valley) area of Northumberland, England. I think of all the areas I’ve traveled around in Northumberland, the Coquetdale is one of the most beautiful and always catches me by surprise when we drive along it’s long winding path through the valley. It has quite a few meanders before reaching the North Sea which makes it that much more picturesque to an artist, it’s curves reflected in the sun as a shimmering snake in a green velvet valley.
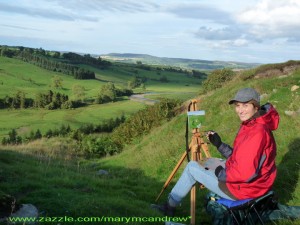 Painting while looking over the River Coquet There I am! We hiked up this great high hill and entered the Bronze Age Celtic ring fort at the top. It’s surrounded by a deep ditch, as was the practice for all ring forts, though I guess a few thousand years ago it would have been deeper and very impressive. After exploring the fort and ditch I settled down inside a ditch with my back to the VERY brisk wind! While I painted I had my hood up to keep the wind off and you notice I’m wearing fingerless gloves, a must for outdoor painting!
For my set up, my favorite wooden field easel and a backpack with attached stool. This is a popular one found in many art supply catalogs but I altered it (as usual!), I took the backrest off by hammering on it until it came away. With the backrest off, I can now sit on it in any direction I like, sometimes the bars of the seat hurt the back of my legs and I feel less attachments equals less weight. I’m put a camping inflatable pillow on the seat, makes it a bit better. All in all, I don’t usually sit when painting outdoors, I find it tiresome to my back; usually I stand up and feel freer with my painting and you can move around to keep warm.
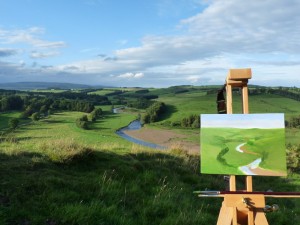 My View Over Coquetdale Here’s a view of what I saw, you may wonder how my masonite board is staying up so magically on the easel? The wonders of Blue Sticky Tack never cease!! I use it all the time, I have some little dots of it on the easel to hold small boards like this, just where I want them. With a small board, I don’t like the wood of the easel’s clamp to get in the way.
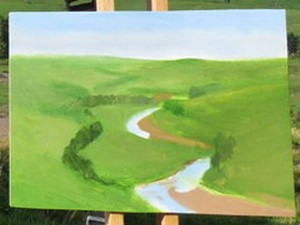 stage 1-View Over Coquetdale When in the field I usually don’t pencil sketch the scene on the canvas, but use either Burnt Umber thinned with mineral spirits, or pick a color in the landscape and sketch directly with the brush. Just pay attention as you divide up your canvas with the horizon line placement and other important elements. If you get it wrong in the beginning, it’ll always be wrong! I go for blocking in big shapes in the ‘nearest’ color to it’s overall color.
When I started this one I blocked in some really bright green, later I decided I should have tried to match the color better to begin with. I just wanted to get it going, so I painted into the wet oil to adjust the color. You’ll notice my river color is quite light, just laying it in to mark it, I’ll adjust the color later. I wanted to have a wet base to paint into. I painted the sky with an all over tone of blue with the gradation of dark to light, later I’ll add the clouds. I also started to establish where the dark areas are, the tree lines.
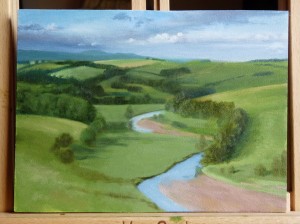 Stage 2- View Over Coquetdale Now I’m set up back at home and continue working from my laptop where I have photos of the scene. I’m sorry I missed a few stages with the photos as I got involved with the painting! I studied where the background mountains should go and toned down blueish green for them. I continued to study where the tree lines were and payed close attention to the light and dark areas of the hills and tree clumps. Don’t put too much detail in the distant trees, just let them describe the curve of the hills as their lines criss cross and disappear. I also started to tuck darks under the tree lines and to the shadow side of them. You begin to notice the tree line on the left front is different than the ones on the right. They are different types of trees so the form and colors are different.
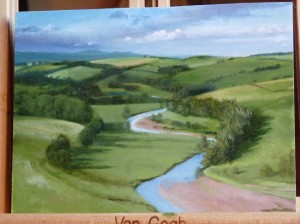 Stage 3- View Over Coquetdale Picking out a little more detail of the hills in the mid-ground, I add some lights to define the hills and more detail to the tree lines. I lightly defined the little dirt road in the front left and a ‘hint’ of a fence, but kept it soft and also added more light to the left field. I put a small path that crossed the field in the middle but then later decided it was just too much of a distraction and took it out. I also added some lights to the trees on the right, you can see they are more pointy than the other trees as they are pines.
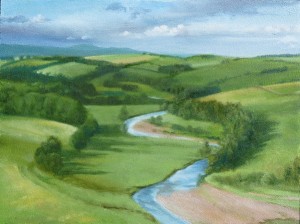 Stage 4- View Over Coquetdale Above you can see I’ve added some darker (but still bright) blues to the river, taking care which direction I stroked it on. I added some yellow to the fields on the left to warm it up and cut down on the lightness. I added more bushes and detail to the front right side by the bank.
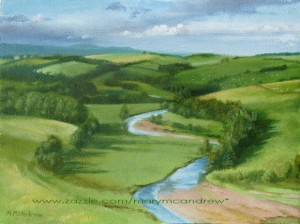 Completed "View over Coquetdale" 6x8" oil The completed painting,6 x 8″ in oil, click it to view it larger in my Gallery of Landscapes. Here you can see I’ve added just a little more detail on the bank and sheep (whitish dots!) on the hills. One thing you notice when driving about the countryside of England are sheep just about everywhere! No hill would be complete without some of these white dots. Of course I didn’t just make blobs but made sure they had a bit of a long shape and slightly darker underneath, it’s just to ‘hint’ at a sheep, not to paint one in full detail at such a distance.
To view prints, note cards and more with this painting, click the links below to see them in my shop! (You can personalize any of them with your own text.)
This is a sketch I did back in September but didn’t have time to post it, thought I’d share it now.
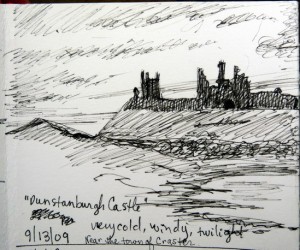 Dunstanburgh castle sketch Just thought I’d put this little tiny sketch up. Gary and I ended up here pretty late on a windy cold evening, but I still managed to sketch with my ink pen and wearing fingerless gloves. It was more like a shilhouette at this point, but as I started it I could still see the grass in front of it. It was scribbled pretty fast because I was so cold!
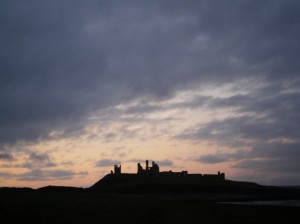 Dunstanburgh Castle at sunset Dunstanburgh Castle is on the East coast of Northumberland, just a short walk along the sea from the harbour Town of Crastor. We walked along with the rocky coast to our right, an area I’d love to explore more in the day time. Quite aways from the castle still is a fence with a gate you enter, there was a bench right there we decided to just sit because it had gone dark. That’s where I did my quicky sketch from, yet though it was quick, because I DID take the time to do it, I remember so much more about being there. Sometimes I prefer a scribbly looking sketch to a perfectly neat and tidy one, it can be much more expressive about the day or the feeling.
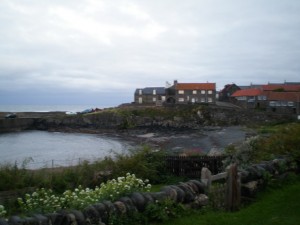 Town of Craster Craster was small and quaint, has a kipper smokehouse, fishermen’s houses and a pub..perhaps a hotel? There is a small bay you can see here (though I know it’s dark!) where the fishing boats come in.
 small book-cover sketchbook This is a picture of the special little sketchbook I made up. Once in awhile I throw this in my bag when I want to carry less and know I’ll be somewhere where quick sketches will be done. It’s an old book my kids didn’t want any more so I pulled the pages out to make this. (ouch, I know book lovers!! It was painless believe me) I cut nice watercolor paper the same height as the book and folded it acordian style to go inside, taping both ends onto the cover. I put a big rubber band around it to keep it shut or open to a certain page while drawing.
Today it was sunny and very blustery! We decided to take a hike near Clennell up the valley along the River Alwin then we looped back by walking up and along one of the huge hills. What gorgeous views we had! Of course I brought my field kit for watercolors with me hoping to find a quick sketch, as usual we pushed on without much lingering for painting or we’d never do the loop before dark. I did get some pencil sketches done that I later colored with watercolor as you’ll see.
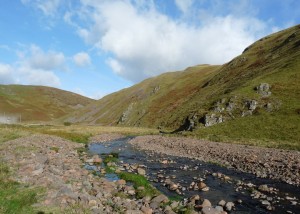 Along the Alwin River This is the valley we hiked along for a few miles, flat and easy except for the driving wind blowing on us at the start. It settled down as we got into the valley more. You can see on the far left a dust cloud with a huge truck in it, that’s a logging truck coming down the road we’re walking on, we’ll be headed around the base of that hill soon.
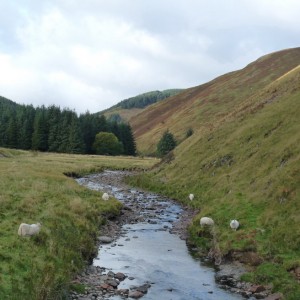 River Alwin into the Kidlandlee Dean As we walked occasionally a Grey heron would be spooked from the river and fly upstream a bit. We had the valley all to ourselves except for the sheep and maybe one passing truck. The Kidlandlee Dean is the forest area ahead; a Dean is a small ravine, a word that comes from the Anglo Saxon’s. At the base of those pine trees we’ll turn our path up to the right and go up onto the hill we’ve been hiking along side.
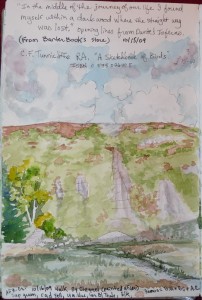 RIver Alwin and "The Dodd" (hill) Here I was able to convince Gary to stop long enough to let me catch my breath and sneak in a quick pencil sketch. This is just before we started to walk up the huge hill and I’m looking across the River Alwin and the Kidlandlee Dean is just to my left. The hill I sketched I found out later is called “The Dodd”. Later at home I painted the colors in with my waterbrush and watercolors while looking at the laptop photos. I put notes at the bottom of the colors I used.
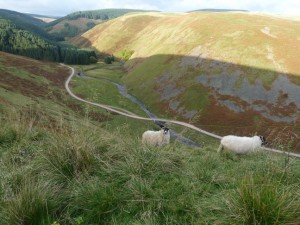 River Alwin below You can see we’ve been walking along the hillside, this is looking back towards the spot where I sat and sketched. We walked all along that ribbon of road down there! Along the way there are sheep that give you a look before running off into the grass, these two were right on the edge of the hill, it was pretty steep.
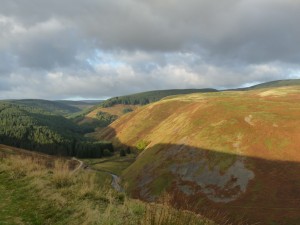 Hills called "The Dodd" and "Old Rookland" Looking back again; though the hills look bleak the colors on them of the bracken, grasses and grey-blue stone are really beautiful, but most especially when the sun hits it and creates dramatic shadows!
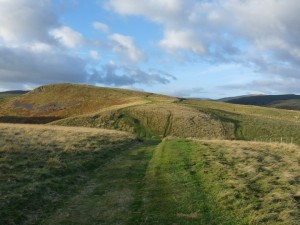 An old Drovers road also called "Border County Ride" This is a view looking back along the road that we picked up on top of the hill. Gary says that it probably an old Drovers road, a drover being someone who’d be hired to drive cattle to market by the farmers 200 years ago or more. So they are English Cowboys I guess! Some 400 years ago they would have been using this road and would have to defend the cattle against the Border Rievers who could steal the cattle.
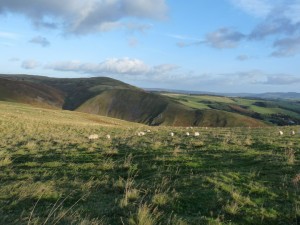 View of Clennell Hill This is a view looking across the valley (at the steep edge the sheep are on) to Clennell, we walked up that valley along the river. The wind was whipping but you can see the views were spectacular, so vast.
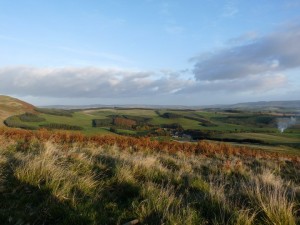 View over Clennell towards Rothbury We sat here upon the top of this hill looking out over Clennell and Rothbury would be further on in the distance, Alwinton would be to our right. A farmer was burning some wood piles down below and it could be imagined that in ancient times when the Celts had their settlements there, there would be similar fires burning. Just below us to the right, on top of a smaller hill is the remains of a Celtic ring fort, at one time it would have had small fires burning in the crisp fall air.
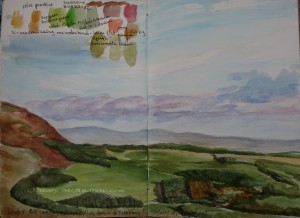 Watercolor sketch "Views over Clennell" We threw the waterproof picnic blanket on the ground and I sat to do a quick sketch. I just used my pencil and ‘zoomed’ in on a view that you see in the photo previous. It was so windy and cold I had a heavy wool blanket over my shoulders as I sat to help block the wind. Come to think of it, lucky I had on my rain pants too, they block the wind quite a bit. All the paint marks you see in the upper left I did on the spot as color notes. I used my big flat waterbrush and labeled colors, yes I know it is right on my watercolor sketch but it’s a ‘working sketchbook’ too and I wanted to do color notes on the spot. So when I got home I painted it in while looking at my laptop, using my big waterbrush (pictured on my equipment page).
I hope you enjoyed coming along on this hike with me, you didn’t have the feel of the wind on your face or smell the fires burning but maybe someday you can come on a real hike with me and learn how to paint in the field too. I welcome your comments below!
This hike was such an adventure that I’ll never forget! It was long and had so many great views that I have quite a few photos to share with you before you see my sketch and watercolor painting at the end.
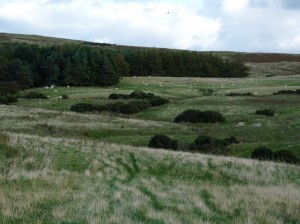 Hike up the valley First we parked the car near an old Medieval church that in itself is very interesting and I’d like to go back to explore it and it’s graveyard with old stones. We hiked up this valley along all those pine trees you see…past all those white dots, those are sheep!
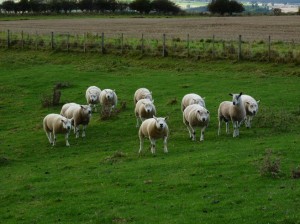 The tough looking sheep closed in on us I’ll be a little silly here and tell you when we walked past these sheep, they kept coming closer and closer like they were ganging up on us. It’s my silly side that thinks they look like thugs in tight wool sweaters, not very attractive sheep! The one who doesn’t have to short pig-like look is a different breed, he must be wondering what he’s doing with all those thugs! haha.
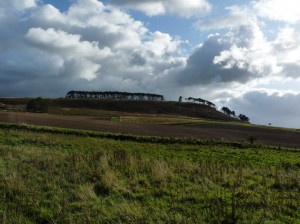 The hill we need to climb We passed the sheep and went up a very gentle sloping hill, but it was huge so it took us awhile. It may look all sunny and pretty but it was really cold and extremely windy that day. You can see the beautiful line of Scotch pines up on the hill, that’s where we’re headed to the ring fort.
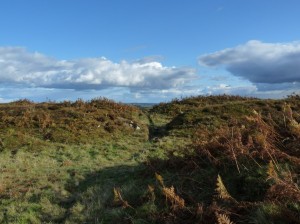 Old walls of the Celtic Ring Fort Well we made it up, the hill seemed to never have a top to it…we walked and walked but enjoyed the views. If you look at the photo above you’ll see a mound of dirt with grass on it, looks like a dune at the ocean, and there’s a spot you can walk through. That’s the Celtic Ring Fort entrance and the mounds are the walls, they used to be much taller and had deep ditches dug all around like a moat for protection. It’s such a huge site, it’s hard to imagine the layout of the fort, but if you look at it on Google Earth it’s really cool to see the image of the rings from above.
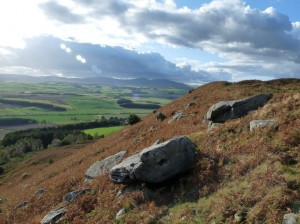 Steep hillside defense of the ring fort This is the view off the front of the hill fort, it’s a very steep hillside which would have given them protection from enemies. At the top of the hill you can just see several mounds of dirt, those are remains of the walls.
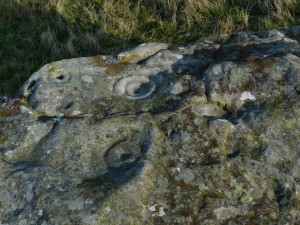 First stone we found Now this is the best part, there is ancient rock art on the stones found around this site. These were carved around 3,000 – 4,000 years ago by the ancient Celtic people who made the hillfort. They are generally called ‘Cup and Ring Marks’, the ones above are ring marks. It’s so beautiful to see the symetrical designs carved into the rocks but they are so worn with age and covered with lichens that they just look so natural.
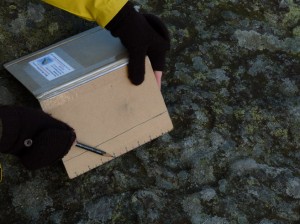 I'm measuring the rings with my sketchbook Here I’m showing how I use the ruler I drew on the back of my homemade sketchbook to measure one of the rings circumferences.
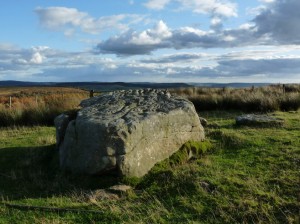 This is the larger stone on Old Bewick This is the second rock we found and probably very photographed by hikers. If you do an image search for “Old Bewick Rock Art” you’ll come up with a lot of interesting stuff.
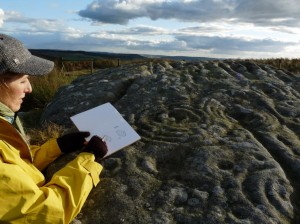 Drawing rings Here I’m sketching some of the rings of the second rock, gosh it was really cold, if you could only imagine it was hard to stand still because the wind was blowing on me so hard!
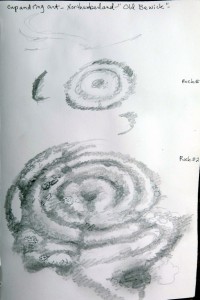 Sketch of the rings Here’s the sketches of ring marks. I tried to hold my pencil lightly and used the side of the tip so I could sort of lightly scribble the forms and build up darks as I went.
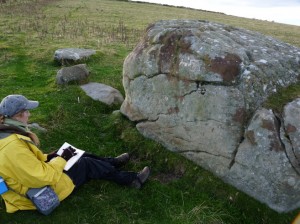 Drawing the line of 'cup' marks Just as we were getting ready to leave I looked back at the huge stone and noticed (with my keenly trained nature sketching eyes!!) the little ‘cup’ marks along the front of the stone.
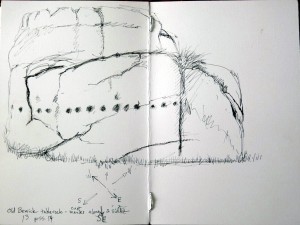 Old Bewick field sketch I had to go back, even though we were tired and ready to go, I sat and did a quick pen sketch with permanent ink of the outline and basic cracks.I’m just getting used to using my new homemade sketchbook and I like that I can draw across two pages instead of having a spiral in the way.
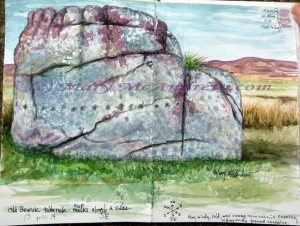 Painting of Old Bewick Rock This is the finished painting of Old Bewick Rock. Once I get home I only have my laptop to look at for reference from photos I take. As I now had time to sit in a warm house with a hot cup of tea I could see where I was a bit ‘off’ with my cracks and added maybe two extra cups marks! But it’s a field sketch, no big deal. So I had fun painting it with watercolors and you can see I left color testing notes in the upper right corner. While I sat there I did note the direction I was facing with my compass and wrote it on my paper.
I hope you enjoyed coming on a great hike with me, I’m inspired to study more of the numerous ‘rock art’ sites all around Northumberland and do some paintings.
I thought I should add a note here about the ancient sites like this, in case you ever visit one please remember they are irreplaceable. Gary and I talked about how soft the sandstone is and crumbles very easy if you just touch it. It’s my opinion that you shouldn’t really touch it too much or especially do rubbings on paper, I think it’s too much abrasion for the stone. Please never climb on it and encourage others to consider it’s delicacy too. Thanks!
Hi folks, just passing on some great news, I have three paintings I submitted to be juried for the Miniature Painters, Sculptors + Gravers Society in Washington DC and all were accepted! Yay! The three paintings I entered are following, click on each to see them larger in my gallery and more details about each. I even have links there to blog posts about how I painted them, have a look!
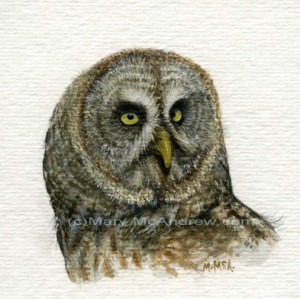 "Great Grey Owl" 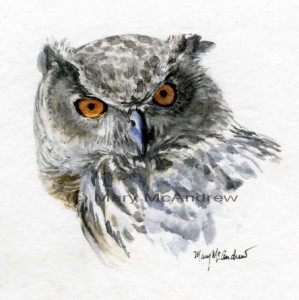 "Eurasian Eagle Owl" 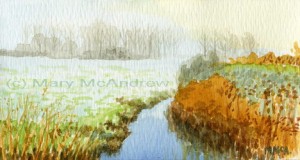 "English Wetlands Show Details are as follows:
Awards Ceremony — Nov. 22, 2 pm
Opening Reception — Nov. 22, 3-5 pm
Exhibition — Nov. 22, 2009 through Jan. 2, 2010
Strathmore Mansion
10701 Rockville Pike, North Bethesda, MD 20852
301-530-0540
Weekdays 10-4 • Wed. 10-9
Sat. 10-3
(closed Sun & holidays)
If you scroll down on this page: http://www.mpsgs.org/MPSGS-Exhib.htm#CurrentExh you’ll see paintings that won awards in last years show.
Here is a direct quote from their website about the society: “The Miniature Painters, Sculptors & Gravers Society of Washington, DC, (MPSGS) was founded in 1931 by Alyn Williams (1865-1941), a well-known portrait miniaturist. The MPSGS is the oldest Miniature Art Society in the U.S. It is the second oldest in the world next to the Royal Society of Miniature Painters, Sculptors and Gravers in London, England–the world’s first Miniature Art Society also founded by Mr. Williams. The Inaugural Exhibition of the MPSGS of Washington, DC, was held at the Corcoran Gallery of Art in December 1931. The Society has held exhibitions annually for 71 years with the exception of the years 1932 and 1942.”
Let me know if you live in the DC area and are going to the show. I’ll be unable to attend as I’ll still be in England.
Today we visited Howdiemont Sands beach along the coast of the North Sea in Northumberland England. We walked across Sugar Sands and climbed up to a point where we could view the point at Howick Haven. I wanted to sit and try to do a small watercolor landscape so I bundled up and brought the usual field kit.
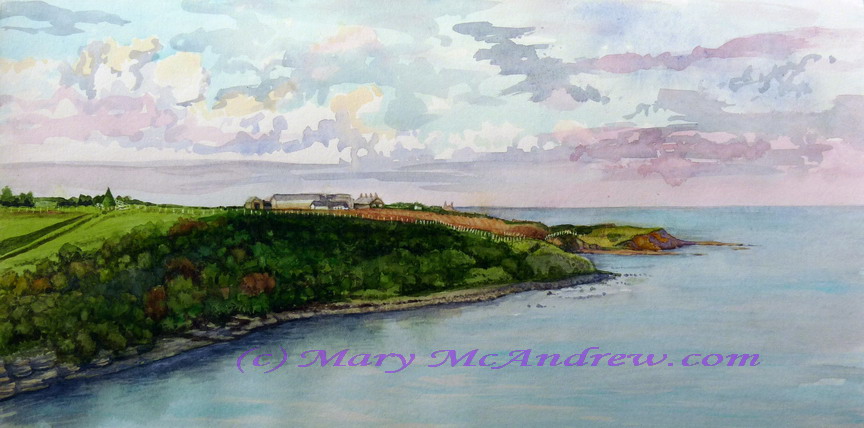 Water color painting "View of Howick Haven" Here’s the finished painting, I did most in the field sitting on top a windy, grassy cold hill. I’ll share the photographs with you of what I saw and tell you a bit about how I did the little painting.
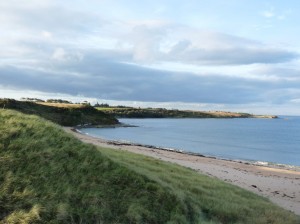 We walked along this beach When you first arrive at Howdiemont Sands you can choose to walk either right or left. We chose left because it was new to us and we always wonder at what new views might be found or other discoveries.
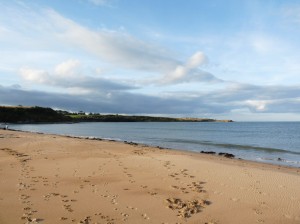 Sugar Sands The beach here (called Sugar Sands) is unbelievable, a pretty color of ‘sand’ shade, (hahah…) clean, soft and inviting even on a cold sunny October day. You can see many other people and their dogs found the beach irresistible today too.
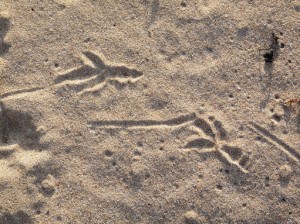 Bird tracks There were lots of interesting bird tracks too, gulls leave a track with a little web foot. This one? It was big and looked like it would drag it’s front toe in the sand when it stepped; I wish I knew what it was.
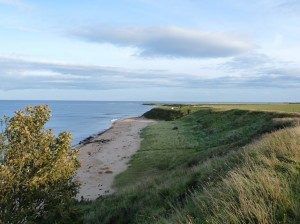 Looking back at Sugar Sands Here’s a view looking back on the beach we crossed, sometimes you have to go up over the grassy banks to get past areas that are under water still.
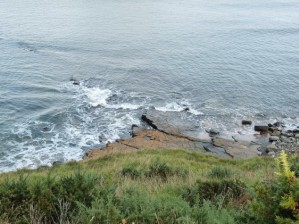 The red rocks below me This is looking down from where I decided to paint, how beautiful the patterns and colors are in these rocks. As the tide continues to go out the rocks will be more exposed.
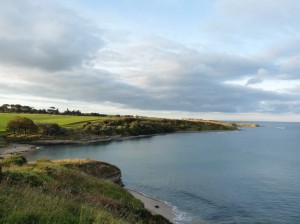 View from my painting spot This is the gorgeous view from where I decided to sit, light was fading fast and I had to pick a place quick. It’s really hard to pick a scene when there’s so much to see around you. It helps to hold up your hands and make a little opening like a rectangle and pretend that’s your paper. Move your hands around until you find a cropped scene that you like.
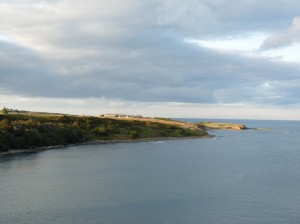 View I painted Because I wasn’t working really big I tried to limit what I was going to paint, also I didn’t have tons of time with the sun leaving soon as it was about 4:30pm when we arrived.
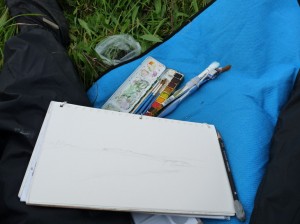 my sketch I sat on a picnic blanket with a waterproof bottom, wore my wind/rain pants over my regular pants, this helped to cut the cold and wind. I also had on my fingerless gloves as usual, sorry no picture today! I’m using a homemade sketchpad that I created so it would be extra long. It’s great for landscapes! I worked with my field pan and regular watercolor brushes, usually when in the field I use my waterbrush. I don’t like the waterbrush for larger works needing big washes of color. You can see in the picture a baggy just off the blanket, tucked into the grass. I forgot a watercup to rinse my brushes in, so I used a baggy with some water in it, it worked great!!
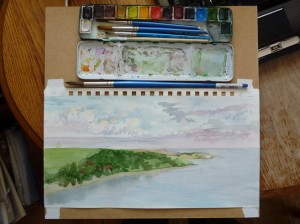 My watercolor field pan This is the painting/sketch laid out at home, you can see this is how far I got with it in the field. The pan watercolors I used is an old metal kit that I popped the large pans out of and replaced with half pans of Windsor Newton brand paints. I use a bit of sticky tack or blue tack to hold each one in place and you can see the handles on my brushes are cut, so I can fit more “things” in it. I brought that one long brush with me and used only that to do all this so far.
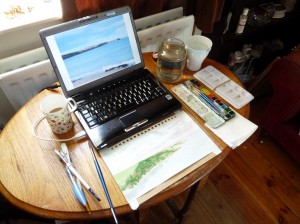 My set up to finish from photo at home Now I set up my laptop with a photo I took while there, and worked on details with smaller brushes while looking at it. I didn’t touch the sky, just left it the way I did it in the field. If you start to mess around with all of it, it can get stiff looking. Notice I put my coffee on the left side…if your right handed, water should go on that side and you don’t want to be dipping into your coffee by mistake! So, I worked on trees and details of that main area; I also used a razor blade to scrape fine lines for the white fence. Also, you may have noticed a funny looking cone shape that looks like a child’s’ painting of a tree? It’s a recreation of one of the oldest ‘houses’ in Britain probably from the Bronze age. Remains of one were found on this very spot! They made their homes from tree limbs in a sort of tee pee style, with turf for the roofing material. I’ll try to find a link about it to add here.
Go here to see the finished painting in the GALLERY.
To see other watercolor landscapes go to my gallery here: http://marymcandrew.com/gallery/landscapes/watercolors/
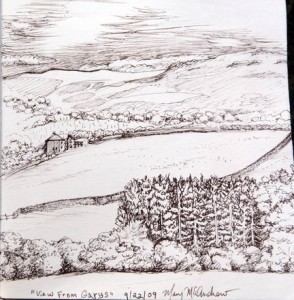 View from Gary's Another small sketch done in brown permanent ink pen (Micron) in my field sketchbook. This was done while sitting and waiting to leave for another adventure. It looks across a farmers field, where the tall pines and trees are is a Burn or stream, then behind that up the hill to more fields with a stone wall crossing it, a nice house and the wall along the top is for the B road that runs along the crags. Above it you can see the hill of crags with heather and bracken growing.
A beautiful view everyday.
Today I’ll take you to the Marina at Derwent water where I stayed overnight at The Derwent Hotel. It’s a gorgeous place to stay all newly refinished, the bedroom was just sumptuous! And oh yes, I really liked that they had internet so I could catch up with the folks at home and let them know I wasn’t lost somewhere in the English countryside!
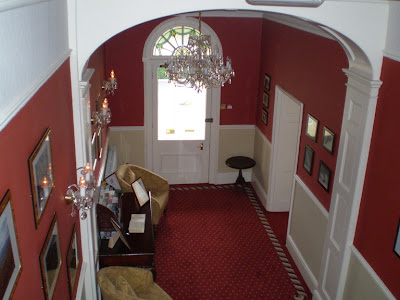 This is the front lobby, coming down in the early morning to have my oatmeal made with cream and oh boy was it rich! 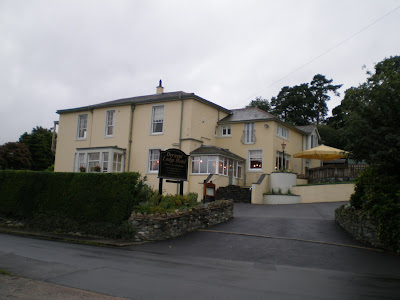 Then I made my way across the street and just down a driveway and there you are…the marina. A small, uncomplicated, peaceful place so early in the morning. http://www.derwentwatermarina.co.uk/ Walking toward the water…I took note of birds I saw, almost all were new to me, how exciting!  I love when the mist is lower than the mountains around it, the puffs were making their way up each ‘valley’ from the lake. Small coots were chugging across the still water looking for fish…I did some small sketches of birds and wrote my bird list on the sketch page shown below.  Click the page to read my notes. 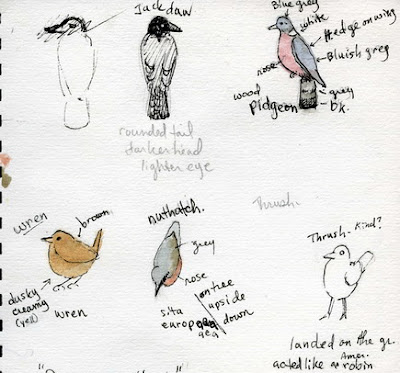 These are simple sketches done while walking around, this is typically how I draw birds in the field. Not much to them, just identification notes, and I had my Altoids watercolor kit with me and did some simple coloring. I think one of my favorite birds was the wood pidgeon; with a flash of white on his wings when he flew from the deep trees where hidden. They are quite big compared to ‘our’ rock doves or pidgeons.  Later in the day I walked up the hill behind the hotel. It was very chilly and damp as I sat and worked. I did a small sketch of the lake view over the hotel, trying to get some color notes on it so I’d remember how it looked. I think my friend Gary arrived just in time though as my fingers were getting quite stiff! Time for hot tea!  I just finished the sketch,(back home in the states) working from a dull photo because it was a dull day. I sat in a coffee/lunch area in the grocery store on a nasty snowy day and worked on it…then finished it in the comfort of my studio. I perked up the color a little trying to keep in mind the original colors I had on the paper. I signed it Lake Derwent before I learned that it’s called Derwent Water. By the way, I did the entire painting using one waterbrush and my travel palette. I’m trying to practice using the waterbrush so it’ll come naturally in the field.
I think it’s a nice little painting!
I think the painting will always mean something different to the artist who painted it in the field. As I sat and sketched, then painted…I absorbed all around me. My eyes studied the colors, my ears heard wrens and thrushes singing, the wind blowing through the pines, my fingers felt the cool rain drops and mist, my face felt the breeze and my nose smelled the wet leaves and mosses in the undergrowth behind me…and the smells of the kitchen below. As I look at that little painting…I can remember it all! THIS is what makes painting outside in nature so rewarding, and it’s why I do it. I hope you’ll join me someday in experiencing this feeling.
 I’ve been trying to go back into my sketches I did on my trip to England and add some color or finish what I’ve started. On this little sketch I scribbled it out in 5min….and added some notes on color right on the page. So to keep practicing with my waterbrush and watercolors I added some color while looking at a photo I had taken that day. It’s different using the waterbrush alone and not an assortment of brushes. You have one tip to work with and a different kind of flow of water. I’m liking it more and more, but it still has it’s limitations, most especially when wanting to lay in a large wash of color. You have to mix a puddle of color first on your palette, squeezing the barrel to make drops of water come out.
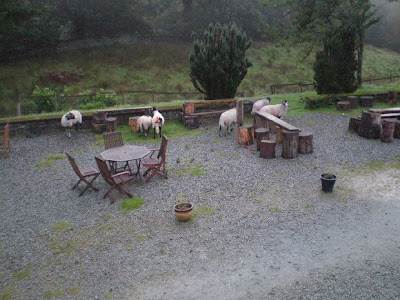
In the morning looking out my window, I was greeted by an unusual sight, sheep in the courtyard! I guess it would be very frustrating to have a garden here as the sheep kind of wander where they like, especially if their gate is left open. The owners of Cote Howe B+B told me it was hard to protect the garden and they try to put fencing around it.
 This morning I was leaving Rydal Water, I was sad to say good-bye. I went out behind the B+B to wait for my friend Gary to come, it was chilly and damp. I climbed up on top of a big wooden gate with huge stone posts and did a balancing act as I swung my legs to the other side. The stone wall is fascinating in itself to study, notice the huge cap stone at the end on the left…I don’t know how deep it goes into the ground, but I’m sure it goes down a few feet at least. This is how the stones were set for Stonehenge and the other stone circles around England and Ireland. The big stone here is used as the post, the wall being built up against it and also gates can be hung on it. The wall has a niche in it, I forget what the owner told me it was for? Does anyone know?
 Above you can see some beautiful forms of fungus’s and moss. It seems anything that wasn’t moving in England this fall, was covered with mosses! I’ll try to identify these later from my field guides, if anyone has some good identification, leave me a comment please!
 There were sheep in the field, an occasional hiker and just a beautiful view looking towards Rydal Water and the path I took yesterday for my hike. I sat on a gate and sketched the sheep and path view, the bunny is from when I was standing by the garden and saw him there. I sat so quietly sketching that the sheep came right up under me, when I spoke to her, she was very surprised to see me! That’s the neat thing about sketching in nature, you sit so quietly engrossed that wildlife will come around you.
Below you can see my original page, this is what I did as I sat on the fence, I painted it in while looking at the photos on my computer screen, using my tiny Altoids watercolor kit and just one waterbrush. You can see my tiny color tests in the spiral area of the paper. 
|
Welcome to my Blog! The most up to date information about my artwork, nature sketching adventures, or step by step demonstrations. Search using Categories or Tags, or use the search box in the left column.
Please sign up below to get notified when I post new articles.
|


