|
|
(This post is done AFTER returning home to NY…gosh I miss my Northumberland!)
Come along with me as I do a small oil painting in a very gorgeous location in the Coquetdale (River Coquet Valley) area of Northumberland, England. I think of all the areas I’ve traveled around in Northumberland, the Coquetdale is one of the most beautiful and always catches me by surprise when we drive along it’s long winding path through the valley. It has quite a few meanders before reaching the North Sea which makes it that much more picturesque to an artist, it’s curves reflected in the sun as a shimmering snake in a green velvet valley.
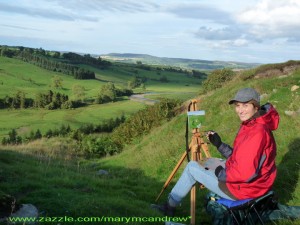 Painting while looking over the River Coquet There I am! We hiked up this great high hill and entered the Bronze Age Celtic ring fort at the top. It’s surrounded by a deep ditch, as was the practice for all ring forts, though I guess a few thousand years ago it would have been deeper and very impressive. After exploring the fort and ditch I settled down inside a ditch with my back to the VERY brisk wind! While I painted I had my hood up to keep the wind off and you notice I’m wearing fingerless gloves, a must for outdoor painting!
For my set up, my favorite wooden field easel and a backpack with attached stool. This is a popular one found in many art supply catalogs but I altered it (as usual!), I took the backrest off by hammering on it until it came away. With the backrest off, I can now sit on it in any direction I like, sometimes the bars of the seat hurt the back of my legs and I feel less attachments equals less weight. I’m put a camping inflatable pillow on the seat, makes it a bit better. All in all, I don’t usually sit when painting outdoors, I find it tiresome to my back; usually I stand up and feel freer with my painting and you can move around to keep warm.
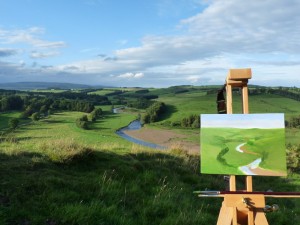 My View Over Coquetdale Here’s a view of what I saw, you may wonder how my masonite board is staying up so magically on the easel? The wonders of Blue Sticky Tack never cease!! I use it all the time, I have some little dots of it on the easel to hold small boards like this, just where I want them. With a small board, I don’t like the wood of the easel’s clamp to get in the way.
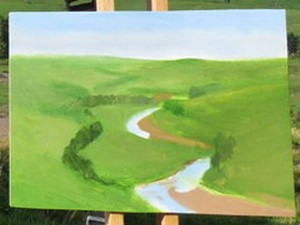 stage 1-View Over Coquetdale When in the field I usually don’t pencil sketch the scene on the canvas, but use either Burnt Umber thinned with mineral spirits, or pick a color in the landscape and sketch directly with the brush. Just pay attention as you divide up your canvas with the horizon line placement and other important elements. If you get it wrong in the beginning, it’ll always be wrong! I go for blocking in big shapes in the ‘nearest’ color to it’s overall color.
When I started this one I blocked in some really bright green, later I decided I should have tried to match the color better to begin with. I just wanted to get it going, so I painted into the wet oil to adjust the color. You’ll notice my river color is quite light, just laying it in to mark it, I’ll adjust the color later. I wanted to have a wet base to paint into. I painted the sky with an all over tone of blue with the gradation of dark to light, later I’ll add the clouds. I also started to establish where the dark areas are, the tree lines.
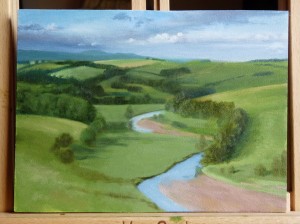 Stage 2- View Over Coquetdale Now I’m set up back at home and continue working from my laptop where I have photos of the scene. I’m sorry I missed a few stages with the photos as I got involved with the painting! I studied where the background mountains should go and toned down blueish green for them. I continued to study where the tree lines were and payed close attention to the light and dark areas of the hills and tree clumps. Don’t put too much detail in the distant trees, just let them describe the curve of the hills as their lines criss cross and disappear. I also started to tuck darks under the tree lines and to the shadow side of them. You begin to notice the tree line on the left front is different than the ones on the right. They are different types of trees so the form and colors are different.
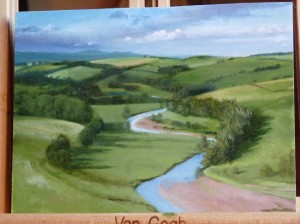 Stage 3- View Over Coquetdale Picking out a little more detail of the hills in the mid-ground, I add some lights to define the hills and more detail to the tree lines. I lightly defined the little dirt road in the front left and a ‘hint’ of a fence, but kept it soft and also added more light to the left field. I put a small path that crossed the field in the middle but then later decided it was just too much of a distraction and took it out. I also added some lights to the trees on the right, you can see they are more pointy than the other trees as they are pines.
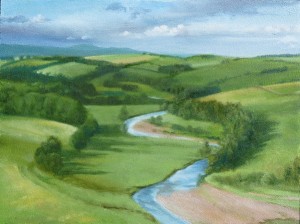 Stage 4- View Over Coquetdale Above you can see I’ve added some darker (but still bright) blues to the river, taking care which direction I stroked it on. I added some yellow to the fields on the left to warm it up and cut down on the lightness. I added more bushes and detail to the front right side by the bank.
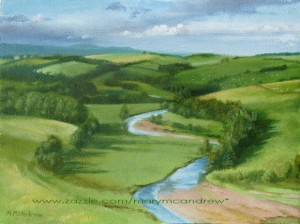 Completed "View over Coquetdale" 6x8" oil The completed painting,6 x 8″ in oil, click it to view it larger in my Gallery of Landscapes. Here you can see I’ve added just a little more detail on the bank and sheep (whitish dots!) on the hills. One thing you notice when driving about the countryside of England are sheep just about everywhere! No hill would be complete without some of these white dots. Of course I didn’t just make blobs but made sure they had a bit of a long shape and slightly darker underneath, it’s just to ‘hint’ at a sheep, not to paint one in full detail at such a distance.
To view prints, note cards and more with this painting, click the links below to see them in my shop! (You can personalize any of them with your own text.)
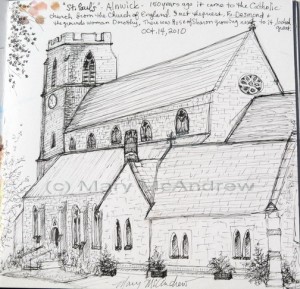 St. Paul's Church Just a quick little post to share a sketch I did the other morning while in Alnwick, (Northumberland England). While I was waiting for Gary I had about 30 minutes to walk to St. Paul’s Church to see if I could find something interesting to sketch. I was first drawn to the architectural feature that is over the door, like a large chimney pot with a crown. (Not sure what it is)
I walked around the church, pea gravel crunching beneath my feet on this cold October morning, and I met the grounds-woman Dorothy. She talked to me about the church and the plants, then I found a spot at the very entrance where I first entered and caught sight of the view I liked. I only had a short bit of time left to sketch and my hands were freezing and stiff, but I held my sketchbook with one hand while I stood there. I used a permanent ink pen so any lines I made were there to stay.
As I drew the biulding, I realized my eyes were fooling me and after reviewing the horizontal alignments I saw the roof was pitched much more dramatically than I thought. This is what I love about drawing buildings, you must draw what you see and take real measurements and alignments to check it.
When I got home I just touched up a tiny bit by adding more lines to indicate stones and darkened in the areas of the windows a bit. I hope you enjoyed this sketch, more coming soon!
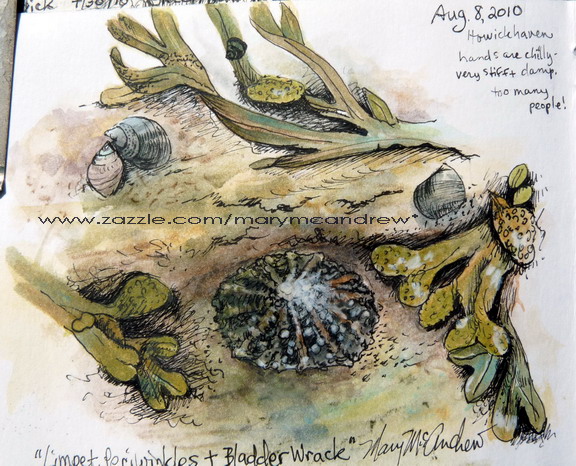 Limpets, Periwinkle and Bladder Wrack Well you can see by the date on my sketch page above, that I’m way behind on my posts! I had another very nice visit to the sea on this day, at Howick Haven in Northumberland England, one of our favorites. There are many rock pools to explore when the tide goes out and that’s just what I did before settling down on a rock perch to draw the above sketch. (Click on it to see it as a glossy note card with text removed) You can read my little note about how it’s damp and chilly, my hands got so stiff it was hard to draw. Then there were too many people walking around for my liking, when they see someone sitting alone on some rocks sketching they get curious and come out pretending to explore just to peek over your shoulder. Well I don’t mind really, many times I chat with nice folks this way. (Hey if you ever see someone out drawing in nature and you think it’s me, introduce yourself!!)
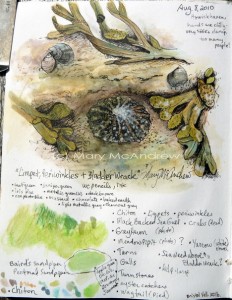 Limpets, Periwinkle and Bladder Wrack full page This is a picture of the whole sketch page to show you my list of what we saw there, I also listed my pencil colors. When you look closer at little things around you, you’ll be amazed at how much more you see. When you start to identify and learn about these things you will see them many more times. One of the new ‘discoveries’ of the day was a Green Chiton, wow it was so cool! (see below)
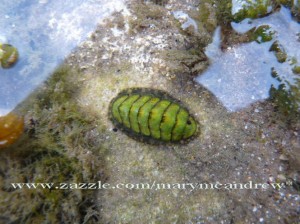 Green Chiton in the water This Chiton was a gorgeous green with black trimming. Gary found it when I coaxed him out to have a ‘play’ like me around the rock pools, looking for interesting things. It was settled under water in a shallow pool, looking similar to a Limpet that clings tightly to rocks. This was unique in that it was oval shaped, and segmented like a pill bug, it could curl it’s shell! I want to do a little color study of it when I have time.
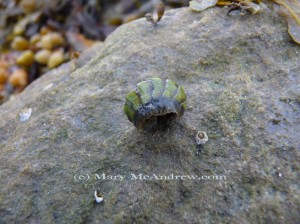 Green Chiton curled up This is what it looked like when touched, it curled slowly. Don’t worry, it was soon placed safely back into the tidal pool.
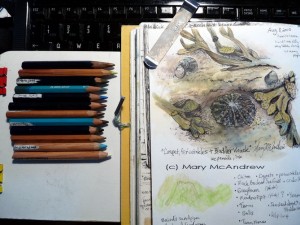 pencils + drawing of seaweed with limpet I wanted to show you my set up with the laptop because the weather was so damp and chilly it was impossible for me to finish my color sketch on the spot. I took lots of photos and then at home just referred to my laptop screen to finish details and colors. Those are all the watercolor pencils I used laid out on the side. I had the sketch book and pencils on a little board on top of the keyboard. I used a variety of watercolor pencil types, mostly Derwent with a few Prismcolor, both great brands to use. As I studied the colors in the Bladder Wrack, this sort of ugly seaweed became more interesting to me. I liked the subtle colors of olive and yellow, the form of the leaves as they lay curling on the rocks and the fascinating little ‘bladders’ of air sacs on them to help them float, with little bumps all over them. What perked up the painting was adding light blue washes here and there where the light was hitting the wet surfaces.
I ended up using the permanent black marker to really define the drawing forms, to ‘dig in’ to dark areas and make them stand out more. I also like the way ink can loosen up a drawing and keep it from looking stiff.
Below I’ve added lots of random photos from my short visit to the coast here in Northumberland England, please have a look and enjoy my day with me! (Some I’ve made note cards of, you’ll see them in my shop when you click on those photos; you can hover over them in the shop to see close up views!)
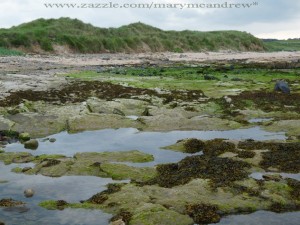 The Beach-Tides going Out You see some of the pools here, the beach and high dunes where we park the car are in the distance. Not a very sunny day!
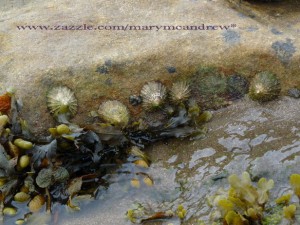 Limpets along a rock A nice photo showing the Limpets and Bladder Wrack (so named for the little ‘bladders’ on their leaves).
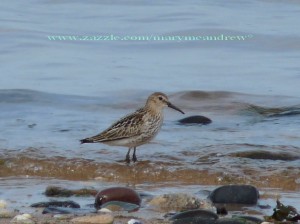 Dunlin wading in the water My birdy expert friend Stuart over at “The Boulmer Birder” helped me out with this ID, it’s a Dunlin.
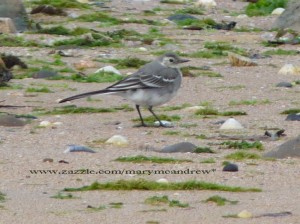 Immature Pied Wagtail This Pied Wagtail had my scratching my head, I’m still new to the birds of England but thought this was a Wagtail but it had no bib. Thanks to Stuart for telling me it is a Wagtail but the immature ones lack the bib.
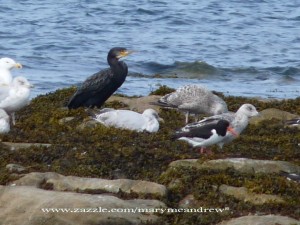 Cormorant + Friends Some more popular shore birds, a Cormorant, Gulls and an Oystercatcher. I love the Oyster-catcher’s red beak and very black and white plumage when they fly.
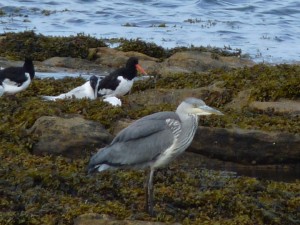 Grey Heron and Oyster Catcher Can’t forget the Grey Heron, sorry he’s a bit blurry, I had to zoom in a lot to get him. They are incredibly shy, hard to get near so the zoom comes in handy.
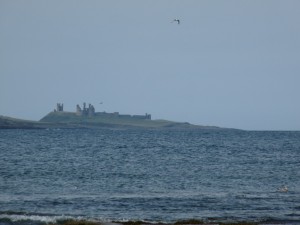 Dunstanburgh Castle This is Dunstanburgh Castle, it’s just north of Craster along the coast. From Howick Haven you can see it in the distance, I zoomed again for this one.
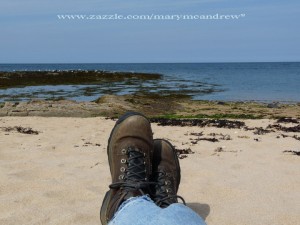 My Boots at the Beach Then there’s the ‘ol boot picture! Just to show I do kick back sometimes and take in the beautiful scenery. (I have a bunch of cool boot note cards for those people who like hiking, click on the picture to check ’em out in my shop, more coming all the time!)
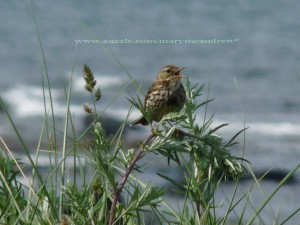 Meadow Pipit singing up in the dunes One more bird, we saw this one while we were walking up on the dunes and as the caption says, it’s a Meadow Pipit.
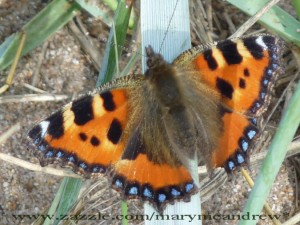 Small Tortoiseshell Butterfly The final beautiful picture I leave you with today is the Small Tortoiseshell Butterfly. I spotted him flying around in the grasses, also up on the dunes. Just love his furry little body and gorgeous colors! Click on the picture to see many photos I’ve taken of these beauties!
I hope you’ve enjoyed the walk with me at the coast. I hope you visit my shop to see the note cards I made, explore my many categories there to see other photographs and paintings. http://www.zazzle.com/marymcandrew*
If you subscribe to my posts and read this in your email, please do visit my website to read it, it looks so much nicer!
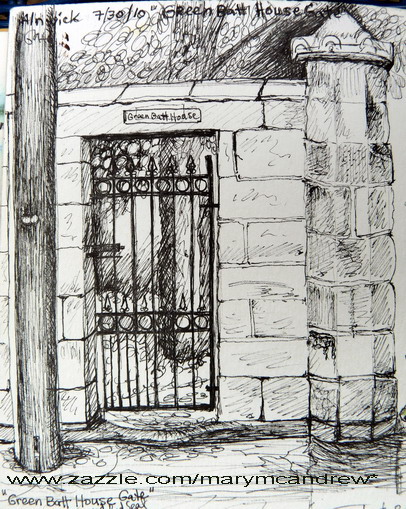 Green Batt House Gate This is an old gate in Alnwick, Northumberland, that I drew while waiting for Gary one morning. I don’t know how old it is or what the history of the name is but I liked the gate, green trees inside, golden sandstone blocks all worn away and the tread worn threshold stone below the gate. It’s just on a side street above the main shopping area of Bondgate Within in Alnwick. I leaned against a wall and many cars and passers by gave me a glance wondering what I was doing there.
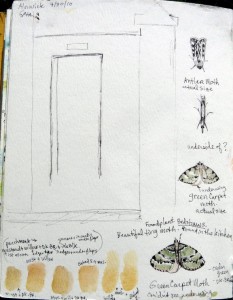 Green Batt Gate + moths Though it doesn’t show you much, I included the sketch in it’s early stages because I started it on one day and went back to finish on another. I wasn’t happy with the first sketch outline as I knew I had my comparative measurements off. So when I returned I decided to just draw over what was there with the pen and oh well! So it came out well, I bet you can’t really tell too much of where I drew over it? I like to show you my mistakes because they’re not really mistakes; every artist starts a drawing and needs to alter it to ‘make it right’. Drawing in permanent pen can make this difficult but also spontaneous, “wysiwyg” or “what you see is what you get”. You learn little things to cover up the mislaid lines or how to work with them. I was in a hurry when I laid down the initial lines but glad I was able to return to finish it!
I’ll save the information about the moth sketches for another post, just thought I’d show you how my pages get all kinds of things drawn next to each other!
Well I must admit I’m getting way behind in my posts, I have lots of new pages to share and adventures to tell about, but keep running out of time (or energy!) to keep up. Here’s a short story about my morning walk in the tiny village of Edlingham on a sunny morning in July.
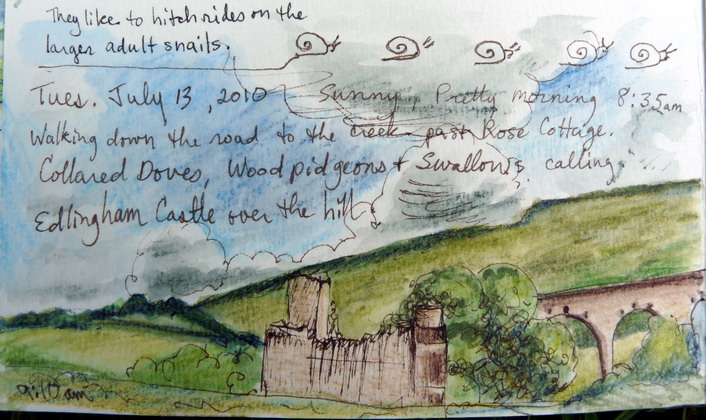 Edlingham Castle from across fields You can read my notes written on my sketch page too. The drawing above I sketched while standing on the side of a road, I just pulled out the watercolor pencil I needed as I worked. First I did a quick sketch with permanent ink pen then touched in with colors. Edlingham Castle is a great ruin to visit and explore, I love wondering what it must have looked like ages ago.
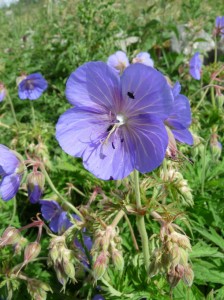 Meadow Cranesbill There were Meadow Cranesbill flowers growing along side the road, very pretty! I guess they’re named such because as the flower head looks a bit like a crane’s head and bill.
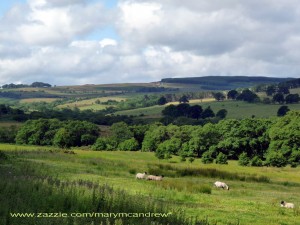 Black Faced Sheep in the Field This is how pretty it is around Edlingham, black faced sheep and huge shadows passing over hills of many greens.
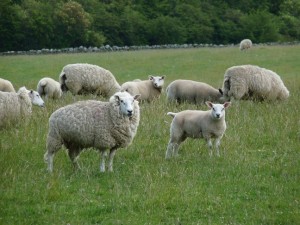 Sheep with lambs Now these sheep are ok as sheep go, but really not my favorites; I think they are a variety from France. I tend to refer to them as “uglies” ohh I know that sounds harsh…but they look like ‘beefy’ sheep thugs wearing wool sweaters.
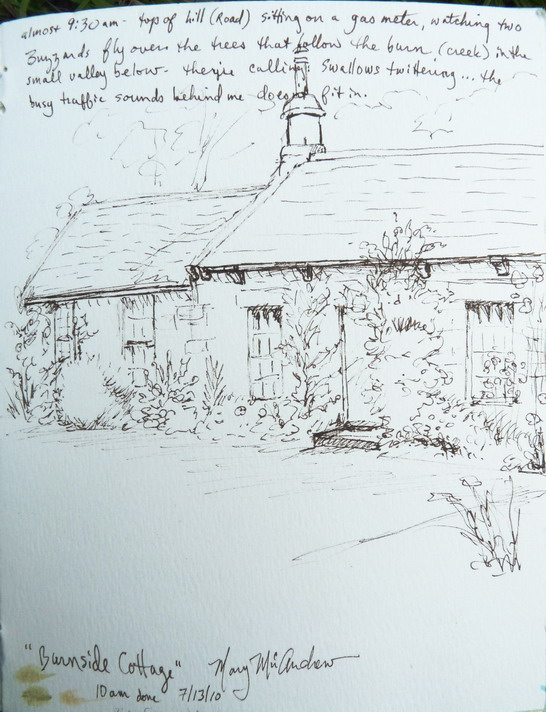 Burnside Cottage, Edlingha I made my way up the lane to near where the busy road is and sat on a gas meter to look over the hills. As I made my way back down there is a sweet cottage called “Burnside Cottage” right by a stream; Burn meaning stream. I stood across the road and just up a bit from it to do this ink sketch while standing. The light changed as I worked but I was interested in an ink drawing so it didn’t matter. I did take a few snap shots of it so if I want to go back and color it, which I think would be nice, I could. (forgive the quality of the picture, it’s not scanned, I only have my camera to photograph my sketchbook with then I try to edit them a bit on the computer to brighten them)
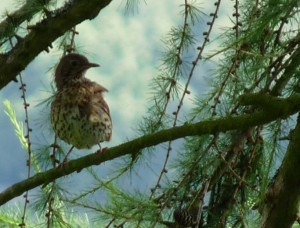 Song Thrush At the very end of my walk I was greeted by the song of the Song Thrush. And here is a little poem I just made up in honor of the Thrush:
The Song Thrush
The Song Thrush
Hides in the bush.
The air is ringing
With his joyful singing.
Take to the air
Snails beware.
The thrush he is a winging!
(c) Mary McAndrew 2010
Don’t forget to visit my shop on Zazzle where you’ll find my most recent photos of landscapes and nature from my hikes in Northern England, CLICK HERE.
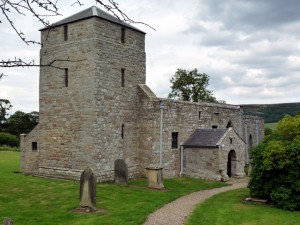 Edlingham Church Today I did something a little different, I went to the 11th c church next to Edlingham castle and instead of sketching it (architecturally) I went inside where it was dark, cold and damp. I only had the natural light to sketch by and you can see the day was overcast.
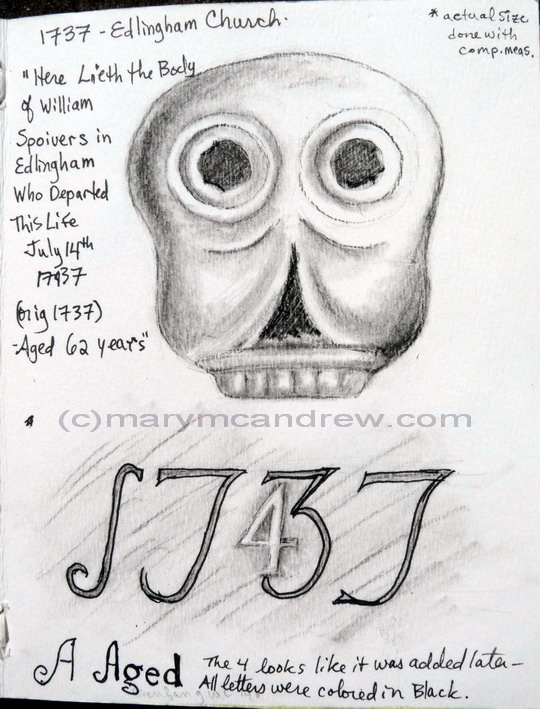 Skull 1737 I know this sketch looks really spooky, well it was supposed to! Sometimes the old gravestones had rather grim or skull like faces carved on them. Was it a fear of the afterlife? I found this one on a huge wall gravestone, inside the church. I find it fascinating to read the dates on really old stones and imagine what was happening back in history at that time. I’m a terrible historian and need to learn more, this helps to inspire me. The skull I sketched using charcoal is life size, about 3″ across, and they put some kind of black paint into the eyes, nose and creases. It was so dim in the church I had a really hard time seeing my drawing while I was doing it!
There were words carved in the center (written to the left of skull) and the date at the end, I love the style so I copied it. The funny thing was they had a ‘type-o’ way back then and changed the 3 to a 4 later, why I don’t know. You can see the chisel marks in the eyes.
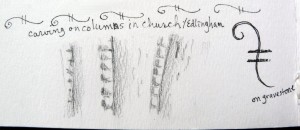 carving on columns Just some interesting ‘beading’ on the columns inside the church.
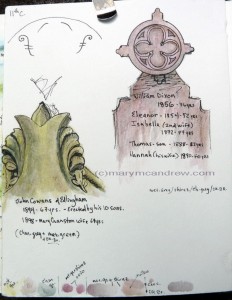 Gravestones at Edlingham I then went out to explore the graveyard, looking at more dates and admiring the carved stones. I guess I get interested in the heavily carved stones with the lichens and mosses growing on them. The greenish stone made me sad, I wrote some of the words down on the page, “John Cowans of Edlingham 1894-67 yrs Erected by his 10 sons. 1898-Mary Cranston wife 69 yrs. I imagined his 10 sons, standing proud together as a family, erecting such a big and impressive stone so long ago. Where would we be without family love, pride and memory?
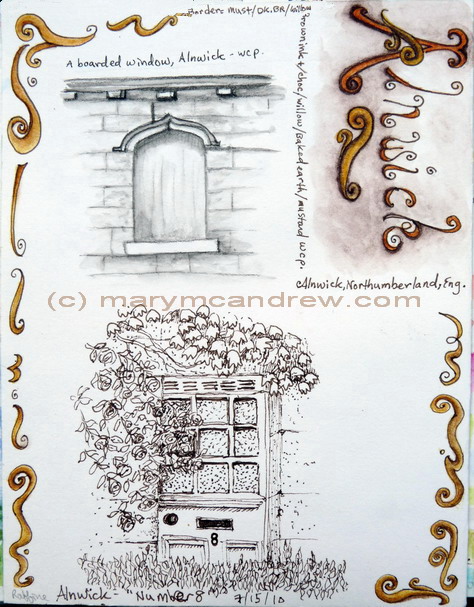 Alnwick Doors + Windows Some more sketches of architectural elements from about Alnwick (pronounced Annick). The page above is my entire sketchbook page, I drew the boarded window, then much later added the doorway. I kept the page just for windows and doors or things like that. Then even later than that I played around with decorating the page with scrolly bits and made up lettering for the word “Alnwick”
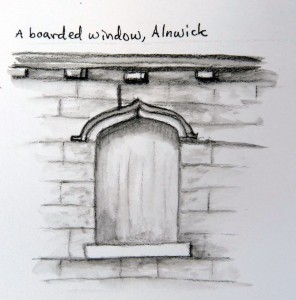 Window in Alnwick I did this sketch using an inktense watercolor pencil and my waterbrush while standing looking over a stone wall into an abandoned yard.
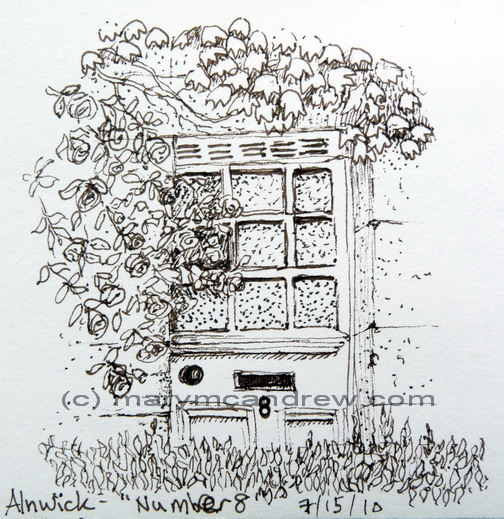 "Number 8" This “Number 8” was done with a permanent ink pen when I was sitting in the car waiting. People might think that I’m secret police studying their houses! I drew some of the leaves at top (vines) and bottom in the hedge then left it to finish later by repeating mostly. This was a little cottage with a white door, dark stone walls and pink roses and greenery all around, very sweet!
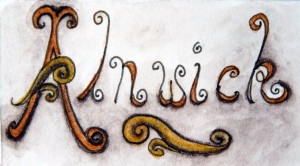 Alnwick Playing around with the name “Alnwick” using my watercolor pencils. I like to make up my own lettering, it’s fun to do this on your pages. Check out some note cards and prints I made using my photos and drawings of architectural elements here.
Here’s a quick little post about a building sketch I did in Alnwick, Northumberland England. Alnwick is an old town, perhaps 800 years or so, and therefor filled with interesting architectural elements. It has it’s very own castle on the edge of town and a huge stone gate that once was part of a wall around the town, now gone for building stones.
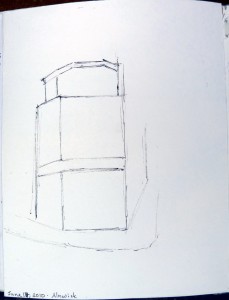 Baily's Cafe sketch I sat on a cold, hard, stone wall on the busy “Bondgate Within” street, a street with shops, small hotels and the upper part still filled with bumpy cobbles. They do have new benches but none gave this straight-on view of the shop I wanted to sketch. I only had enough time to start my sketch when Gary showed up and we were off and running again; this was on June 17.
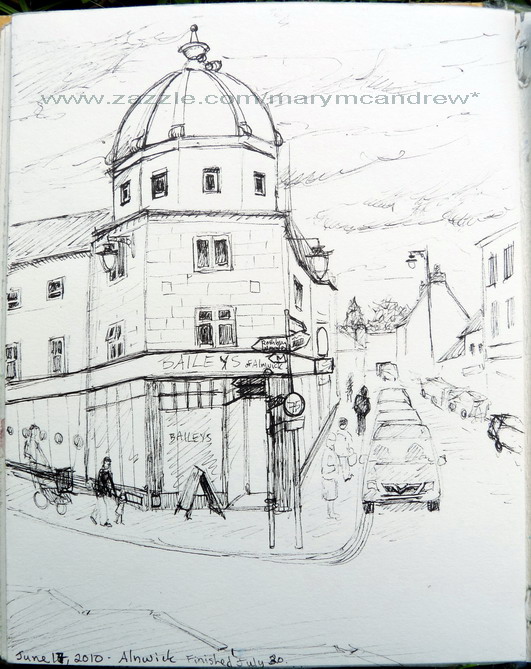 Bailey's Cafe sketch finished Click here to see sketches of buildings in my shop as note cards, more coming!
We returned on July 20 and I, with sketchbook in hand, said I’d be drawing while he ran errands. I had about 35-45 minutes to finish this sketch, so I found the same hard, cold rock on the stone wall to sit on and got busy. This is with a permanent ink pen so whatever marks I made were not erasable. I first tried to put the rest of the lines in for the main building row and the dome. Then I added windows, lamps, people and cars. I didn’t bother to add the distant buildings and cars till the end, but glad I got them in, they really add some depth and interest to the drawing. What I loved about this building was it’s green patina dome, I would really like to do another sketch of it using my colors.
I go through phases with what materials I use when I go out sketching and my love of watercolors sometimes gets pushed aside for watercolor pencils. It normally doesn’t last too long and I’m reaching for my familiar pan of watercolor paints, but for now I am in a watercolor pencil mood. So I thought I’d share with you a good lesson for people starting out with watercolor pencils or those wanting to practice.
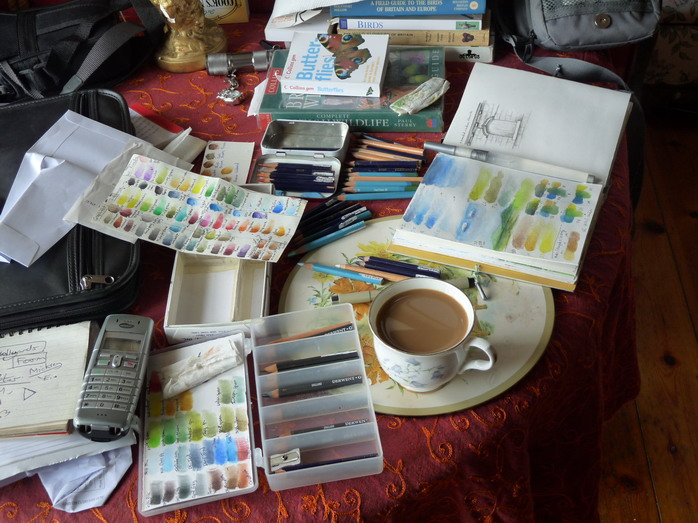 Set up for watercolor pencil color play I have quite a few colors but when I go into the field I try to carry as little as possible to keep the weight down. Above you can see many pencils and containers with lots of color charts, my sketchbook, waterbrush, bit of paper towel and of course the cup of coffee! You may notice my pencils are short, I cut them in half so I have less weight and bulk in the field, keeping the other set at home or in other field kits.
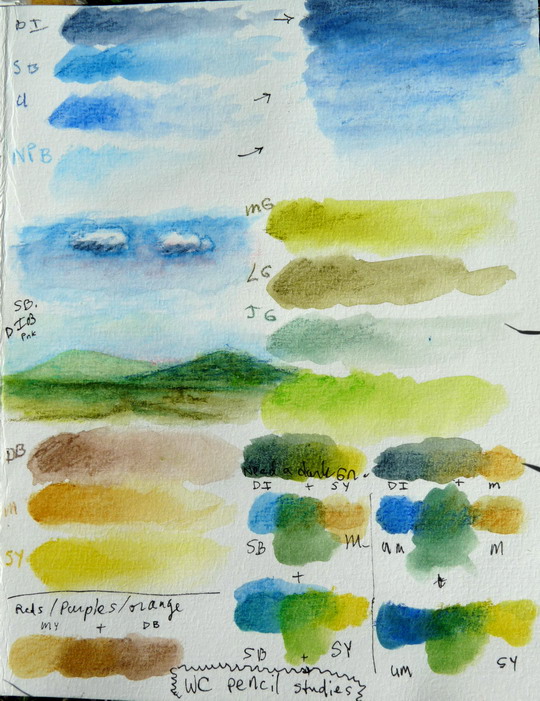 Watercolor Pencil Practice - page 1 I was specifically trying to pick out colors I could use for landscapes while in England, so you’ll notice I made little ‘mountains’ with the colors to test the mixing when overlapped. To do a color ‘spot’ with medium pressure just scribble a small area and label it with initials of the color. Take your wet brush or waterbrush and rub into the color then keep rubbing lightly as you move the brush away; it will get lighter and you’ll create a nice color swatch. I group mine together, blues, yellows, greens etc. Between colors, either rinse your brush then wipe on paper towel, or if you’re using a waterbrush, just stroke it on the paper towel until it appears clean.
From the blue swatches at the top left, I then selected a few and lightly colored them next to it and then wet it to see if it’d look good as ‘sky’ colors. Then at the bottom right I was pleased with the test of mixing basic blues with my yellows to make various greens. If I like I could leave the green pencils behind but it does mean more layering and mixing and while in the field I try to make it so I can sketch fast.
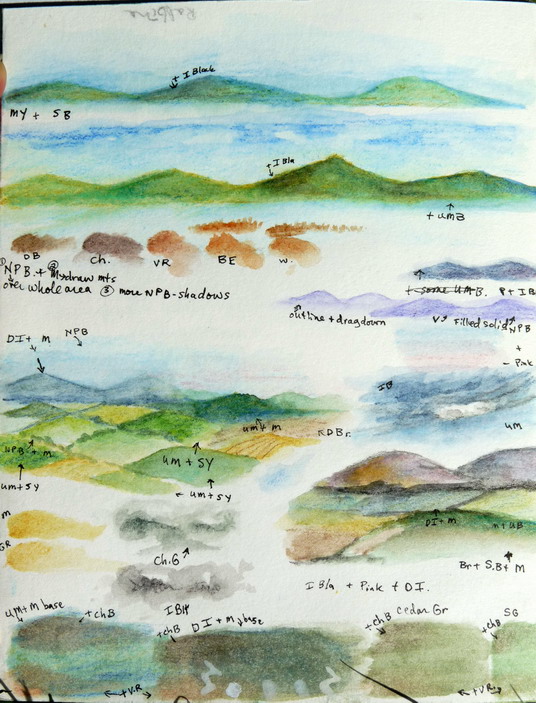 Watercolor Pencil Practice - page 2 This picture looks paler than I’d like, I don’t have use of a scanner here so these are photographed with my camera! But anyways, at the top I was experimenting with first laying down a light blue wash then putting the green mountains on top. Then I tried purpley colors because distant mountains sometimes have that hue. Then I made up some fields and tried layers of various yellows, blues and greens. At the bottom I experimented with toning down the vibrant colors by adding charcoal grey and various reddish colors (red is opposite of green so it can tone it down)
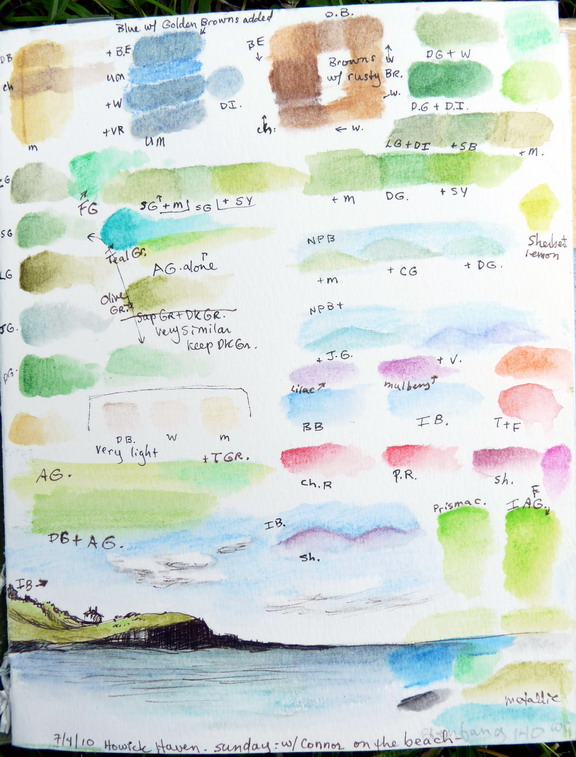 Watercolor Pencil Practice - page 3 This page is also a bit light but you can see my colors still. I was determined to eliminate any excess green pencils if I could, so I tested them next to each other. At the top you can see I tested some browns, overlapping them in a square pattern. At the bottom is a quicky sketch in ink done at the beach, later I played with the colors to test them on it.
Well I know it’s not a thrilling post but it shows you how to get familiar with your watercolor pencils if your a beginner or very experienced and just needing to pick out some colors. Once you pick the colors you’ll use in your ‘kit’, make a small color chart of them, labeled so you can refer to it quickly until the pencil choices come easily.
A note about one of the reasons I like watercolor pencils; if you lay more than one color down dry, then wet it to blend and bring out the vibrant color, I like the grainy textures left and how you can see bits of both colors (depending on how much you rub it to blend). You can draw lines and leave them somewhat or you can shade lightly for more of a watercolor look.
So, grab your watercolor pencils and have some fun playing!
Though I went for this walk a month ago, I need to catch up on posting my sketches from all my walks so you can see where I’ve been. This walk started at the Edlingham Church from the 11thC and Edlingham Castle.
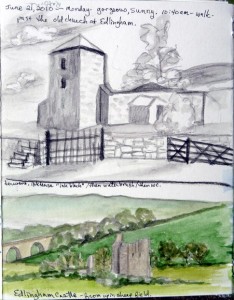 Edlingham church and castle quick sketch As I noted on my page, it was a gorgeous, sunny day. I started by walking past the old church and as I stood in the parking lot near it, I sketched using my Derwent Inktense “Ink Black” watercolor pencil. I then used my waterbrush to make washes using the pencil lines. You can add more color or value by touching the tip of your pencil with the waterbrush and adding it to the already damp paper. If you re-draw on the damp paper the pencil will make a very strong line and be harder to blend. Since I don’t have use of a scanner here, I photographed my pages and then brightened them, the picture here looks a bit more contrasty than the real one.
The sketch of the castle at the bottom of the page (shown above) is started with the same Inktense pencil then later colored with watercolors and watercolor pencils. I was way up in a sheep field looking back when I did this, just a quick impression.
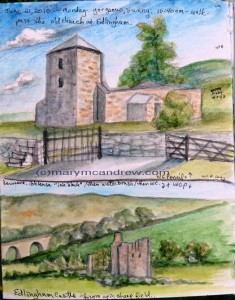 Edlingham Church and Castle After my walk I added color to the top sketch of the church, with watercolor pencils. I’m going through a phase with them right now, as I so often do…then I switch back to my loved watercolors. I’m having fun layering colors to find nice greens and browns. I don’t like a drawing or painting to look ‘mushy’, that is be too soft, and I’m tempted to go back and draw with my ink pens into these little studies. But they are studies and sometimes the soft look of them is nice.
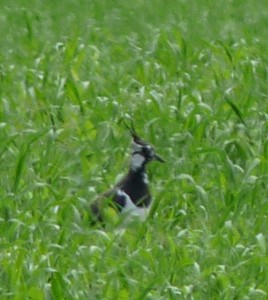 Lapwing As I walked up through another farmers field I saw Lapwings on the ground. They are such a neat bird with two long feathers on their crest that looks like a fancy plumed hat! When they fly their wings are wide, rounded and a sharp looking black and white. They have a very nice call too. This picture is a bit blurry as I shot it from far away, but you get the idea of what they look like.
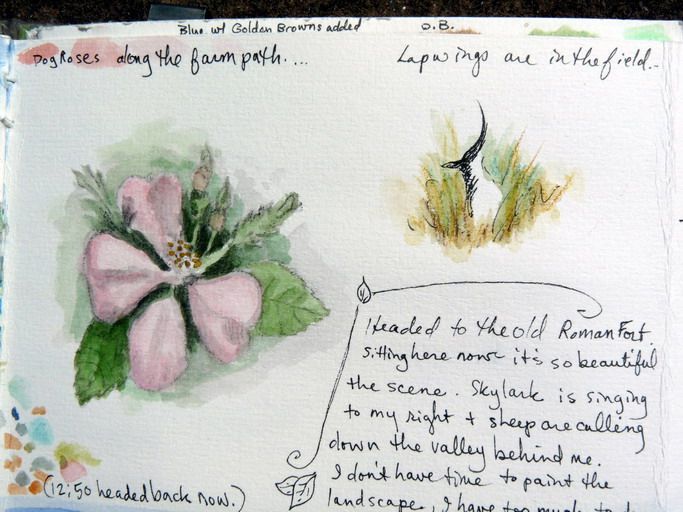 Dog Rose + Lapwing I’ll type out the notes from this page down below.
I had fun and created a old fashioned looking greeting card with this Dog Rose watercolor I did. Click to see it in the shop, it has pink inside and you can add your own text. Click your back button to return.
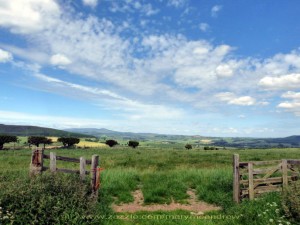 On the way to the top This photo shows just how gorgeous the views were; I wanted to stop and paint all the time! But if you don’t keep walking you’ll never see as much, so on I went. (click it to see it in my shop larger)
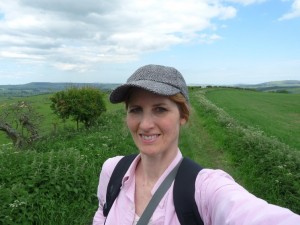 Yup, that's me! Yes, well, that’s me! I was happy to be out walking alone, stopping as I pleased and discovering interesting things, like the butterflies below.
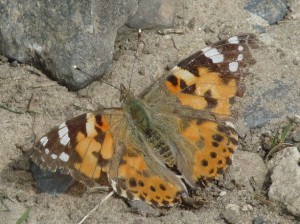 Painted Lady Butterfly This is a tattered looking Painted Lady, it looks similar to the Tortoiseshell below, but see how that one is dark in the center around the body?
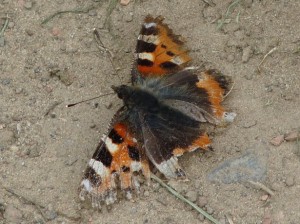 Small Tortoiseshell Butterfly This small little Tortoiseshell butterfly looks like it’s been through some weather, maybe even escaped a birds beak? I saw quite a few butterflies along the little dirt lane I walked on, I think they enjoyed the windbreak of the stone wall that followed it.
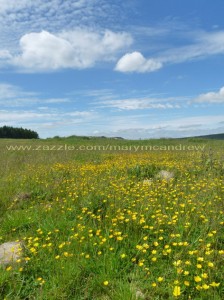 At the Roman Fort site, wow, buttercups! (Click to see this picture as a glossy note card) This picture is at the top of the hill where the Roman Fort used to be. There are piles of stones around in a big rectangle shape, all that is left of it now. The Buttercups were so pretty, I crouched down low to get this shot, I liked the angle of it.
Here are the notes I wrote on my page: ” Headed to the Old Roman Fort. Sitting here now- it’s so beautiful the scene. Skylark is singing to my right + sheep are calling down the valley behind me. I don’t have time to paint the landscape, I have too much to do at home. 🙁 oh…I couldn’t resist! Quick watercolor sketch!” (See below!)
 Small watercolor view from top of Edlingham I’m so glad I took some time to do this little watercolor, now I look at it in my field journal and can remember the scene so well. I sat on a huge rock of the fort, with my feet up and set a little container of water besides me. I used regular watercolor brushes for this one. I first laid on washes of blue and quickly lifted areas with a tissue for clouds. Then overlapping (on purpose) the blue near the horizon, I put pale green hills. The blue showed through and it made very nice distant hills, keep it soft and pale for this. Then I put various patches of greens for the fields in front.
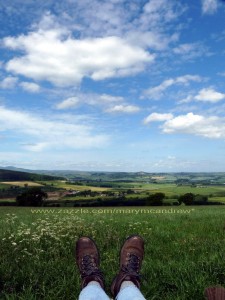 View from Top, "Ah, this is the life!" I used this picture to create a glossy note card for those who love hiking, click on the picture to see my “people in landscapes” but I also created one that says on it: “Ah, this is the life!” I guess that says it all, you’ll find that one in my shop here.
More posts coming as I catch up! Please sign your email in the box at the right if you’d like to be notified. Exciting news coming soon about Creative Journaling and Sketching tours!
|
Welcome to my Blog! The most up to date information about my artwork, nature sketching adventures, or step by step demonstrations. Search using Categories or Tags, or use the search box in the left column.
Please sign up below to get notified when I post new articles.
|


