Support This Site

If you like what I do please support me on Ko-fi

A New Sketchbook!

My New Sketchbook! (please click pictures for clearer view)

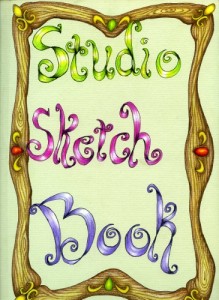
I had fun decorating the cover of my new sketchbook!

I had fun decorating the cover of my new sketchbook!

Sometimes you just need a new sketchbook. A fresh start along a new path. Something that allows you to jot down all your creative ideas, no matter how small. I’ve put so much of my art career on hold this past year because of preparing to move to England. Lately (as you may know) I’ve been exploring the art of felt making and silk painting and that ties in here too! I wanted a sketchbook that I could draw ideas in and tape things in like a scrap book. So I created this big sketchbook that is meant to stay in the studio, not venture outside for hikes.

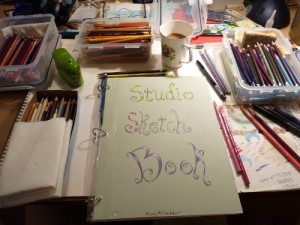
I surrounded myself with color pencils and just had fun!

I surrounded myself with color pencils and just had fun!

A sketchbook to an artist is like a living thing; we tell it our inner thoughts and ideas, inspirations, by drawing, writing and painting in it. It becomes the very closest, best friend you’ve ever had! Sometimes we share what’s on the pages freely, enjoying the reaction and feedback from those we share it with. But it’s also nice to have a sketchbook that is just for you, that you decide how much of it you’ll share. Most of my sketchbooks the past few years, have been very public; nature sketches done while walking here in New York or in England. I LOVE sharing them! When I was in England it was enjoyable to let interested strangers look through my pages, finding out what they liked best, hearing their comments about places I painted that they recognized. But my new sketchbook I’m ‘allowing’ myself to share only what I want, PHEW! It’s funny the feeling of freedom you get just making that decision as a teacher and one who loves sharing their work.

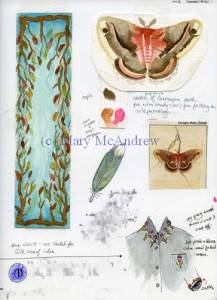
The first page in my sketchbook, totally geared towards felting and silk painting.

The first page in my sketchbook, totally geared towards felting and silk painting.

This is the first page in my sketchbook; you can see it’s all geared towards felting and silk painting. Instead of worrying about this new love distracting me from my illustration and painting, I embraced it because I saw it as good practice while my mind is occupied with other things. I taped some watercolor studies in later used the space around for more notes and ideas.

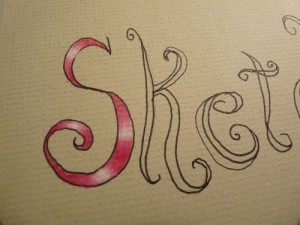
Working on the letter "S".

Working on the letter “S”.

I drew the letters free-form on the cover (which by the way is a piece of colored mat board), later realizing that I should have made them fatter. So I added onto them and it still worked alright. I had fun making the letters look like shiny ribbons.

Ok, what I love about my new sketchbook is the size! I used full sheets of 9 x 12″ papers from various sketchpads. I put bristol board, watercolor papers, card stock and plain drawing paper for an assortment and labeled each in tiny letters along the edge. This way I can continue to test and evaluate what paper I like best. I’m used to working in sketchbooks half this size for drawing and painting in the field.

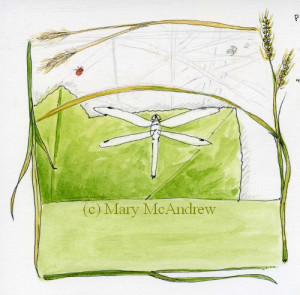
My sketch in progress, for a new poem, "Red Dragonflies".

My sketch in progress, for a new poem, “Red Dragonflies”.

The very best thing I’ve found use for on these big pages, is that I can jot down a new poem and then right next to it do sketches of my ideas for illustrating it! I was in the garden in September and enjoyed watching two red dragonflies, landing on the leaves, sunning, glittering. When I went in the house I started writing a poem about them and did four stanzas. The next day I added two more and then at the end of the month I tied it up with two more! But the best thing is I sketched an idea of an illustration right next to it, while looking at photos I took of the dragonflies. As I have time I’m adding a bit of watercolor and working on the little sketch.

I also put notes around sketches for ideas of what to put in the painting, like colors and subjects, as below.

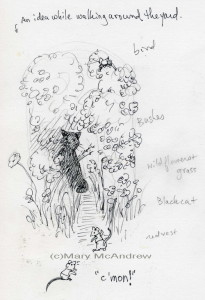
An idea I had for a funny illustration, while walking around my backyard.

An idea I had for a funny illustration, while walking around my backyard.

One day while walking around my yard I noticed the little paths that go into the tall grasses along the edges of my yard. I always look at these and imagine the critters who walk on them and think they’re great subjects for my stories. Well there’s a stray black cat that hangs around my yard sometimes and after seeing the paths and thinking of the cat, I drew this funny little sketch! The cat is waiting in the shadows…but he doesn’t look mean, is he going to eat them? Or is he a friend? The one mouse beckons to the other, “C’mon”….as you wonder what will happen. The little wren at the top looks on.

So there is the evolution of my new sketchbook! Lots going into it and I’ll try to post more soon! Please leave comments below, I love reading them and responding!
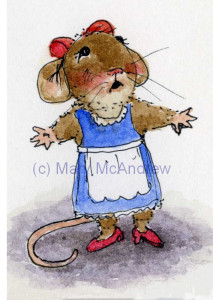
Sketch for a little girl mouse.

Sketch for a little girl mouse.

Because I FELT Like It!

I thought I’d post a few pictures that have to do with my little creative sidetrack, felting! I found a little local shop that teaches all different techniques in many crafts, but one I’ve always wanted to learn is felt making. I love wool, I love the color and texture of handmade wool felt, I love sculpture, I love sewing. I think all these things are going to come together as I learn, and I can see where it takes me. I’m not leaving my painting behind but this has been a HUGE creative boost lately, when I’m stressed about moving.

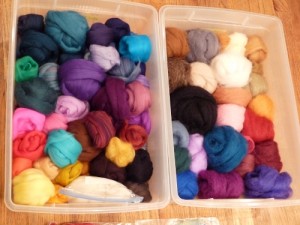
Merino + Romney/Corriedale mix wools

Merino + Romney/Corriedale mix wools

This is my first stash of wool roving. Look at the colors! The Merino wool on the left is so soft, I love putting my hands in there to pick up the balls.

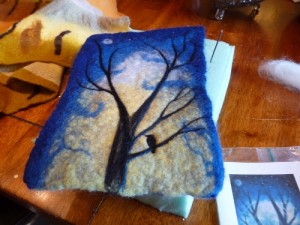
Needle Felting

Needle Felting

This piece (above) is first starting with a wet felted rectangle that I made, while trying to imitate the colors in my painting “Moonlight Sentinels”. What I love about the wet felting is you can’t control how it’s going to come out too much, well I can’t too much as a beginner! But I didn’t do too bad hitting the colors and subtle changes in my background. Next is “needle felting” the tree and crows on using blacks etc. and adding the moon and stars. I did this much in one sitting but haven’t been back to finish it!

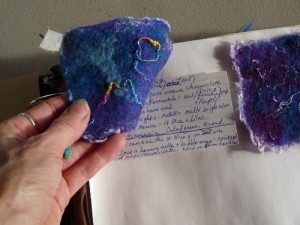
Binder with felt square experiments.

Binder with felt square experiments.

I don’t feel I have time to dive into big projects right now, so as a beginner felter I’m creating lots of these little squares of felt and keeping notes. It’s a great way to be creative and experimental without wasting materials. I staple or pin them onto stiff card stock and put the notes underneath.

Wet Felting Experiment

Wet Felting Experiment

This is one of my first squares where I ran out to the garden, grabbed the well worn piece of cheesecloth off my broccoli plant and brought it inside. I shook it off, cut some small squares and then put wool roving on front and back. I added some non-wool yarns to experiment with how they would felt and I love the results! This is technically “nuno” felting, sandwiching a fabric between the layers of wool roving or attaching the wool to fabric by felting. You can see the white edges of the cheesecloth showing in my squares above.

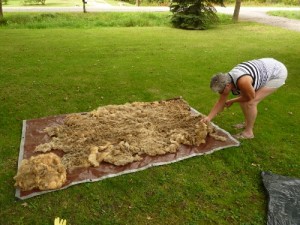
My sister and I spread the fleece out on a tarp, it was huge!

My sister and I spread the fleece out on a tarp, it was huge!

 Then I went to a “Fiber Group” meeting in East Aurora NY, what a great bunch of ladies I met! All of them loved sewing, knitting, felting, dyeing etc…just anything to do with fiber. They were forewarned that I was coming as a new ‘felter’ and would they please bring some examples of what they did. How kind! They did, and one woman had a huge black garbage bag that contained one very dirty, raw Cotswold fleece. She said she had another (very smelly) fleece at home and her husband really wanted her to do something with it, so she gave it to me for free! There it is above, my sister Betty helped me spread it out so we could decide what the heck to do with it.

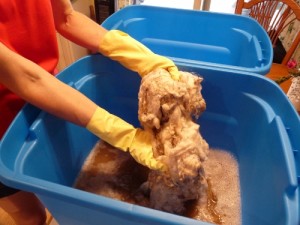
Washing a raw Cotswold fleece, it was filthy!

Washing a raw Cotswold fleece, it was filthy!

 So I get to learn about cleaning fleece now, see above picture. We looked up some info online and I tried cleaning one chunk of fleece. Wow how dirty it was! The next time I washed some of the fleece I did it outside, then I could just dump the water out. But I learned doing too much in the container at once isn’t good, it didn’t wash as well.

sq 5-3 finished  (2) (375x500)

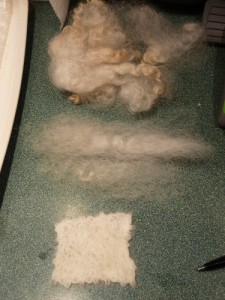
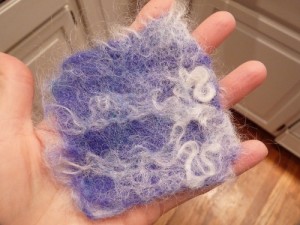
Cotswold fleece- top- unbrushed, middle- brushed lock, bottom felted square.

 Above you can see some of the Cotswold fiber…and the square I made using just Cotswold. It is soooo cool! It has a look of lace but I think it would be too scratchy to wear next to the skin, like for a scarf. Anyone have experience with this wool?

Square #10 - Cotswold + Romney Corriedale wools.

Square #10 – Cotswold + Romney Corriedale wools.

In the square above I put Cotswold fiber on the outside layers, with Romney Corriedale mixed wool in the middle. I tried laying locks on to see if they would stay; pretty cool huh?

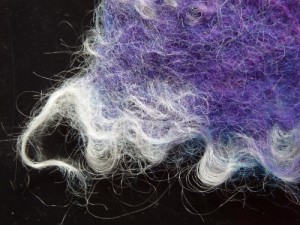
I just LOVE this edge!

I just LOVE this edge!

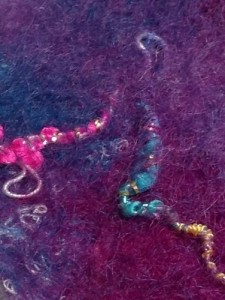
I love this, the waviness of the Cotswold fleece just had to pop at the edge. Some of these loops popped up in the felt fabric too. (see below) I would love a scarf looking like this, but just not sure how it would feel yet. (scratchy? itchy?)

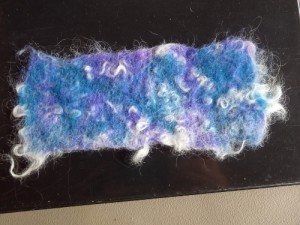
Test #11- Cotswold + Romney Corriedale + Merino, love the waviness.

Test #11- Cotswold + Romney Corriedale + Merino, love the waviness.

The picture above shows the whole piece, showing the side I put the Romney Corriedale mix on. You can see it’s a very hairy piece of wool! I love it!

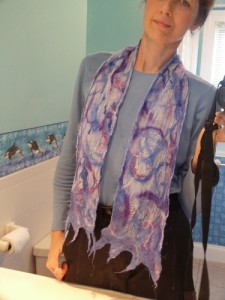
Here's how long the scarf is, just right for one loop around.

My first Nuno scarf! This shows how long it is.

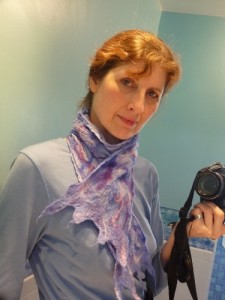
This week I thought I was going to have a stressful melt down on Tuesday, I just felt so uptight and unsettled. I arranged to go to Creative Essence the next day for a Nuno felting lesson and already ‘felt’ better. This is my first nuno felted scarf, it used silk chiffon as a base and you felt the wool to it. The chiffon was painted a light blue color first. You can’t see how light and airy the scarf is here, but it is!

This shows the pointy ends and how the length is perfect.

This shows the pointy ends and how the length is perfect for one wrap around.

I tried to show the neat pointy ends, which I later trimmed a bit to round them off. There is also sparkles of Angelina fibers in the wool that I don’t think you can see. Not a great photo, I’ll have to get a better one to show off the great colors!

So there is some of the fiber fun I’ve been having lately; a little at a time. The great thing about all this is I needed a sketchbook to start putting ideas in and my new “Studio Sketch Book” has been born! I’m very excited about it because it’s given me some more freedom to be creative with my MANY ideas and projects! I’ll post about that next time! If any of my readers out there are into fiber art then please leave a comment about what you do!