Support This Site

If you like what I do please support me on Ko-fi

Adding Color to the Mouse Family and Other Studies

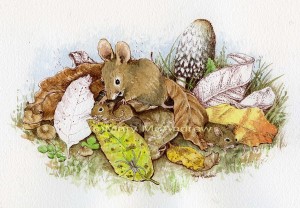
I thought I’d show you the progress on my illustration of the ‘mouse family’ and some other little studies.

(click on them for larger view)

Work in progress, adding watercolor to the ink drawing.

It looks so different than it did as just a pen and ink drawing! They are starting to come to life more with the added color and fur. I’ve been so busy with other things that this illustration is going slowly. What I did here I did in one evening while watching a movie, if I could just sit down one more time it’ll be finished. So she says!

I’ve run out of opportunities to paint from ‘real’ colored leaves as they’ve all gone to the dark side in my yard, they’re all brown and blackish. But I did take lots of reference photos and that will serve me well as usual. I have a decision to make about the leaf in the mommy’s hand, it blends in with her and the baby maybe a little too much? I may add a purpley maroon, something with alizarin crimson? I’ll be adding just a touch more color to the leaves but I don’t want them to overwhelm the mice either. I do like the touch of blue in the background, it helps to show the mushroom better.

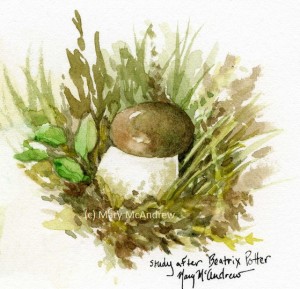
Before I forget I’ll show you a little study I did after Beatrix Potter’s mushrooms.

Watercolor study after Beatrix Potter

It’s from a painting with more mushrooms but this little one and the grasses were all I needed to study the colors she used. This was great for me to do before diving into the color of my painting, especially because I wasn’t working outside from real life. I just love and adore her paintings!

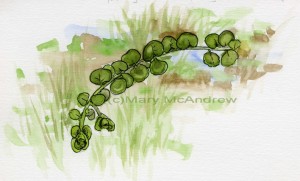
A small watercolor study of Moneywort done in springtime.

This is a small study I did in the spring of Moneywort. It likes to grow in wet areas so my land is filled with the stuff! Wonderful in late spring as it covers itself with little yellow flowers; my ditches along the lane seem to be filled with gold! I don’t know if the name refers to the yellow flowers (like gold) or the round leaves looking like coins? I found out something interesting, it’s a native to Europe and was introduced to America for use as ground cover and as an indoor hanging plant. Ha! I never would have thought to use it inside!  Well anyways, I remember sitting in a lawn chair on a cold spring day, in a flooded area of my yard when I did this.  I watched the little Nursery Web Spiders scampering over the water and over the plants. How great it is to study from life! That’s why I love Nature Sketching so much.

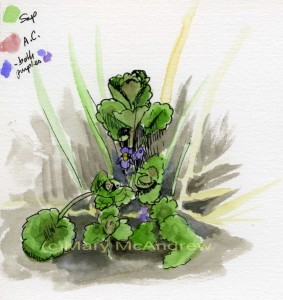
Study of a small wildflower (weed) that grows in my grass.

And this is another favorite ‘weed’ I like that grows around anything not moving! haha…It seems to grow at the edge of everything but I don’t mind, it has tiny pretty flowers and neat rounded leaves that remind me of a tiny geranium. I haven’t yet looked it up, guess I should. Oh by the way, the bees love it! Don’t go killing everything that grows in your grass, as long as it’s green it looks fine! Look closer at some of those weeds, they can be pretty and the bees need them.

I just thought I’d show these because I feel it’s important to always study from real life. Even if it’s a tiny study done quickly, it will help you to look closer at what’s really there, and you will remember it. Especially when it comes to color, the photos you take will not be as accurate as what your eye sees at the time, in that lighting.

Well I hope you enjoyed seeing my progress and other studies. I’ve been playing around with adding some new colors to my watercolor field palette, so we’ll see how that goes. Leave me comments if you like, I always love hearing what you think!

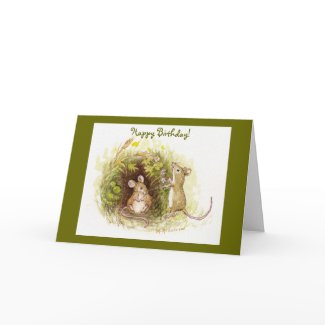
Click the picture above to see another cute mouse painting I did! If you hover over it (in my shop) you can see an enlarged image.  Go to this link to see some other new children’s  illustrations in my shop!

Mouse Family in Ink

Though I’m working on illustrating a story with Teddy Bears at the moment, I just can’t leave behind my love of nature. I haven’t had much time for my usual nature studies but what I have been doing is testing out different papers to use for illustration. Arches, Fabriano, Canson…cold press, hot press, dual sided even!, they are all getting tried. I was surprised to find the ones I thought I’d love I hated and the cold press was feeling pretty nice. Cold press paper is rougher and can show nice textures when working with watercolors, but not as nice if you’re doing fine detail.
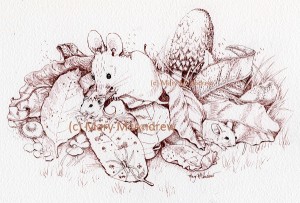
"The Mouse Family" in Windsor Newton Nut Brown Ink on Arches 140lb watercolor cold press paper.

(please click the pictures to see larger)

So I combined my experimenting with papers with wanting to draw some mice, my subject in many, many little children’s poems I’ve written. I want to keep a realism but cross the line into children’s illustration…make them a bit cute and giving them humanesque qualities.
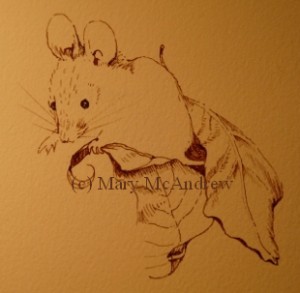
Just showing the start of my drawing; I did it without a pencil sketch first!

I started by drawing freehand in permanent ink (no pencil sketch) this mouse on Arches 140 lb cold press paper. I used Windsor Newton Nut Brown, a really nice brown ink. (Forgive the yellow picture quality, I snapped this with my camera at night-time so I could record the stages of drawing.)
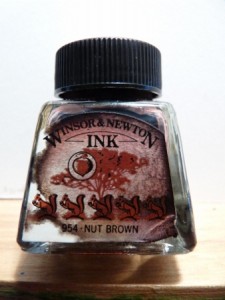
Windsor Newton Nut Brown Pernanent Ink

Then I went outside and grabbed up a bunch of leaves to add around it, and drew some of them.
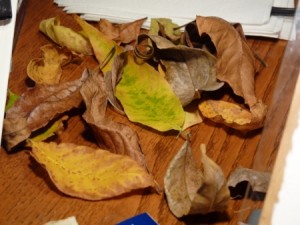
my pile of leaves I first brought in to sketch from

What started all this was a cute sketch in ink of the mouse (mother) but she had to have some leaves to be tucked into. I brought in a good variety from the yard, they looked more colorful than this in the beginning. They all curled and dried but that’s ok, I like keeping some dried leaves around in a small box, for sketching.
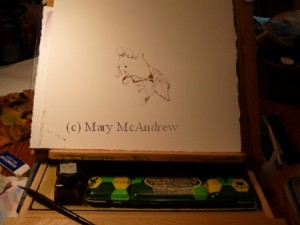
Here it is on the easel, you can see my dip nib pen and brown ink there.

This is my set up, a small table easel that has a little drawer you can slide out. I like to put my watercolors there and anything else I might be using to draw. You can see my bottle of ink and my small ‘dip nib pen’ laying there. I have my paper on a piece of plexiglas. This is great to use when you are tracing a sketch onto ‘good’ paper, just go over your sketch with dark ink, put good paper on top, stick a lamp behind and sketch lightly with pencil. I didn’t do that with this drawing, as I said, I just started in and the drawing grew.

Here’s a picture of my “dip nib pen”.
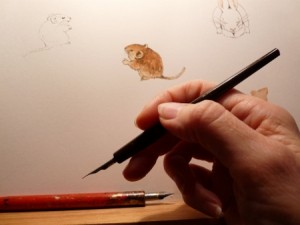
Small "dip nib pen" with a little study after Beatrix Potter's Dormouse in the background.

You can see my two favorite pens here, when I want to use loose dip ink that is. I just love the detail I can get with this little nib! There’s something nice about using loose ink. I decided I liked when it ran out of ink regularly, it gave me a pause to check my drawing and think before making marks!
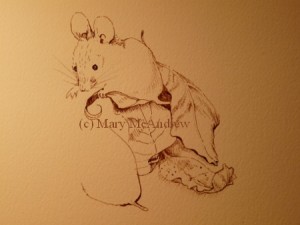
Just a little more drawn in...

As I drew the mouse I started to think maybe it could become a story, so I felt I needed to leave the area in front of it open to possibilities. *Very important when working with permanent ink to take your time and plan a bit!
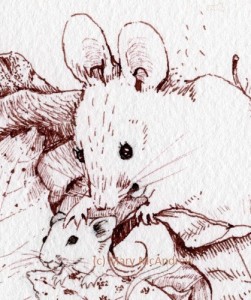
A little close up of the mother mouse and baby.

I was going to put a grasshopper in because they are everywhere in the grass right now, but I decided on a baby mouse. At this point I started sketching with pencil…the rest of the leaves, mushrooms and babies, because now it had become an actual illustration to NOT mess up! haha. You can see I changed the mouses face, added an open mouth, eyes a bit bigger with lashes, just a touch! I’m looking for my ‘mousy style’.
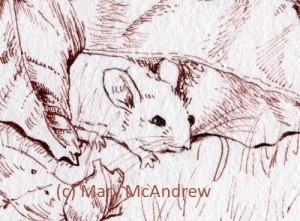
And a close up of the other little baby mouse!

And you know with mice…where there’s one there’s many!…so I added this baby on the right. It’s good for the composition because it leads your eye around the page. Keep this in mind too when arranging your leaves, all the curves, waves and curls can really be exciting to draw and look at as they lead your eye around the composition.

Below are a few photos of what inspired me to keep adding to my drawing.
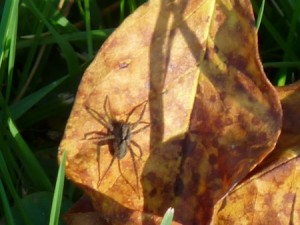
baby nursery web spider

I’m fascinated by the Nursery Web Spiders in my yard. In spring I see them living half under water and half above, then all summer they have their webs in the tall grasses on the lanes. Now as I walk through my yard in fall I see tiny baby spiders darting across the leaves everywhere!  I couldn’t wait to sneak them into an illustration!
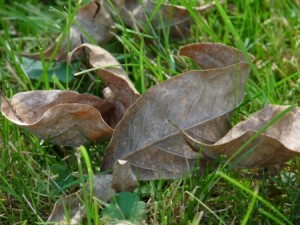
I liked the twist of this leaf so I used it in my drawing

Well these leaves aren’t colorful but I love the curve of the big one, and the other small one fit in nice. You can see them on the right side of my drawing. I used this photo on my computer screen when I drew these leaves.
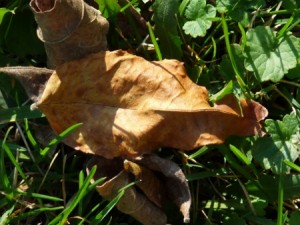
dead fall leaves in the grass

This is another one I added on the right side by the baby mouse. I tried not to go too heavy adding the shadows, since the leaves were all photographed at different angles in the sun. I also looked at this on my tiny computer screen while drawing, late into the night!
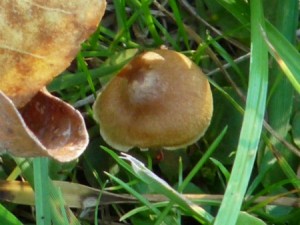
little golden mushrooms in the grass

One day when I was walking through the yard I spotted an area of mushrooms, each were about 2″ across at least. They blended in so well I almost didn’t notice them at first, but looking for “things in the grass” for my drawing they were a nice find. It wasn’t until the next day I went out to photograph them and they were all gone! I searched and searched and finally started noticing these tiny mushrooms around under blades of grass. NO, my lawn is NOT neatly mowed, I’m lucky when my son comes and gives it a cut, so I get all kinds of things growing and hiding in the long grass!
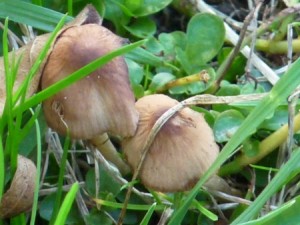
more tiny little golden mushrooms

I love looking at mushrooms, though I admit I don’t know too many species names. If anyone can tell me what these are I’d be grateful (Western NY-wet area)
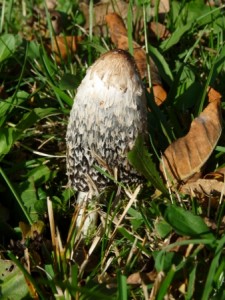
This is the small Ink Cap mushroom I used after the first one disappeared

This one was the best find! It’s a Shaggy Ink Cap mushroom and I’ve never seen one here before, I’ve only ever seen them when I was in Ireland and England. One day I spotted a big one growing in the yard, I wasn’t able to get out to photograph it until the next day. To my great disappointment it had all but disappeared! I never saw one ‘roll up’ as fast as that! For those who have never seen this, the mushroom will start to roll up from the bottom, disappearing until just the top is left, surrounded by a black inky goo. It’s really quiet interesting and yuchy at the same time!

But lucky me, walking my laps around the yard the next day I spotted this small one growing not far from the other spot. So I grabbed my camera right away and got some good shots. I couldn’t wait to use it in my drawing and already knew it would be perfect as a backdrop.

"The Mouse Family" Ink on Arches watercolor paper.

So there you have it, all the parts together! Now that I’ve scanned it, I can play around with watercolors on it and we’ll see how that goes! Please visit my shop to see the Note Cards and Gifts I made using this and other photos in this post. I’ll add a few picture links you can click to visit it, please please share my shop links with friends once you get there! 🙂

Glossy Note Card with plain white background
Glossy Note Card with changeable text and brown background
Customizable Mug
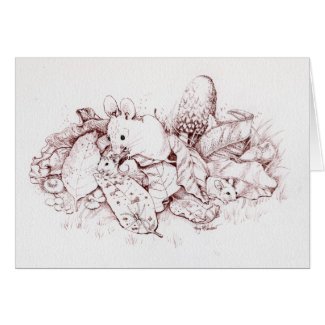
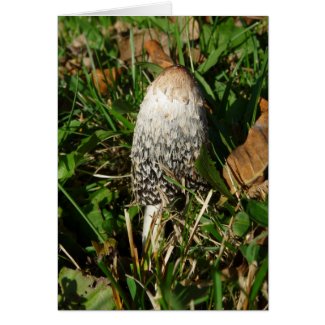
Shaggy Ink Cap Glossy Note Cards
Hope you enjoyed my post! Please leave me comments and share on your Facebook or Pinterest pages!
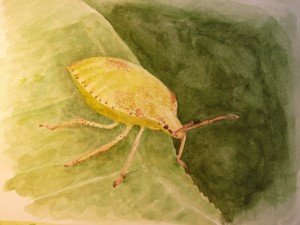
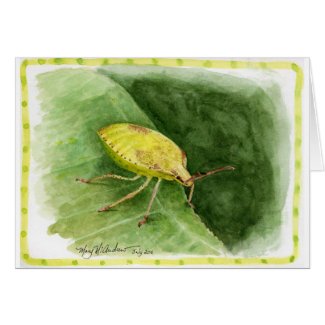
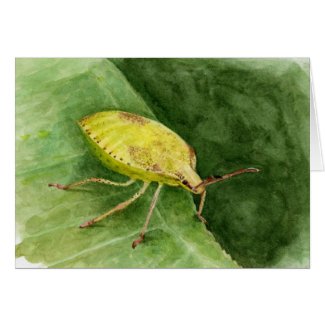
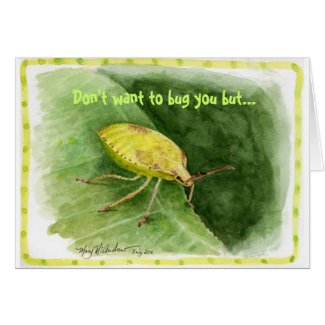
Light Green Stink Bug

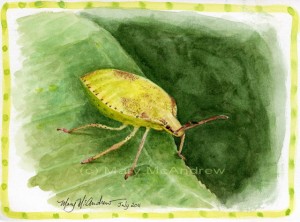
(Light Green) Stink Bug watercolor

(click the picture to see it in my shop where you can see ZOOM view by holding your curser over it)

This is a painting of (another) Stink Bug, though I’m not sure what the exact species is, a friend in England suggested maybe it was a ‘baby’ with this coloring. I really enjoyed painting this, the colors, the leaf and then the detail on the bug itself….love those dots on the legs! It’s a page in my journal so I added a little fun border with my brush and watercolors.
Almost there!
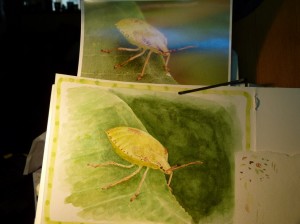
Here’s my set up; I found that using a large bobby pin to hold my photo in place worked out really well. I keep a little piece of paper nearby to test dabs of color. You can see at this stage I’ve got a lot done, but don’t have the deeper shadows or finer details in yet.

Close up of my progress

Here’s a closer look, though the color is not right (because of my camera shot) you can see how pale the whole thing looks. Adding more shadow under the bug and rich color to the leaf really helped it. I also took a damp brush and rubbed the edge of the leaf, above the bug, to make it softer. Something else I did, though it’s not in my photo, I added just a bit of cast shadow from his feet. This really made it look more 3 dimensional and realistic!

Well I’ve had a lot of fun making some attractive products with this painting in my shop, please click any below and have a look!

 Science teachers would love this! You can put whatever words you want on it.
I love this tee-shirt! I ordered one for myself on the ‘value tee’, it was printed huge on the whole front! WOW, so much fun to wear! I know some Science teachers who’d love this! You can put whatever words you want on it.
Glossy stickers, you can change the words if you like.
A great card when you need to ‘gently’ remind someone of something!
Hope you enjoyed my being “buggy”…love to hear from you, leave me some comments, shop in my store, but definitely have a great day!

Visit with a Friend (black and white studies)

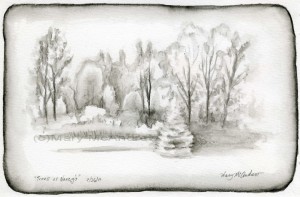
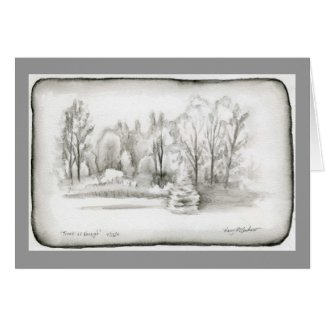
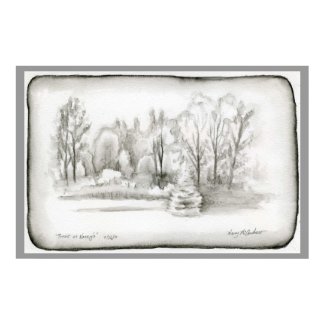
Trees at Nancy's - Inktense 'Ink Black' watercolor pencil

(Please click on the pictures to see them clearer, use the back button to return)

I had a chance to visit with my friend Nancy the other day and we sat on her back deck to do some sketching. We had a nice view; just behind her place is a small pond with trees on the other side. I was showing her how to do something simple by just using one watercolor pencil, the Inktense “Ink Black” by Derwent Pencils. I keep one in my kit always because sometimes it’s nice to just do a sketch with a waterbrush using this one pencil. The nice thing is you can go back over your black and white study with color after, the Inktense pencils will not lift off like watercolor can.  It IS a VERY intense pencil, go very lightly at first and see what it does when you wet it. I started with the simple border as kind of a warm up, just draw a line around your page then use your waterbrush to wet it. To get it to look like mine, keep your brush ‘inside’ the line with the tip always touching and rubbing the line, letting the color run into the wetness left behind from the brush.

Sketch your scene lightly, trying to do most of it before you wet it. Once you wet the paper you’ll have a hard time adding more lines because they will be very dark and intense! If you need to just touch your waterbrush to the tip of the pencil to pick up more ink, then use your brush to add it to the sketch. Test how dark it is on a piece of scrap paper before you touch your sketch, this will help you avoid mistakes. I really like the look of this, sort of like an old antique picture.

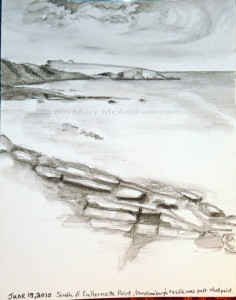
Sketch of Cullernose Point from the south

Here’s a sketch I did in England last year, along the coast of Northumberland, of Cullernose Point as viewed from the south. I had my sketch journal with me (OF COURSE!!) and because we wanted to keep walking, just sitting a bit and doing a sketch with no color worked well.  I used my waterbrush and especially like how the clouds came out.

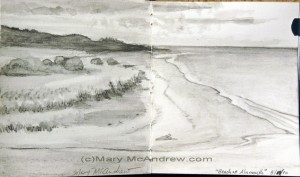
Alnmouth, Northumberland -water soluble graphite

Alnmouth, Northumberland -water soluble graphite

Now I thought I’d add this one too just to show how nice it can be to do non color studies. This was done with water soluble graphite, not the colored type, just plain old graphite color! We were at Alnmouth, Northumberland England; a beautiful coastal spot! I did it in my tiny sketch journal which was so much fun to use! It was a wonderful experience to stand on the hill at the coast and capture the scene forever in my memory. Please read my post about it here to see the wonderful photos I took that day! I loved being there and can’t wait to go back for more! I love, love, love England!

I hope you enjoyed my little ‘non color’ sketches, as I said they’re a great way to capture a scene without the worry and time of adding color. And thanks to my friend Nancy for a nice visit! (ps. I photographed lots of dragonflies at her place and two of them were new for me!) I created a really nice print and greeting cards in my shop, see the links below! I love the dark grey background with it.

Make your own card at Zazzle

When you see this print in my shop (below) don’t be scared by the price! It shows you the huggest size but can be ordered as a 16×11 for only $11.20 too!

Walk to Aspen Hall

(I wrote this at the very end of May and wanted to share it with you before it gets too late!)

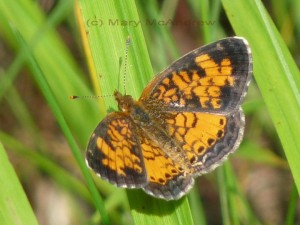
I took a walk out through the fields today to “Aspen Hall”,  just for a bit of exercise and to enjoy the sun. Along the way I discovered some beautiful butterflies, though it’s tiny, the “Pearl Crescent” was so pretty when you look at it on zoom!

A beautiful little butterfly called the Pearl Crescent

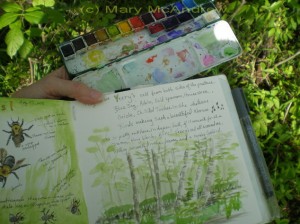
When we got to Aspen Hall, I did a very quick sketch using my watercolors and waterbrush. I say quick because the mosquitoes were finding us fast! The picture below shows how I held my palette as I worked.

This is how I held my palette while I stood and painted.

You can see the last post I did on Carpenter Bees there to the left. I also always make a little pen holder with clear tape on my sketch book.

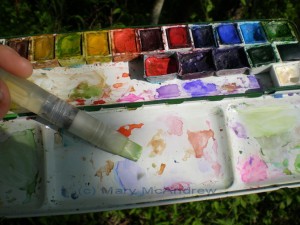
This is the water brush I used to do the whole painting, a big flat.

Here’s a picture showing the big flat waterbrush I used to do the entire painting. The flat was great for making the marks on the trees and I used the corner when I wanted to make small marks. (If you click this pic you’ll see a really cool note card I created where you can put your own text on the palette!)

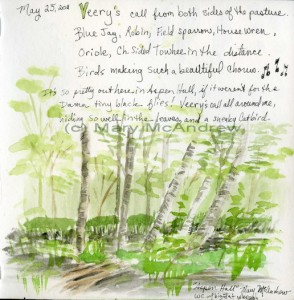
Painting and notes done while standing in "Aspen Hall", watercolor.

This is the page I created with my notes and watercolor sketch.  Click it to read my notes, the black flies were terrible, biting me and being pests! It was hard to paint, but I’m happy with the little watercolor sketch. Standing still is great for seeing and hearing birds, they were all around me.

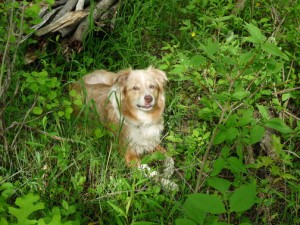
Ginger gives me a toothy smile and says, "Hurry up already!"

And there’s Ginger, my faithful Aussie! She’s just looking at me saying, “Are you done yet?” 🙂

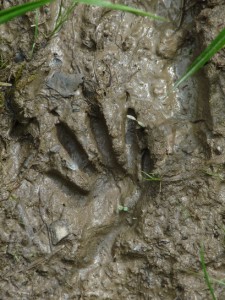
A footprint in the mud from ?

Here’s a cool footprint I spotted in the mud in “The Maze”, another area on my land. I have to look it up, but I’m thinking Opossum? Skunk?

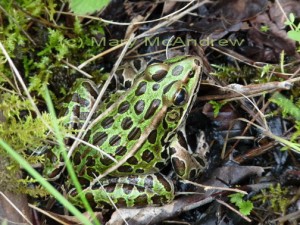
Another Leopard Frog friend!

Could I take a walk on Long Lane Farm and NOT see a frog? I don’t think so! This is one of the most popular kinds here, the Leopard Frog. Isn’t he handsome? (oh it could be a female…can a frog be pretty?) I just love the spring greens, olive greens and bronze of their skin; in the sun it really is metallic!

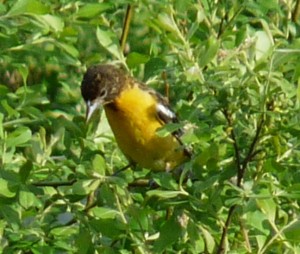
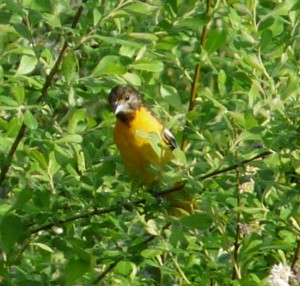
A female Baltimore Oriole looking for food in the bushes.

A great capture, photos of a female Baltimore Oriole searching for seeds on this wild bush in my field.

Another shot of her as she searched for food.

It’s interesting to observe ‘garden’ birds further afield than your backyard. Seeing her feeding on native bushes, bugs, seeds….whatever she was eating she was very busy doing it.

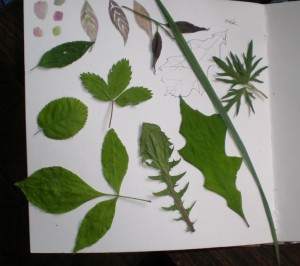
A collection of leaves I picked while sitting in one spot.

After painting I sat for a few moments in Aspen Hall, I looked around me at all the green plants. It didn’t look like anything interesting to paint or draw, but, if I had students with me I’d challenge them to find as many different leaf shapes as they could to draw. I picked one of each just within my own reach and look how many I found! It would be nice to do as a lesson, ignoring color and talking about shape, and some botanical terminology.

I hope you enjoyed this (short) walk today! Wait till you see the next post, a new moth discovery for me!

BTW here’s a new page I created called “My Photography Equipment” to show what cameras I use when I go out walking and exploring, I love ’em!

Visit my shop for note cards (and more) of:

Frogs

Butterflies + Moths

Landscapes (New York areas)

Birds

Watercolor Crayon / Lesson 1 – Color Charts

I thought I’d add a series of posts that introduce my new watercolor crayons, a few old ones, and how to start using them in hopes that some of what I do may help someone else.

When I first bought watercolor (or water soluble) crayons I tried them and didn’t like them at all! I thought the colors garish and harsh. I thought “what a lot of money for these little things and I’m not going to use them!”. Well I’ve only recently pulled them back out and have been playing with them. I’ve learned from using watercolor pencils, go lightly at first until you know just what your colors will do when you wet them.

Please click on pictures to see them bigger.

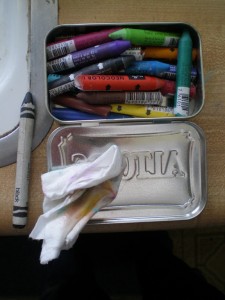
Water soluble crayons in a tin

Here’s the set of colors I started with, Caran D’Ache Neo colors and one or two Derwent Watercolor crayons.  I also show a “crayola wax crayon” and explained in another post (below) how I used it. I cut them in half (oh heavens yes I did!) to make them lighter to carry in my sketch bag and I could fit more; here I show them in an “Altoids” mint tin.  The other halves go into a baggy for later or to carry in another kit.

I took them out into the field and did some small landscape studies using these few crayons. There are links at the end of my post you can click on to read about them. After doing them I was feeling more enthused about my crayons, I think it’s time to look for more colors!

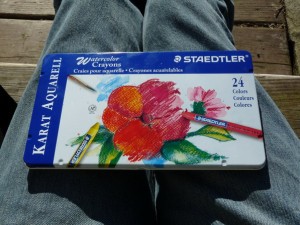
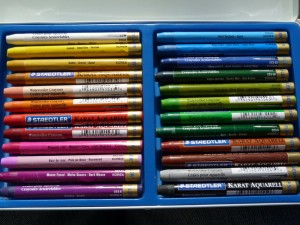
New Tin of Watercolor Crayons, Staedtler "Karat Aquarell" Neocolor II

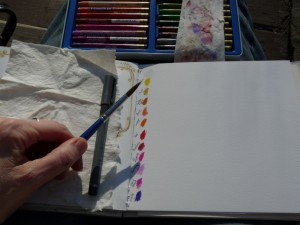
More colors in other brands…landscape colors hopefully. I thought I’d try these Staedtler “Karat Aquarell” neo color II, they were reasonably priced online. Because I’ve been desperate for sunshine this spring, it was gorgeous that evening so I sat on my front steps to do my color charts.

New Watercolor Crayons, wow look at all those colors!

Here’s the crayons! Woohoo….they look nice! I’m hopeful that some of those greens might be what I was looking for.

Getting ready to wet the colors and have some fun!

First I want to stress that before you do any paintings with ANY media, watercolors, color pencils, oils etc, you should ALWAYS do some color charts of all your colors. This will help you to get to know the colors as they really look on paper (or canvas) and get familiar with how to handle them.

In my sketch journal, I rubbed a small spot of color and wrote in permanent ink pen the colors name next to it. It helps to also put an initial for the name brand too or label it at the top as I did.  Prepare one row and do the wash before you color the next set of spots, just so you don’t run out of room. Keep it neat because you can refer back to these charts again and again as you get to know your colors.

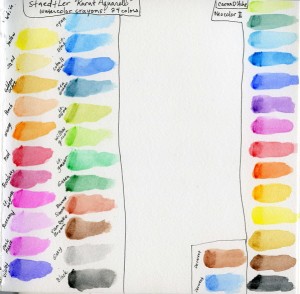
Color Charts of two brands of Watercolor Crayons

After you make your dry spots of color take a waterbrush or regular watercolor brush and water, wet the bristles and touch it to the color spot. Notice how as you ‘rub’ the color it releases and becomes like watercolor. If you rub a lot you can blend the spot right out for an even tone, but leave some intense color there, drag your brush as you rub back and forth, to one side to pull color away. Then lift your brush to stop, don’t rub too far out, keep ’em neat. Now your ready to put on any more spots you may need to and wet them; leave room for labeling them. After wetting a color rinse your brush and wipe or rub on a paper towel to make sure all color is cleaned off it.

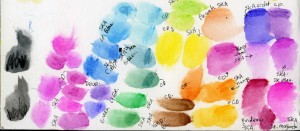
As you can see, I did my new crayons on the left, my original crayons on the right so I can compare them.

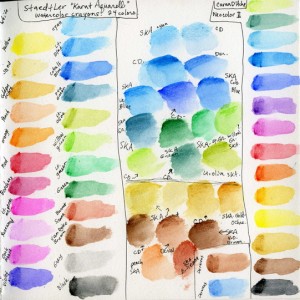
Color Charts with my comparing colors close together in the centre.

Now to have some more fun, it’s time to compare colors from different sets so I can decide which ones are too similar to carry around with me. This is a ‘getting to know you’ exercise now and VERY important! The more you play with your colors the better your choices will be when you’re painting. Sometimes when I haven’t painted in a certain media in awhile, I’ll go through and do color charts just like this.  So you can see the middle is a riot of colors!! I grouped the blues, then greens then browns and goldie colors, all good for landscapes. Label, label, label!!

( I really like how this page looks with all the color swatches, I decided to make note cards and t-shirts of it!! See the links at the end of this post 😉 )

More color play to further test some out.

Ok, then the page adjoining that one had to be used for more testing, wow, am I going to use all these pinks?

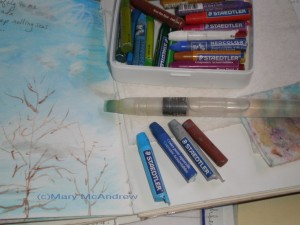
My Watercolor Crayons + Waterbrush

After all this playing I ended up with a pile of cut crayons (yes I cut my new crayons in half too! Yikes how awful!) So I searched through my favorite shelf of odds n ends, containers etc for my field kits, and found a plastic case from I think, a small first aid kit. I love that it’s plastic = lightweight! This is a picture from my previous blog post where I used the big flat water brush.

Here are the blog posts I’ve done so far using the crayons, in order of date posted:

And here are some links for FUN things with my color charts printed on them! (you can change text on them)

I hope showing you how I work helped you out! Please leave comments if you have any questions.