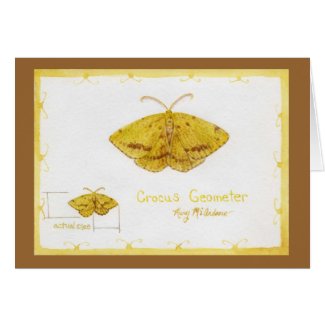
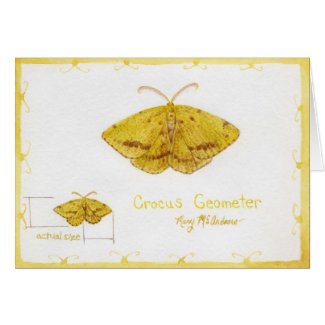
Crocus Geometer Moth full page from my sketchbook journal
In the morning when I let Ginger (my dog) out the back door for her morning wee, I always survey the screen porch to see if any visitors of the mothy type, have overstayed their visit. I used to leave the screen door open so I could be lazy and Ginger would just run right out, but stopped when too many flies were coming in! But I did get all kinds of moths in there! Well even with the door shut, some do sneak in and that’s how I found this little guy. Well sad to tell you it wasn’t alive, but laying on the floor in perfect condition. So I gently, gently picked it up and put it in my “Crisco” container for study.
Above is a full sketchpage from my journal, I did a life size study in the lower left corner and an enlarged size in the middle. I had fun with the border by just using my waterbrush with a matching color and added little ‘butterfly’ heads.
My set up when I sketched the moth
You can see in my picture that I lay the moth on the lid of the “Crisco” container and that way I was able to move it around as I worked. My watercolor pan is under it and the sketchbook is on my little table top easel box. (you can see my last page from the lady bug post!)
Drawing a study at the same size first
Now here I’m showing how nice it was to sketch the same size study by having the moth on the plastic lid. Using my pencil I did comparative measurements to compare the width to the height of the moth. Do you see those lines on the page? I put them just as a teaching tool, to show you that I found the measurement from inside wing to outside tip was the same measurement as the bottom of the wing to the top, his head I think it was. I always use comparative measurements when drawing!
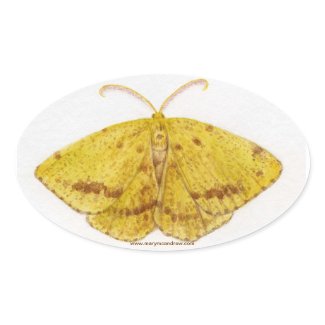
Such a gorgeous colored subject!
Isn’t this a beautiful moth? His antennae were really elegant and graceful, very hard for me to paint with watercolor! The more I studied him under a magnifying glass the more I saw and appreciated it’s beauty.
This is how my larger sketch looked at first.
(Above) Now I’ll show you the steps I took to do the large painting of this Crocus Geometer Moth, mostly how I drew it. Do you see how boring and technical it looks? I know, but if you don’t start with a clear drawing done in PROPER PROPORTION it will never look right! Sorry, I”m not shouting, but it is REALLY important! If you do anything, learn how to draw well!
So I used my pencil to compare the width of the wings tip to tip to the measurement of the moth top to bottom. I put light lines on the paper then drew an arc as close to the shape of the ‘real’ moth subject as I could. Then I decided where the wings ended in the centre, keeping in mind that they overlap.
The second stage is lightly sketching the placement of shapes, wings, body, head.
Above you see a lot more drawn here; I drew an arc lightly for the bottom wings too, then decided where the two wings met and overlapped then drew them. I found the wing tips were half way between the head (top) and bottom wing edge, can you see how there’s a little ‘t’ at the tips?; that’s centre from top to bottom.
It’s really fun when you get into a drawing and start to find things that are the same measurement so you can check other parts of your drawing by comparing them! That’s why it’s called Comparative Measurements! (This is something I teach my students first!)
Then I clean up the lines and decide how the outline will look.
Look back and forth at the subject and drawing, look for areas that might be out of line and fix it now. After you feel your measurements are right, you clean up the light lines and decide on the lines you leave. Keep your final line clean and neat. Use your kneaded rubber eraser now to dab repeatedly at the line to lighten it as much as you can, just enough so you can still see it but you can do watercolor over it and not have it show.
Laying in some washes with watercolor and adding some details.
Here I put the first washes of color on and then started to add where the dark markings are and light wing ‘ruffles’.
Larger study of the moth finished.
And here it is finished! I just kept adding the tiny spots and built up the larger dark markings. Sometimes it dries and just doesn’t look as colorful because watercolor can look lighter and duller after it dries. So I go back and add some light washes when needed to perk it up, I added bright yellow and more browns on this one. (ps. I did have trouble with the antennae! I need to practice how to do such tiny detail with watercolor!)
I’ve created some really pretty note cards and other things in my shop using this page from my journal, please have a look! Please forward my shop (or this post) to your friends to help me spread the word.
I’m showing you the page from my journal first, then I’ll tell you a little story about a ‘bug discovery’ I had. You’ll see on the right my studies from the lady beetle I found, bottom left is studies of lady bug ‘faces’ so you can see at a glance how this is a handy way to identify them. It’s not really their face but the pronotum which is the part just behind the head on beetles. Then I have a quote by Paul Cezanne and had some fun adding a old style border. (Please click on pictures for a BIG clear image!)
Multi-Colored Asian Lady Beetle studies
You can read my note that the one leaf I actually traced to get the exact size on my paper. That’s a great thing to do when you’re making ‘scientific’ type notes and it saves time for studying other things about your subject.
Ok…now to get on with my bug story. Now this is really exciting, well for someone who’s interest in bugs has really peeked this summer it is!
Multicolored Asian Lady Beetle pupa
When I went out to get the mail I find myself looking down at the weeds in my front ditch near the driveway. I’m getting more used to spotting insects and today was no different.
Multicolored Asian Lady Beetle pupa 2
I thought it was some kind of small bug but I didn’t have my (reading) glasses on so I didn’t really see what I was looking at as clearly. 😉
Multicolored Asian Lady Beetle pupa 3
Well after taking pictures of it I gently set it down by some weeds in my yard, but when I looked at the enlarged pictures on my computer I realized what it was! I double checked in my Field Guide and yup, it’s a Lady Bug pupa. It’s a pupa just like butterflies come out of!
Multicolored Asian Lady Beetle pupa 4
It was when I saw this picture that I realized it was hatching right now! Yikes!
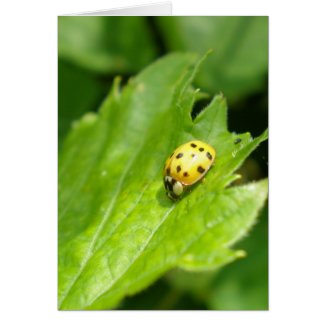
Newly hatched Lady bug
So I ran back out into the yard and found where I had put it, brought it inside and put it in my plastic “Crisco” container you’ve seen me use before. He/she slept in this overnight (yes in my living room!) and the next morning there it was, all fresh and yellow, a brand new Lady Beetle! How cool is that?
Newly hatched with wings still very tender
Can you see the clear ‘spots’ on it’s yellow wing covers? I had a suspicion that these spots would turn into black spots we all are familiar with. And I think just like butterflies do when first emerged, I think it was letting it’s wings ‘develop’ and firm up…they looked quite tender at this point.
Newly hatched lady beetle
It looks like a little lemon seed, I love it!
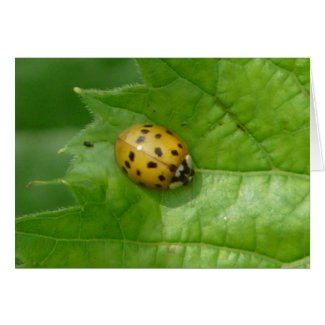
Multicolored Asian Lady Beetle with it's spots developed
Well what did I tell you? The very same Lady Bug now with it’s spots all developed. I released it as soon as possible onto the same weeds I found the pupa on. What a wonderful experience it was to see this Lady bug go through these changes!
My eyes are getting better at noticing little things on the weeds and plants around my yard and land. I find that I’m seeing many more bugs, interesting eggs and pupas. If you take your kids out on a bug hunt, tell them to pretend that they have “Eagle Eyes” or “Superman Vision” and they need to stand still, zoom in on leaves and watch for little things. It’s a wonderful hobby to get kids interested in, especially if you loan them a small camera like I use, and get them photographing them.
This little beetle is definitely waiting patiently on my list of things to be painted! Below are some note cards I created using the “Multi Colored Asian Lady Beetle” pictures.
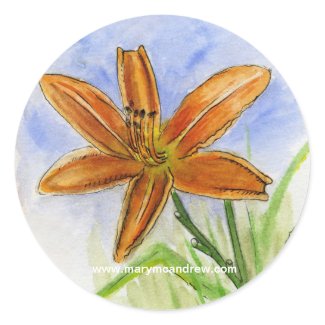
This will be one of the shortest blog posts I’ve done in ages! I just did this little sketch the other day to test out some paper and new kit supplies. I stood to paint in front of the row of Day Lilies and it wasn’t easy. The ‘no see’ums and the ‘see um’s’ were all biting me and started to make me miserable! Oh the joys of painting outdoors! Anyhow, the paper proved to be too thin and cheap so that won’t be going into my sketch journal.
After I got as much done as I could, I retreated to the shade and just outlined with a permanent ink pen to tidy it up. It looked a LOT better after doing this! Then later that night I saw my little kit of metallic watercolor paints and thought, ‘what the heck?’ so I brushed some on and it looked nice. The border is just the permanent ink pen then I loosely brushed on some metallic paint.
Well folks that’s it! Told you it was a short post, haha. More bug sketches and paintings coming real soon! Enjoy the links below to my shop!
Yes I know, what a name! This bug is a type of “Shield Bug”, so named because when viewed from above it looks like a shield. I don’t have a definitive identification on it but closest I could come was a type of Stink Bug.
My sketch page with finished paintings of Stink Bug
This one I found was much smaller than others I’ve seen in the garden, you can see from the picture below. I put my subject into the “Crisco” container that I like to use for bug study and photographing. It crawled around constantly and was a real challenge to draw!
Stink Bug and sketch book
Below you can see an experiment I tried, I colored swatches of watercolor pencil on a heavy piece of watercolor paper. I used it with a waterbrush to paint the Stink Bug studies. I wanted to try it because it’d be great to take along right in my sketchbook into the field. It worked pretty good for small studies and I’m going to try it out some more. It helped to mix the colors on a small metal palette to the side to keep this color palette clean.
Watercolor pencil palette and waterbrush
Another tip, if you need to show some white highlights you can carefully scrape off layers of paint using a very sharp blade. This was just a small penknife I sometimes have in my field bag. Scrape sideways, gently and repeatedly to remove layers; sometimes scrape the opposite direction to remove it.
Scraping with a sharp blade
Here’s a bunch of pictures of the interesting little bug. If bugs aren’t your ‘thing’ I want you to just take notice of a few things. You can appreciate some things in insects that you may also appreciate in birds. What catches me about birds is how you identify them by checking their shape, patterns, colors and behavior. Well the same is true of insects; you can identify species by their special shape, patterns, colors and behavior!
Stink Bug 5
This guy has an interesting shape from every angle you look at him. Just check out those red antennae!
Stink Bug 4
And the spotted legs! Looks like he needs a shave! But isn’t it fascinating that it has such pattern?
Stink Bug 3
This angle is very interesting, his head seems to streamline right into his body, and the eyes are right along the edge.
Stink Bug 2
Stink Bug 1
Here we see his pointy shoulders, like he’s wearing football shoulder pads! And I love the pattern along the edges of his back. Can you see the fine veins patterns in that little section at the bottom of his back, that’s part of his wings folded up. His underside was a gorgeous light green that reminded me of marble, but it was hard for me to capture as he kept running around! After I took all these photos in the garden, he flew away, I think just to show off!
Hope you enjoyed my insect study, I’ve been on a real bug kick this summer! More coming!
PS. I have a Flickr page that I’m trying to add to when I can. Check it out here.
(Click on any picture to see larger, picture links at the end of the post go to my shop, enjoy!)
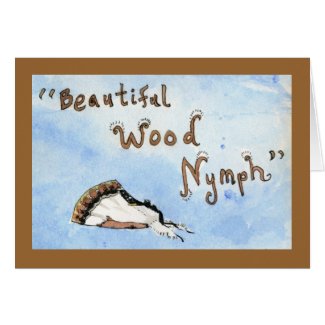
The "Beautiful Wood-nymph" moth...my newest discovery!
As your family and friends get to know how much you love to study new bugs and things, they will start to point things out to you that they find. This is great because it’s more ‘eyes’ watching for things than just your two. Well my son Paul, home from college, said there was an interesting moth on the back screen. I didn’t pay much attention until he again said, “Mom, you really should look, it’s really different looking!”
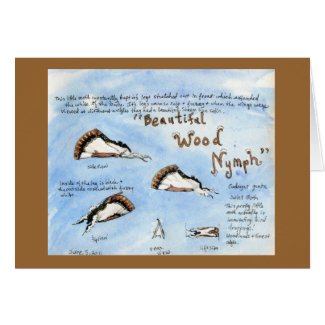
My two page spread of studies from life of the moth.
Glad I listened and glad I looked! It was a small moth who must have made it’s way onto my porch looking for the lights. Above you can see how I used two pages of my sketch book journal to do studies. I’ll share with you the steps I usually take when I find a new bug to study.
View from above taken with my tiny Olympus camera.
Before anyone gets their portrait painted, I get as many photos as I can to file for references, maybe for a future painting or at least to properly identify it. I usually have some plastic containers around that I use, this one was perfect, it’s from a “Crisco Sticks” shortening package; the kind you buy with three sticks in a pack and they’re easy for measuring. One of the plastic containers has a lid and the whole thing is nice clear plastic!
View underneath the moth, many times reveals a surprise color!
I also have some fine mesh that I can put over the top with a rubber band, I never want to kill the creature (unless it’s a house pest, I may not be so nice then!) I love using my tiny Olympus camera to take the close up photos, it works great on the macro setting. This shot is through the bottom of the container. Another tip, I go outside into the natural light if I can to take pictures, the color is always so much better; this was taken in bright sunlight.
This is my set up showing how I positioned the moth under a magnifying glass.
This photo shows you my set up for drawing. Now that I have lots of pictures to save, I put him under an old magnifying glass that stands up and start sketching. Do you see there is no lid? The moth was staying put, maybe because of the light, so I kept the lid off to work. I start with a light pencil sketch and then use permanent ink (you can see my pen in the background, this was an Itoya Finepoint System .2)
I did a 3/4 view to show another angle.
This is a close up of one of the sketches, I try to do different angles to show various aspects of the bug. I thought the furry legs were fascinating! (and made it look ‘cute’ actually!) I colored him in after drawing with the ink, but sometimes I do it in the opposite order. I laid the washy blue background in after I colored all the moths, I wanted it to be lose and just ‘pretty’.
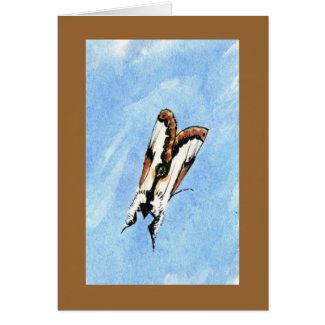
View from above of the Beautiful Wood-nymph.
What an appropriately named moth…”Beautiful” really is in it’s name!
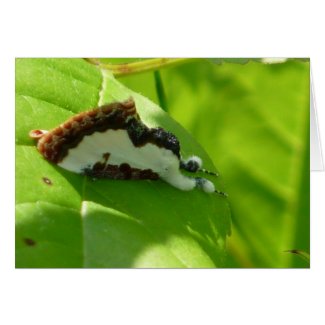
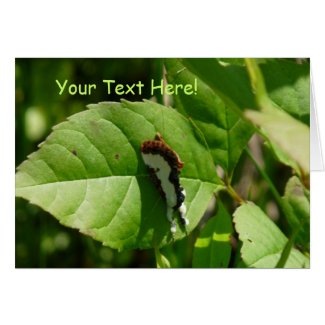
Beautiful Wood-nymph in the 'wild' on a leaf.
Now here’s the cool part of my story! I went for a ramble the very next day, hoping to find some interesting butterflies to photograph. I was into the first pasture and saw a tiny fluttering in a low plant, I watched for where it seemed to end up then just studied the leaves and grasses, looking for a butterfly. See below:
Hiding down low in the grasses, can you believe I found him?!
Ok, I’ll brag a little here, I think I have good eyes for spotting things, because I found him! Hiding amongst all those grasses and leaves. Can you see how well he can blend in, but then, not totally.
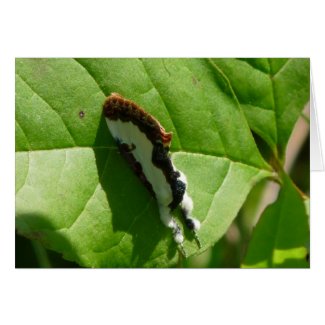
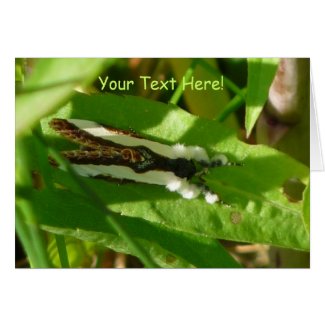
Another shot showing how well they hide on the leaves!
Then he flew around again and re-landed; this shot shows him pointed downward, always keeping his legs stretched out in front.
The Beautiful Wood-nymph imitating bird dropping, that's his job!
When they do that, it makes them look like bird droppings and that’s their defense!! I’ve seen pics in books about such things, but never saw one myself. Though he imitates such a yuchy thing, the moth itself is really pretty! I enjoyed studying how the wing pokes up through with a curling flourish and the fuzzy legs that remind me of a Poodle dog. The wings had a sheen in the sunlight that looked like white satin.
The big thing all of this made me realize, was that I’ve been living here for about 17 years and I never noticed one of these before! Well, much of that time I was busy raising my boys, taking care of animals and whatever else. I didn’t go out walking in my fields all the time as I do now. What I’m trying to say is there is SO MUCH around us that isn’t seen, unless we start looking closer to see it. And then, like this moth, once you see it and study it, it’s more likely you’ll see it again. Try not to miss anything, try to capture it all and the best way is in a sketch journal!
(No moth was harmed in the making of this blog entry, the names were not changed because he’s not innocent, he’s guilty of being “Beautiful” heehee)
The following pictures go to glossy Note Cards I created using my painting and photographs of the moth. Please have a look and share the links with nature loving friends you think may enjoy them!
(I wrote this at the very end of May and wanted to share it with you before it gets too late!)
I took a walk out through the fields today to “Aspen Hall”, just for a bit of exercise and to enjoy the sun. Along the way I discovered some beautiful butterflies, though it’s tiny, the “Pearl Crescent” was so pretty when you look at it on zoom!
A beautiful little butterfly called the Pearl Crescent
When we got to Aspen Hall, I did a very quick sketch using my watercolors and waterbrush. I say quick because the mosquitoes were finding us fast! The picture below shows how I held my palette as I worked.
This is how I held my palette while I stood and painted.
You can see the last post I did on Carpenter Bees there to the left. I also always make a little pen holder with clear tape on my sketch book.
This is the water brush I used to do the whole painting, a big flat.
Here’s a picture showing the big flat waterbrush I used to do the entire painting. The flat was great for making the marks on the trees and I used the corner when I wanted to make small marks. (If you click this pic you’ll see a really cool note card I created where you can put your own text on the palette!)
Painting and notes done while standing in "Aspen Hall", watercolor.
This is the page I created with my notes and watercolor sketch. Click it to read my notes, the black flies were terrible, biting me and being pests! It was hard to paint, but I’m happy with the little watercolor sketch. Standing still is great for seeing and hearing birds, they were all around me.
Ginger gives me a toothy smile and says, "Hurry up already!"
And there’s Ginger, my faithful Aussie! She’s just looking at me saying, “Are you done yet?” 🙂
A footprint in the mud from ?
Here’s a cool footprint I spotted in the mud in “The Maze”, another area on my land. I have to look it up, but I’m thinking Opossum? Skunk?
Another Leopard Frog friend!
Could I take a walk on Long Lane Farm and NOT see a frog? I don’t think so! This is one of the most popular kinds here, the Leopard Frog. Isn’t he handsome? (oh it could be a female…can a frog be pretty?) I just love the spring greens, olive greens and bronze of their skin; in the sun it really is metallic!
A female Baltimore Oriole looking for food in the bushes.
A great capture, photos of a female Baltimore Oriole searching for seeds on this wild bush in my field.
Another shot of her as she searched for food.
It’s interesting to observe ‘garden’ birds further afield than your backyard. Seeing her feeding on native bushes, bugs, seeds….whatever she was eating she was very busy doing it.
A collection of leaves I picked while sitting in one spot.
After painting I sat for a few moments in Aspen Hall, I looked around me at all the green plants. It didn’t look like anything interesting to paint or draw, but, if I had students with me I’d challenge them to find as many different leaf shapes as they could to draw. I picked one of each just within my own reach and look how many I found! It would be nice to do as a lesson, ignoring color and talking about shape, and some botanical terminology.
I hope you enjoyed this (short) walk today! Wait till you see the next post, a new moth discovery for me!
BTW here’s a new page I created called “My Photography Equipment” to show what cameras I use when I go out walking and exploring, I love ’em!
You know there are interesting things all around us to discover, some are right under our noses…or under our eaves! I have known about Carpenter Bees but never paid them much attention, until this year. I caught one and started to draw it from life, safely keeping it in a plastic container under a screen. I did the studies above from life, then just for fun added the little quick sketch bees as a border around it. I put the green after to add color and liven it up, and the red and blue ribbon with an arrow was just me messing around!
Female Carpenter Bee I captured for study.
It seems the bees LOVE the eaves under my back porch, and are making their home there.It may not have bothered me much before, then I watched a video about the damage they can do to your timber. Uh oh. This is a photo of the female bee, you can clearly see the abdomen (end part) is shiny black, unlike the bumble bee which is nice and fuzzy black. It also has a spot on it’s back where there are no bristles, like a bald patch.
Front view shows no light patch that the males have.
Oh my, look at those choppers! The female will chew and cut wood with her mouth parts, so I wouldn’t want her landing on my arm! Yikes! Actually, the female can sting and the male cannot. I liked this view though, with her wings sort of up, head down.
Male Carpenter Bee in flight, showing the light patch.
After I drew the bees and photographed the female, I got curious about the bees and that’s when I looked them up online and did a little research. From my upstairs bathroom window you can see the males around the porch eaves below, like they are guarding territory. The male is easy to tell by the light patch on it’s face, it will look whitish to you, but a book said it was yellow. Isn’t this a cool picture? It took me many, many tries just to get the few blurry pictures I have here! I like how he has his antennae up while flying, his little legs tucked under.
Side view of male bee in flight.
Look at this shot!, he’s so stout looking.
Rear view of Carpenter Bee in flight.
This is one from behind, now that definitely looks stout! How does he hold himself up with those little wings?
Here's a close up of my sketch so you can see it better.
This close up shows how the wings are folded over the back.
Here’s a close up that shows the wings folded over the back, you’d never know there were actually 4 wing parts when you look at it. There is two on each side, just like butterflies; each has a forewing and hindwing.
Check out this article about Carpenter Bee Control, complete with videos! Then you’ll see why I need to get rid of the bees.
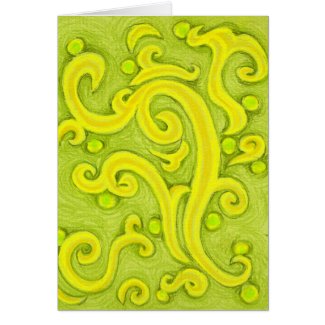
I thought it’d be fun to share with you my newest journal I just created, well at least the cover, while I work on the next post waiting in the wings. I don’t usually bother much with decorating the covers because I care more about what’s on the inside and use them in the field. But I have noticed as I make more journals, they are getting more attractive, colorful and fun to look at. I can’t speak for other artists who journal (sketch journal), but it becomes a very important part of you, so why shouldn’t you make it something you like to look at?
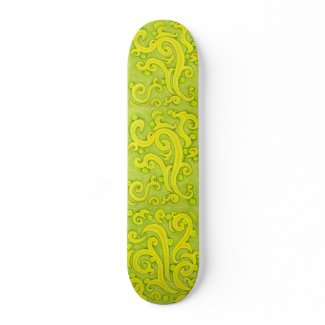
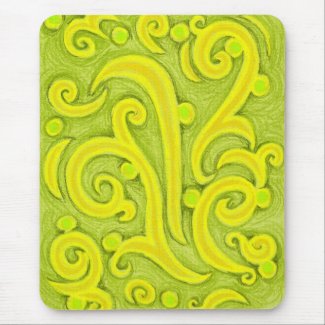
Swirls and bubbles of green and gold
I made it from colored mat or mount board (for matting/mounting drawings and paintings). It’s a lovely shade of green and I made the spine a different green. I wasn’t sure what I was going to do with it, but then thought it’d be fun to play with color pencils.
So as I watched a movie on Youtube, I drew some swirls,
that turned into curls…
and some dots that looked like spots…
then some scrolls filled with green and gold….
And I used a new landscape format for this book, for me to fill and you to look.
My journal open, landscape format
I think this is the first time I created a journal that’s a ‘landscape’ format, it’s spine is on the short side. It’ll be interesting to see how it fills out!
Sketch journal front cover
When I was done I covered the whole surface with wide, clear packing tape you can buy at any office supply store or department. I found the Scotch brand actually was nicer to work with, heavier and stickier than the store name brand.
Sketch journal back cover
I lay the tape on overlapping edges, and then burnish it by rubbing with my fingernail or the bone folder tool I have, you could use a spoon too I guess. (ps. the color looks different here because I shot it in different light with a different camera.) I can’t wait to finish my present sketch journal so I can start this one!
This design was so cool on front and back, that uploaded it to my Zazzle shop and created some neat things with it, even a skateboard!! I’d be so pleased if you had a look, tell me what you think.
Click on any of the following pictures, there’s more there than what I posted here:
I’m going to get one of these for grocery shopping!
I love this little heart sticker, you can choose different shapes with this design, I thought the heart looked nice. It’d be great as an envelope seal.
Sometimes it’s good to take a break from always studying how to draw a subject and draw something free hand like this. It’s a different kind of activity for the artistic brain and I think very healthy! It can be very freeing to work on. If I was an “Art Doctor” I’d recommend adding this to your diet, some abstract designs for good digestion!! 😉
What did you think I’d be doing on Mother’s Day? It was gorgeous outside and I had the day to myself until later when my son comes over, so off I went for a walk with my sketch journal!
female bluebird I met along the way
Along the way I captured this shot of a female Bluebird, I’m so happy it came out. I didn’t use my long lens today, so the camera was actually easier to hand hold. (click to see as Note Card where you can see up close)
My watercolor crayons in a vinyl case so I can scatter them as I worked.
I was thrilled to find that the land on one side of the field was actually sort of dry. I mean I’ve been wading through water for weeks now, so any dry grass was pretty great. Before walking at all I decided to sit right down and have a go with my kit. I knew something would strike me. Above you can see something new I tried that worked great; I brought this empty vinyl case along and when I was ready just opened it and put it on the ground. I took my watercolor crayons and set the box right inside it, as I used colors I could just plop them in front and find them easier as I worked. This would be good to use for the watercolor pencils too, as they get lost easily in the grass.
Putting color down around a round plastic shape.
I wrote some notes at the top of my paper as I sat, not even caring about painting, just enjoying the great weather. Then I decided I’d try to put a landscape but leave a circle in the foreground to fill with something. I have a piece of plastic I cut from a plastic milk carton and just filled in green watercolor crayon around it.
Blocking on more green for grass, sky has been painted a bit.
As I decided where my horizon line would be I colored blue in the sky, leaving the clouds just blank paper. (lately I’ve been doing them with white wax to ‘block’ them out using a resist method, this time it’s just bare paper) I then brought the green up as far as I thought it should go, then wet my paper with the big brush to blend all and used a brown crayon to put trees in on the wet paper. I like how sharp the trees can look if you put them on wet paper; if you draw them dry first and then wet them, they can get fuzzy looking.
My set up on the grass, balancing my sketch journal on my knee.
Here’s my set up, as I sat on my piece of vinyl and kept everything in easy reach. I actually leaned on one elbow to do most of this sketch, and quite smartly tucked an empty sandwich bag under my elbow. By the time I was done, my elbow would have been soaked!
The real scene behind my sketchbook, the clouds have already floated by.
So here’s the sketch with the ‘real’ scene behind it, I don’t really like the greens of the watercolor crayons, but more practice will help. Sometimes I admit I could do a better job but when working in the field either the weather is too cold or my back hurts then I just want to hurry up. So I try to work fast, I can always touch up later if I want, or leave it as a study.
This is the page as I finished it in the field, dandelions and all.
This is my study finished in the field, I decided to put dandelions in the small circle as they were everywhere. First I lightly sketched in pencil then went over it with a brown Windsor Newton Permanent ink with a dip nib pen. Then I colored them in by touching the brush tip (a finer one) to the crayons then painting. I colored the letters the same way using a blue crayon. I really want to go back and tone down that green on that grass! Yikes!
Field sketch after touching it up back at home.
Well here’s the sketch after I got home and touched up the greens and added the yellow dandelions.
Leopard Frog
On our way after that sketch, I kept seeing Leopard Frogs. If I stood still I would start to pick them out of their hiding places.
Leopard Frog
I was really getting good at it! As you walk by they get scared into the water…then if you stop a few steps away, they would seem to appear everywhere. I imagined a funny cartoon of a photographer stopping to look for frogs, the way in front of her clear, but behind her all these little heads popped up in the water! haha, well it’s me of course!
mystery water bug
This was really cool, I noticed as I stood watching for frogs without moving, a little something moving in the water below me. I swore they were just catkins from the tree floating along the bottom, but it’s a standing pool of water and instinct told me otherwise. I bent over and kept watching them and remembered reading about larvae that formed cases by ‘gluing’ stuff around them. I got this great shot of it actually poking out of the case a bit! I am not sure yet what it is, have to look it up.
Long Lane green and lush.
Here’s Long Lane on the way back home. It’s green and lush in this very wet spring we’re having. It’s a bounty for the frogs but that means soon will come the mosquitoes too!
I hope you enjoyed this springtime walk with me and my sketching. I hope you go out and capture some nature the way I did, just stop and stand or sit still and you’ll be amazed at what you notice.
Before too much time goes by I wanted to get this post out, especially because I already have another waiting in the wings! Gee it sure has been a productive spring with getting out for walks and doing sketches in my journal!
Today I walked on my land and sat in “Aspen Hall”, a clump of trees that grows along “Long Lane” that the boys and I used to walk to when they were little. It became a special place to picnic, clear little paths and just feel adventurous. To anyone else it would just look like a clump of trees; some dead and broken, many new little ones coming up, a bit weedy but with the odd clump of daffodils and crocuses that we planted so many years ago. But to us it was a special place and as they grew and started to venture out for hikes on their own it was as far as they were allowed in the beginning. To get to Aspen Hall from the lane you have to cross a big ditch that is always filled with water. Over the years I would do a bit of house cleaning by tossing dead branches and trees across it. As they piled up we could gingerly walk across, while holding onto the wild grape vines that hung nearby.
View From Aspen Hall - watercolor crayon + ink pen
I’ll type out what my text says on the sketch above:
“May 4, 2011 Very, very wet walk, the land is saturated. Sloshing all the way! Sitting in Aspen Hall now on my pile of logs. I got pics of the Oriole near the barn! Sitting here I can hear: Song Sparrow, Towhee, Crow, Goldfinches, Yellow Shafted Flicker, dogs barking in the distance, cars droning, bubbles softly popping in the water of the wet ground, Red Winged Black bird, Blue Jay, House Wren, American Robin, Chickadee.”
“I can hear a lot but it’s not a great place to draw from, bushes all around, uncomfortable seat of logs.”
I wrote this first as I settled into the spot. It’s good to settle in and listen before you draw or write, absorb your surroundings no matter where you are. I use a permanent ink type pen to write then I can paint right over it. Then I did a light sketch of all the trees using a brown ink pen, Faber Castell Pitt. Then I took a clear wax (birthday candle) and rubbed on the paper where I wanted the clouds to be. Next I used watercolor crayons to put in the blues and greys of the sky and colors of the bushes and grass in front. I darkened the distant trees by adding crayon to them too, though it’s hard to keep it detailed using them if your in a hurry. To use the crayons you just color like a coloring book and then wet them, you can choose to color softly and leave no lines, or use the lines and marks as part of your sketch. I’m finding as I use my new watercolor crayons, the sets I have don’t have a good brown! They both have reddish browns which I find limiting. As I keep working with them I might just come up with a combination of using them with watercolor pencils.
Yellow Warbler
Now as you read on my sketch page, I did meet a few beautiful birds today! This picture isn’t super clear but I had my long lens on and was hand holding the camera. This Yellow Warbler was constantly on the move and very hard to capture but I just had to share him with you! He was flitting around in the reeds by my pond, wow was he pretty!
Baltimore Oriole
And there’s the Baltimore Oriole, oh wow, one of my favorite summer birds! He was way up in a tree along the lane, but I caught a few pictures of him as he sang his loud, clear song. Click on this pic to see it as a note card that you can customize.
Baltimore Oriole
I’m always amazed at the deep orange on his throat and the contrast of the velvety black with hot (cadmium) orange on his body.
Baltimore Oriole
I keep saying, “Someday… someday I have to paint an Oriole!” It’s on the list, believe me! Click this picture also to see it as a note card.
Swamp Sparrow
Now I was excited about this little guy, a Swamp Sparrow VERY quietly and demurely hopping around under the bushes. I was standing in the flooded area in front of my pond, in about 8″ of water (wearing my rubber boots of course) and taking pictures of the Yellow Warbler. I kept seeing something out of the corner of my eye moving like a leaf in a light breeze. Just here and there a tiny movement, I started to let my eyes roam over the area until I saw it again, and yes, it was a little sparrow. I had to put the camera on manual focus because of the branches in the way; the camera will focus on them, not on him. I was able to catch enough pictures of him, though each picture caught a different part of him, to identify him later at home. I think, with all the water I have here, his name is befitting him! haha 😉
Well another nice walk on Long Lane Farm, glad you came along with me on this cold day. If you like sketching or it’s something you want to try, I encourage you to get out and just start. Take time to sit and absorb, listen and then just write about what you hear, what you’re thinking. Then add some sketches or colors, the more you do the faster and better you’ll get at it! And if you’re like me, if it’s cold outside you’ll learn to sketch even quicker! 😉
The most up to date information about my artwork, nature sketching adventures, or step by step demonstrations. Search using Categories or Tags, or use the search box in the left column.
Please sign up below to get notified when I post new articles.
Crocus Geometer")

 small painting sketch")
 Crocus Geometer 1")


Crocus Geometer - lg wc")
Crocus Geometer cr")

MC Lady Beetle")


Day Lily 7-15-11")

stink bug")


Beautiful Wood-nymph cr4")
Beautiful Wood-nymph")
Beautiful Wood-nymph for sketch 2")
Beautiful Wood-nymph for sketch cr")
set up")
Beautiful Wood-nymph cr4-1")
Beautiful Wood-nymph cr5 cr")
Beautiful Wood-nymph (21)")
Beautiful Wood-nymph (28)")
Beautiful Wood-nymph (14)")
Beautiful Wood-nymph (5)")
 Pearl Crescent")
 journal + palette")
 WC Palette 2")
Aspen Hall wc")
 re")

Leopard Frog 1_5-25-11")
 cr re")


Carpenter Bees")


Carpenter Bees 1")
Carpenter Bees 2")
Carpenter Bees border")


 re")
 re")
 re")
sketchbook (6)")
sketchbook (8)")
sketchbook (10)")
Mother's Day 2011 ed2")
 re")

 re")
 re")
Looking out of Aspen Hall")
 re")
 re")
 re")
 re")
 re")