Support This Site

If you like what I do please support me on Ko-fi

Beautiful Wood-nymph Moth / June 2011

(Click on any picture to see larger, picture links at the end of the post go to my shop, enjoy!)

The "Beautiful Wood-nymph" moth...my newest discovery!

As your family and friends get to know how much you love to study new bugs and things, they will start to point things out to you that they find. This is great because it’s more ‘eyes’ watching for things than just your two. Well my son Paul, home from college, said there was an interesting moth on the back screen. I didn’t pay much attention until he again said, “Mom, you really should look, it’s really different looking!”

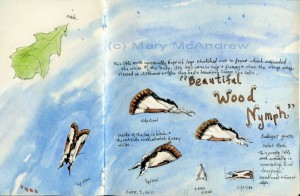
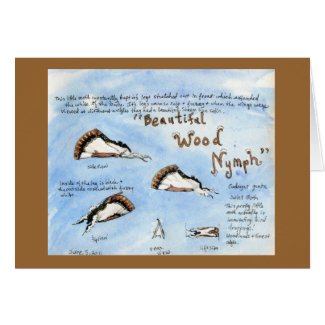
My two page spread of studies from life of the moth.

Glad I listened and glad I looked! It was a small moth who must have made it’s way onto my porch looking for the lights. Above you can see how I used two pages of my sketch book journal to do studies. I’ll share with you the steps I usually take when I find a new bug to study.

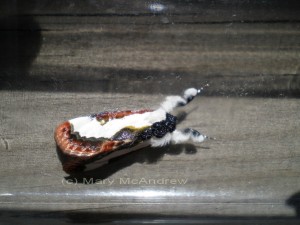
View from above taken with my tiny Olympus camera.

Before anyone gets their portrait painted, I get as many photos as I can to file for references, maybe for a future painting or at least to properly identify it.  I usually have some plastic containers around that I use, this one was perfect, it’s from a “Crisco Sticks” shortening package; the kind you buy with three sticks in a pack and they’re easy for measuring. One of the plastic containers has a lid and the whole thing is nice clear plastic!

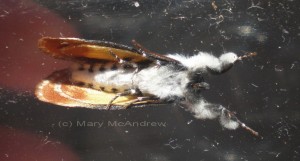
View underneath the moth, many times reveals a surprise color!

I also have some fine mesh that I can put over the top with a rubber band, I never want to kill the creature (unless it’s a house pest, I may not be so nice then!) I love using my tiny Olympus camera to take the close up photos, it works great on the macro setting. This shot is through the bottom of the container. Another tip, I go outside into the natural light if I can to take pictures, the color is always so much better; this was taken in bright sunlight.

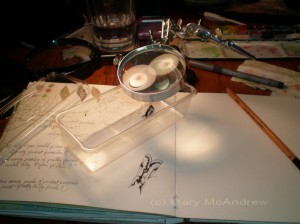
This is my set up showing how I positioned the moth under a magnifying glass.

This photo shows you my set up  for drawing. Now that I have lots of pictures to save, I put him under an old magnifying glass that stands up and start sketching. Do you see there is no lid? The moth was staying put, maybe because of the light, so I kept the lid off to work. I start with a light pencil sketch and then use permanent ink (you can see my pen in the background, this was an Itoya Finepoint System .2)

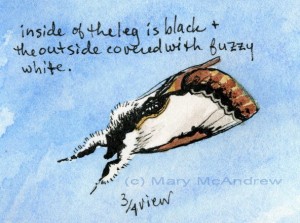
I did a 3/4 view to show another angle.

This is a close up of one of the sketches, I try to do different angles to show various aspects of the bug. I thought the furry legs were fascinating! (and made it look ‘cute’ actually!) I colored him in after drawing with the ink, but sometimes I do it in the opposite order. I laid the washy blue background in after I colored all the moths, I wanted it to be lose and just ‘pretty’.

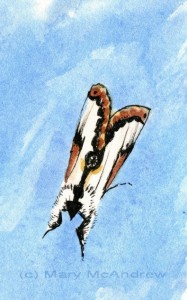
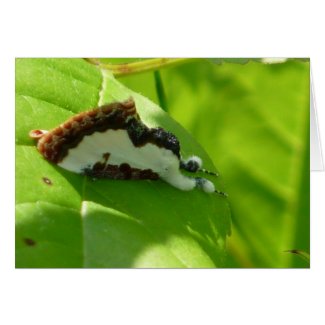
View from above of the Beautiful Wood-nymph.

What an appropriately named moth…”Beautiful” really is in it’s name!

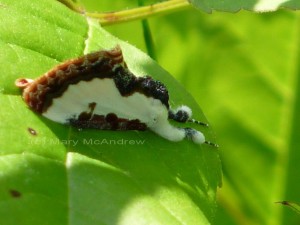
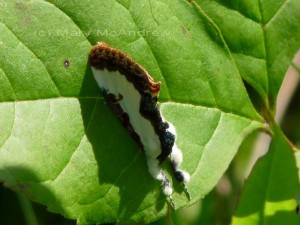
Beautiful Wood-nymph in the 'wild' on a leaf.

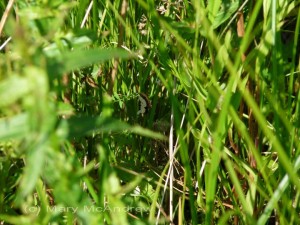
Now here’s the cool part of my story! I went for a ramble the very next day, hoping to find some interesting butterflies to photograph. I was into the first pasture and saw a tiny fluttering in a low plant, I watched for where it seemed to end up then just studied the leaves and grasses, looking for a butterfly. See below:

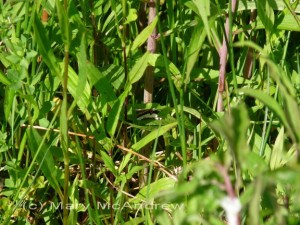
Hiding down low in the grasses, can you believe I found him?!

Ok, I’ll brag a little here, I think I have good eyes for spotting things, because I found him! Hiding amongst all those grasses and leaves. Can you see how well he can blend in, but then, not totally.

Another shot showing how well they hide on the leaves!

Then he flew around again and re-landed; this shot shows him pointed downward, always keeping his legs stretched out in front.

The Beautiful Wood-nymph imitating bird dropping, that's his job!

When they do that, it makes them look like bird droppings and that’s their defense!! I’ve seen pics in books about such things, but never saw one myself.  Though he imitates such a yuchy thing, the moth itself is really pretty! I enjoyed studying how the wing pokes up through with a curling flourish and the fuzzy legs that remind me of a Poodle dog. The wings had a sheen in the sunlight that looked like white satin.

The big thing all of this made me realize, was that I’ve been living here for about 17 years and I never noticed one of these before! Well, much of that time I was busy raising my boys, taking care of animals and whatever else. I didn’t go out walking in my fields all the time as I do now. What I’m trying to say is there is SO MUCH around us that isn’t seen, unless we start looking closer to see it. And then, like this moth, once you see it and study it, it’s more likely you’ll see it again. Try not to miss anything, try to capture it all and the best way is in a sketch journal!

(No moth was harmed in the making of this blog entry, the names were not changed because he’s not innocent, he’s guilty of being “Beautiful” heehee)

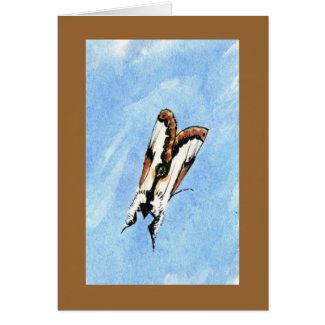
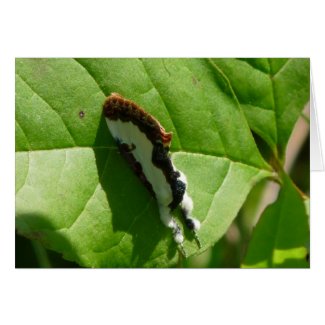
The following pictures go to glossy Note Cards I created using my painting and photographs of the moth. Please have a look and share the links with nature loving friends you think may enjoy them!

**

**
**
**
**
This one has customizable text!
**
And here’s the last one!
Let me know if there’s anything you want created or customized in my shop, I’m glad to do it for you!

“Common Looper Moth” 4-30-10

Well at first I was going to call this post “Little Brown Moth” as I couldn’t guess what kind it was. Have a look at my sketches below and then read about how I figured out what it was.

The last time I found a moth it was a fugitive hiding behind my kitchen door curtain, this one was very similar. He was inside my kitchen sliding door frame…just another ordinary little brown moth. I dismissed it as such and thought, well later I’ll look at him and maybe do a sketch. All I could find to hold him while I studied him (without hurting him) was an empty camera lens case; it’s extremely clear, round, flat and about 3″ across. I made sure not to close it so he could have air and tried to work quickly, I am mindful of his life in my hands and don’t want to stress him too much.Trying not to touch his wings I gently cupped my hand over him and could feel him fluttering inside my hand.

He did get away I’ll admit, then it was actually easy to hold the lid over him then put the bottom up to catch him from off the exhaust hood over my stove…with me perched on a chair!

"Common Looper Moth Studies"

"Common Looper Moth Studies"

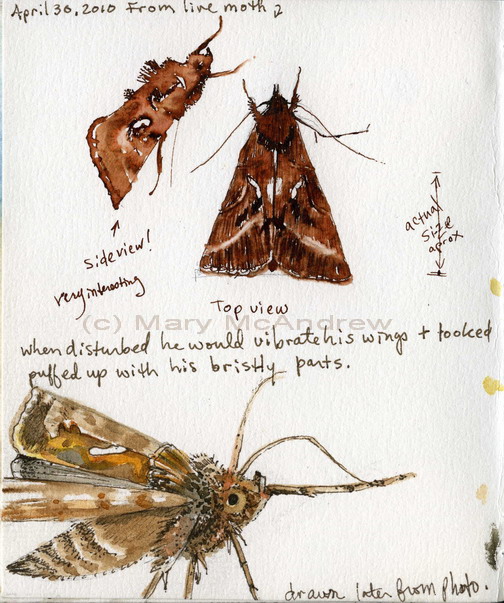
The first two sketches are done from life using a quill pen and brown ink. The ink will run when wet so I used a waterbrush to gently touch it and ‘make’ it run; it turns a beautiful reddish brown when you wet it. (Pelican ink) I also noted the actual size, you can see it’s quite small so a magnifying glass was handy to help me see him.

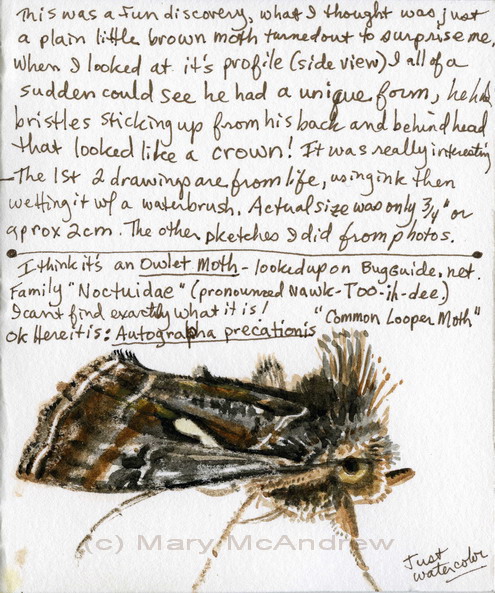
The drawing on the bottom of the page (above) is done while looking at a photo I took of him. I put a very light sketch in pencil then used my permanent brown ink pen, to which I added some watercolors. This study is only 2″ tall, pretty small in my tiny sketch book.

Common Looper Moth study with notes

Common Looper Moth study with notes

You can see from my notes, what was so interesting about this little brown moth is his profile! When I looked at him from the side I was surprised to find the bristles sticking up like a crown or furry coat. He also has a big ‘nose’ looking thing, I think that’s actually his tongue or mouth parts?

Common Looper Moth side view

Common Looper Moth side view

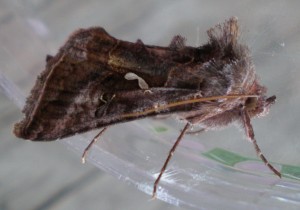
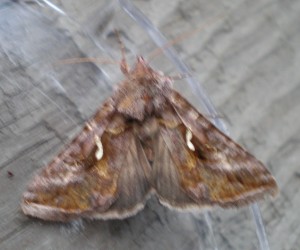
Here are two photos I got of him as I released him outside; it was going dark so the lighting isn’t great. I think the best shots I’ve gotten of captured insects are when I am about to release them, outside on my screen porch in natural light. The photo below is blurry, SORRY! but the light was fading, I just wanted to show you his wing pattern.

Common Looper Moth top view

Common Looper Moth top view

Now a few notes about how I identified him. After studying his form and the unusual profile this helped me, I took note of the whitish marks on his wings and the color of the ‘underwing’. I went to my “Nature Links” page and clicked on “Bug Guide.net”; this site is very helpful but sometimes can be difficult if you’re a beginner like me. I started with “Moths”, click on that, then they showed a silhouette box and that was most helpful. I clicked on the one that looked just like my bug, and from looking it up in my “Field Guide to Insects and Spiders of North America” I at least figured out that it’s some kind of Owlet Moth. Cool, well, now what? My field guide gave me no more help, but on the Bug Guide website I saw another website called “Moth Photographers Group”, (now a link on my Nature Links page!) and when I went to a page it recommended, I was able to really see so many moths and almost certainly identify mine. Then I copied the name and went back to “Bug Guide” and pasted it in the search box, oh wow!, lots of pictures came up now of MY MOTH! Yes, that’s it, an Autographa precationis!

A tip from me, on Bug Guide, if you find a page with pictures you want to look at, use your back button to return from looking at a photo or else it will bring up a whole new set of pictures, not sure why. Another tip, when you visit the Moth Photographers Group, to see pictures go to the “Plate Series” page for links to pictures, BUT I highly recommend starting with Bug Guide or your Field Guide to get an idea of the scientific name, it’s the only way to search on this site.

I hope you enjoyed discovering more about this not so plain little brown moth with me! What it teaches us, if you look at something much closer, with curiosity, you can discover new things you never knew were right under your nose!