|
|
This walk was on April 13, 2012, all around on my land checking on how things were doing now that spring is well underway. (please click pictures to see larger)
lane with arched branches") "Lane with Arched Branches" watercolor and ink I did this watercolor study while standing in the lane, looking ahead through the natural arch formed by this one bush or small tree. Over the years as I would walk under it, I’d trim off branches hanging down right where you walk, so it formed a natural arch. The branches on top reach straight up like suckers do. I actually did most of it on one day then another time I was out I added the ink.
snail cr") The first snail I met this year! Now you can meet some of the critters I met on my walk. The first was a snail sliding along on this piece of dead grass floating in the water. I noticed this before on snails like this, his body color is blueish! Cool.
 The second snail I met was this flat shaped coiled one. Here’s a totally different kind, this one’s shell makes a coil but flat. Can you see the paler band of color at about 9 o’clock? Everything from there to the lip is new growth just from this year!
 I took him home and he decided to come out to explore Well, yes, I did tuck him into a little baggie I had with some of the water from where I found him! I stuck him in my pocket and brought him home to look at closer. I thought I’d have time to sketch him but when I realized I wouldn’t I released him right away.
under the oak (2)") Looking up to the spreading grandeur of this old oak! Now here we are in “Oak Lane”, so named because of the very old, very huge oak trees growing there. They were probably planted some 200 years ago by the original owners of this farm as a land boundary. I love looking up at them as they tower over me, and marvel at how many years they’ve been looking down at people before me even. There are so many critters living in, on and under them!
squirrel tail") Way up high this squirrel's tail was hanging out of it's hole. When you’re out walking, if you keep your eyes open and maybe more importantly, stop sometimes and just stand still to listen and look, you may be surprised at what you see. As I was admiring my oaks and listening to birds I caught sight of something way, way up high, moving. It was just a stirring but it caught my eye; turns out it was a Grey Squirrels tail left hanging outside his/her hole! How funny it was, just blowing around in the wind like a flag put out on a porch. I think it was sleeping!
Mourning Cloak Butterfly (21)") This is the first butterfly of the year for me, the Mourning Cloak Then all of a sudden in a flutter, a Mourning Cloak butterfly appeared and landed not far from me. It was sticking to the open lane where the sun was. Everytime I got too close it flew off but I was patient and followed it along, and the last shots I got were the best because I think, it was tired and didn’t want to fly as much. After that I left it alone, thank goodness for digital zoom!
I hope you enjoyed this little walk and my watercolor study. Stay tuned because I have some more posts in the works! And as always please share my blog with friends and visit my Shop at Zazzle where you’ll find TONS of my nature photos and artwork on all kinds of products.
(please click to see enlarged and clearer)
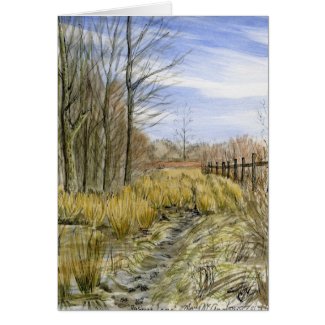
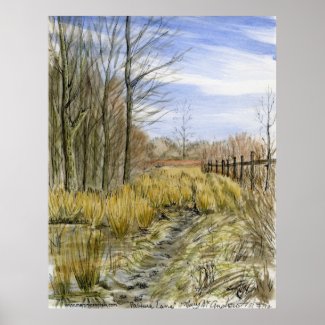
Pasture Lane 3-7-12 final") "Pasture Lane in March" watercolor and ink The land is starting to thaw at Long Lane Farm. The Robins have returned along with many other birds so I went out to look for signs of spring. It was very quiet except for occasional Chickadee’s following me or a Blue Jay calling, some Canadian Geese flying over. I made it just up the lane a little and decided to sit and do this sketch.
I carried a small camp stool over my shoulder so I sat on that and put my sketchbook on my lap along with my watercolor pan. I used two waterbrushes and a permanent ink pen to draw it first. I found it a bit difficult to paint the grasses right in front of me, that were all matted and crisscrossed on the ground, sooo much detail! You can see I didn’t get crazy into detail, mostly just looking for the darks and lights of the scene, showing the water around the rushes and the dry color of grasses in the lane. I didn’t fuss over it too long because my back hurt like a ‘son of a gun’! Darn back of mine, I think I may have been better to just stand like I usually do.
PS. A note to those who follow my blog, I’m so glad you keep coming back to read and see what I’m up to. I’ve not posted as much lately only because I am finally concentrating seriously on illustrating all the poems and stories I’ve written over the past years. I’ll try to share a bit as I can, but don’t want to let the cat out of the bag too soon! We’ll see what I end up with and I’ll keep you posted!
I made some cards with my sketch, check them out by clicking pics below:
Glossy Note Cards 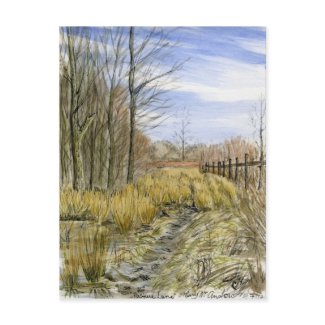
Glossy Post Cards Poster/Prints in many sizes and papers
(you can change the size smaller and the price will go down accordingly)
(Some of the images go to my shop where you can hover and see enlarged details)
Snowy Lane") Snowy Lane in black wax crayon colored with watercolor Even though I did this sketch back in December, while I was in Northumberland England, I guess it’s appropriate now seeing as there’s been a return of snow there! This was their first snow of the winter and it fell quite heavy for a time, coating everything with that heavy kind of silent snow. I had a cold but peaceful walk up the lane and stopped at this view with the trees I always like looking at. I did the sketch while standing to the side of the road using a black wax crayola crayon. The snow was falling on my paper as I drew and it made it hard to draw, not to mention drawing while wearing my fingerless mittens. It was later that I added some touches of watercolor.
P1260784") A lovely gate along the way I love the way this ivy covered gate looks and would love to do a painting of it. Problem is it’s someone’s front gate and with the house being just inside, they may think I’m being rude standing there staring at it.
P1260837 cr3") The snowy lane so quiet under snow This is one of my favorite views as the lane curves into the distance. You can see this is the view I stood and sketched in my drawing.
P1260835") Another view along the high lane The trees stand sentinel as they’ve done for hundred’s of years. Many of the trees you see along a lane are just overgrown from old hedges that weren’t kept trimmed down.
P1260816") The black faced sheep were quiet in the cold. I love how the trees look in the back of the field and how peaceful the sheep were, just trying to conserve energy I guess. These ewes are probably getting fat with lambs in them now…can’t wait to see the little ones in spring!
P1260805") The thick snowy hedge along the lane. P1260801") There are beautiful colors all around you even in winter! I like seeing the leaves in winter; these were interesting with the red spots. Sorry the picture isn’t brighter but the day was so grey!
P1260839") Just waiting to be put in a drawing! This is an old farm shed I always look at along the lane, it’s so old it’s actually fallen off it’s foundation and the sides are collapsed. I don’t usually want to paint old barns as some people do, but this with the trees, shrubs and grass with their colors in this shot, really attract me. I can see it as an ink sketch perhaps or chalk.
I hope you enjoyed coming on this little snowy walk with me. More sketches and photos from England coming soon.
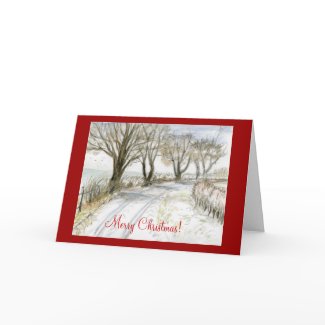
Click the picture below to see a glossy note card I created in my shop for Christmas! I even wrote a verse for the inside!
Glossy Note Card with customizable text
Today I saw a Goldcrest for the first time ever, but not the way I’d like to have seen it. This beautiful and tiny little bird flew right into the patio window while I was sat just on the other side of it. I’m pretty certain this is the same bird at home we call the Golden Crowned Kinglet.
goldcrest L") Tiny Goldcrest Studies in watercolor Poor little thing! I picked it up carefully with a paper towel and decided I’d do studies before putting it to rest in the field. I selected a nicely curled dry leaf to lay him on, it just seemed right for such a natural little creature. I sketched it out then added more detail then the layers of watercolor. I was fascinated by the tiny, hard black beak and little whiskers around it. The yellow crest was so beautiful, surrounded by black borders as if to hold the color in.
goldcrest R") Goldcrest studies in ink and watercolor The top drawing was done with permanent brown ink then I added just a touch of color. It’s amazing how long the claws are on such a small foot!
I hope to see a live one when I return to England, then I can do a painting from life! Much better I’d say!
I know it’s already November and I’m way behind! I have more trouble getting online and having time to edit photos since I’ve been here in England. But I’m trying to go with the flow and keep up with posting my sketches and photos. I’m also using a tiny new laptop and my usual photo program isn’t on here, so I’m getting used to editing pictures with something new (sorry if they look small etc). I’ve also felt really down since my dad passed away and it’s hard to feel creative, as many of you probably know how that is.
But here’s a few cows to start off with! It’s what I see most of around where I’m staying so they’ve gotten my attention. I just love the velvety look of their fur in fall. The days have been very cold, damp and windy but I did these sketches standing along the field in the wind! Brrrr.
 Red Cattle in the Field, Oct 1 I wrote a poem as I watched them, just put a few words down then later I changed two words to make it better. I’ll retype it here:
“September ends…October is here,
The little Robin sings, Winter is near!
The red cattle in the field look so nice,
Fur like rust velvet, ready for Winter’s chill and ice.”
(c)Mary McAndrew 10-1-11
 Overthwarts on the Hill, watercolor The page above I did on October 2nd, it was windier, colder and wetter still than the day before! I wrote a note on the page about how hard it was to draw, of course I was wearing my fingerless mittens too and they are hard to paint in! There’s a farm called Overthwarts up on that hill as I looked from where I stood near Edlingham castle.
 Cows at rest and an Angle Shade moth, ink. The same day I walked a ways up the lane where it got even windier, I found some cows to sketch and sat down along the lane where I could see them through a break in the hedge. Getting down low really got me out of the worst of the wind.
Then another day an Angle Shade moth paid us a visit by coming inside, I guess it’s hibernation time! He didn’t want to leave. I put some sugar water in a little jar lid and he sucked it all up and grew very fat! Anything to help a little hungry wanderer. It hung around a few days just sitting there then disappeared, so I don’t know if he’s hiding out in the house or went back outside.
 The furry red cow eyed me warily Here’s one of the bovine beauties watching me, I tried to walk slowly and talk quietly to her but they are so skiddish, she turned away and made a retreat as I approached.
Well I hope you enjoyed my outdoor sketches, more to come, slowly but surely!
I had some fun creating note cards with cow (and sheep) photos I took in England, have a look in my shop!
I headed out to the back fields today, before the day got too hot. As I picked up my straw hat and plopped it on my head Ginger got all excited, her eyes riveted to my every move. Her whole body tensed and ready to run out the door, as she knows this means we’re going out. Now…when I have my sketch bag in hand and pick up my camera and sling it over my shoulder she knows we’re in for it! The ‘Big Walk’ hahaha…well it means we’re leaving the yard and going out to the ‘wilds’ of the fields and lanes. Yes, if I was a dog I’d be acting just like her!
 Ginger waits expectantly! As I walked I was VERY mindful of watching out for the huge yellow garden spiders that I discovered in my overgrown field, I didn’t want to walk through one of their webs! I’ll show you pictures in another post! Every step I took about three grasshoppers or more would fly up and over the grass for a short bit then land again. As I studied them I laughed to see when they landed, many times they did a sort of “moonwalk” backwards down the stalk they were clinging to.
grasshopper 7 (3)") Red Legged Grasshopper I think If you stop to study them close, using the zoom lens on a camera is a great way, you’ll notice how many different varieties there are. I am guessing some of the many types may just be different ages of the same grasshopper, or males and females, all were really interesting.
fat yellow grasshopper (5)") Fat Yellow Grasshopper Most had some kind of interesting pattern and colors that I’d like to do some studies of someday. First I need to start identifying them better, my field guide to insects is woefully lacking in species of many insects, grasshoppers included.
 Nat. Wildlife Fed. Field Guide to Insects and Spiders of North America Though it’s not a bad all round guide to start with, I find now I need much more species to choose from.
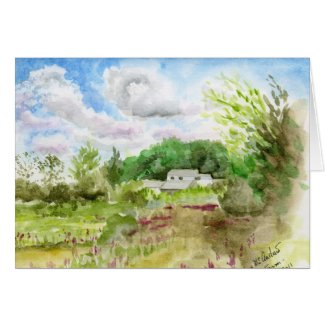
Long Lane Farm in August") Long Lane Farm in August - watercolor Well as I got out into the field a ways, I paused and looked back and this is what I saw. The Purple Loosestrife was blooming, clouds billowing, wildflowers dotting the field. I did this small watercolor using one waterbrush and my pan of colors, while standing in some very hot sun. It was really hard to find any shade and it made me a little ‘snow blind’ looking at my page.
7-13-11 Eastern Tailed-Blue (9)") A tiny Eastern Tailed-Blue butterfly After that Ginger and I made for the lane for a bit more shade. I’ve been noticing this tiny butterfly now sometimes when I walk on the lane. It first caught my attention flitting around the grasses and I thought it was one of those tiny white moths I always see. (It’s only as big as the end of my thumb!) There was something about it though, it seemed to have a bluish look too. So I followed it with my eyes to see where it landed then zoomed in with my camera and there you go! Ahha! A butterfly. Just one of my little discoveries this summer.
7-13-11 Eastern Tailed-Blue (10)") He shows a peek of blue wing They don’t give up much, this tiny, tiny butterfly hardly ever opens it’s wings to show off it’s gorgeous blue!
P1230732") Hummingbird Moth feeding on Teasel I couldn’t resist slipping this picture in to share. I have a great big area behind my barn that’s overgrown now with Teasel. I found the Monarch and Viceroy butterflies, and to my delight Hummingbird moths, loved feeding on them. I would encourage everyone to grow some for them to feed on and for their beauty of form.
 Teasel drawn with permanent pen I love drawing Teasel and long into winter you can enjoy their elegant forms. This is a drawing I did years ago in the fall, (sorry I don’t have it scanned large enough to enlarge much) can you see how much fun you could have looking at it’s bristly but graceful form?
I hope you enjoyed our little walk on Long Lane Farm. I always see or find something new when I stop and look for awhile. I want to point out that I have been adding great links for identifying things on my “Nature Links” page, please have a look. I use these links often when I need to identify bugs or blooms. I’m adding links all the time so everyone can use it, please let me know if you have a favorite you want to share!
Below are a few note cards I created in my shop from my sketches or photos, I hope you enjoy them!
My watercolor sketch
Hummingbird Moth
Awww, who could resist that face?!
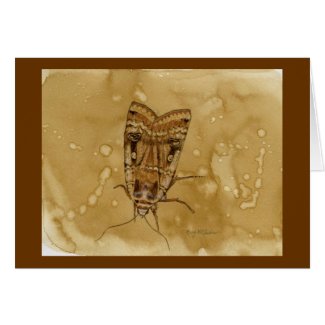
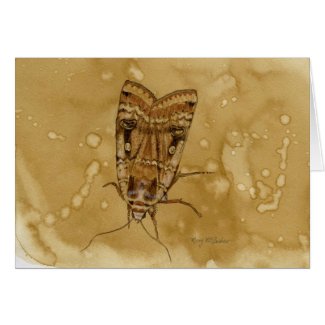
coffee stain moth 1") Watercolor moth painted on coffee stained paper This moth is a little watercolor painting I did on coffee stained paper (click it to see it larger and clearer). Using instant coffee to stain your paper is something I taught in my Creative Journaling class. It’s great to use lightly on your paper to make it look antique or like parchment. Here I just played with it like watercolor and brushed it around, then splattered water drops into it. Let it dry totally then you can draw or paint on top of it as I did. I have a few small sheets that I did at the same sitting, so I can grab one when I’m in the mood and use it. I lightly sketched with pencil first then just used burnt umber, burnt sienna, black and a touch of white for highlight. This was from a “Yellow Underwing” moth I photographed last year.
I have always loved the illustrations of Arthur Rackham and it’s the works he did using mostly brown colors that inspired me to work with brown tones alone. Click on any of the illustrations to see cards or gifts I created in my shop! There’s more items coming in the category Vintage Illustrations.
 Flippant Fairies Floating Freely Just look at how gorgeous this painting is!! Sigh…I love his work. (Sorry I don’t have a bigger copy to view) The background is just subtle tone, there’s a hint of tree tops below and then the sparrows come into view as they nonchalantly go about their business of preening. The branch is laid out as a perfect design element reaching across the paper and reaching up to lead your eye but not take you totally away from the subject of the fairies. Yes, those fairies, painted lighter than the rest to really make them stand out, aren’t they wonderful? Not having pointy ears, pointy eyes, pointy hair, sexy clothes and striped socks. Good God some of the awful modern day interpretations of what a fairy is is shocking! Just plain tacky and awful!
 Oh but this is one of my favorites! This is one of my favourites! SIGH….that’s how I feel when I look at work by another artist I revere. I love her dress, the attention to it’s detail but it doesn’t take over the attention of the piece, do you notice how the lower part blends into the tone of the ground and the skirt is the same as the background? It’s all married together, floating but on the same ground, do you know what I mean? Just like the tree roots coming from nowhere out of the paper and growing up into this tree that is alive. I love how he combined just enough elements that say man and tree at the same time, the fabric hanging adds a touch of color that picks up in her cheeks and it’s form adds a floating liveliness to the painting; movement. Not to mention the tenderness of the way they clasp hands….sigh.
 Subtle tones means less distraction In “The Man in the Wilderness” above, I love the way he draws his trees to be just like people, look at the ‘arms’ of the one in the background reaching up to the sky. For a child (or adult) reading the story this illustration would be something to pause over, study and discover. They’d see the obvious girl and elf and think about what they are doing but then they’d look at the trees and realize with delight they have faces and arms! Here again I like how he’s used such simple color to make this illustration, just a simple bit of red and gold on the elf to show the main subject. I can’t wait to use the card in my shop (click picture to see) as an invitation or birthday card, “Can we meet for tea?” “May your day be full of discovery”. Oh, how about a funny one for your friend…”I know you’re kind of different….but I like you all the same!” haha
 The Queen floats in as if on air This illustration shows use of line at it’s best, do you notice how in some places it’s thicker and heavy then it gets thin and light? This is very important in drawing, good drawing. This one is definitely more of a drawing than a painting, hardly any range of values used, quite flat. It’s all about the lines and what lines!, all swirling and curling, sweeping like there is a magical breeze blowing just her skirts and delicate lace veil. To give some depth and interest I like how he put the pale leaves and branches at the top then used a light similar design on her skirt in just the front.
I have wanted to do drawings and paintings starting with a freely painted base of brown or parchment colored paper for ages. The moth is my first one I guess, though I’ve done paintings before that are monochrome browns, (Autumn watercolor, Etain oil, Twilight oil) they were never started on a freely tinted paper. By that I mean a piece of paper where you just play with the color and use water drops and salt to add interest and you end up with something that in itself looks good. I’ve played with coffee staining before (as you can see on this post) but never got around to painting on them. So I’m hoping to do some more starting with small studies like this moth. Hope you enjoyed my discussion on using browns and the great Arthur Rackham! (more sighs) Oh, and I found an excellent, though old, article written about a show of his works in London in 2002 here on the “Telegraph”.
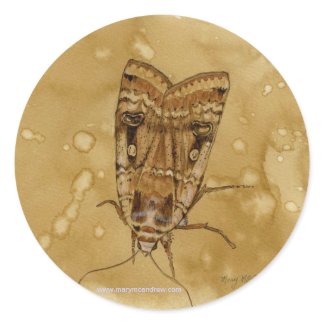
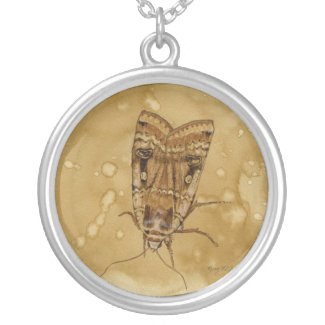
Below are a few items I designed with the Moth painting on it, please click the picture to see them in my shop. Enjoy and let me know if you’d like it on another item!
Try these stickers out, they’re glossy and I love ’em!
Below, Sterling Silver necklace!
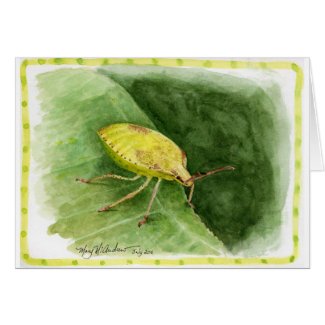
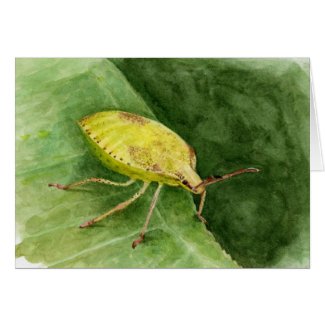
lt green Stink Bug") (Light Green) Stink Bug watercolor (click the picture to see it in my shop where you can see ZOOM view by holding your curser over it)
This is a painting of (another) Stink Bug, though I’m not sure what the exact species is, a friend in England suggested maybe it was a ‘baby’ with this coloring. I really enjoyed painting this, the colors, the leaf and then the detail on the bug itself….love those dots on the legs! It’s a page in my journal so I added a little fun border with my brush and watercolors.
 Almost there! Here’s my set up; I found that using a large bobby pin to hold my photo in place worked out really well. I keep a little piece of paper nearby to test dabs of color. You can see at this stage I’ve got a lot done, but don’t have the deeper shadows or finer details in yet.
 Close up of my progress Here’s a closer look, though the color is not right (because of my camera shot) you can see how pale the whole thing looks. Adding more shadow under the bug and rich color to the leaf really helped it. I also took a damp brush and rubbed the edge of the leaf, above the bug, to make it softer. Something else I did, though it’s not in my photo, I added just a bit of cast shadow from his feet. This really made it look more 3 dimensional and realistic!
Well I’ve had a lot of fun making some attractive products with this painting in my shop, please click any below and have a look!
Science teachers would love this! You can put whatever words you want on it.
I love this tee-shirt! I ordered one for myself on the ‘value tee’, it was printed huge on the whole front! WOW, so much fun to wear! I know some Science teachers who’d love this! You can put whatever words you want on it.
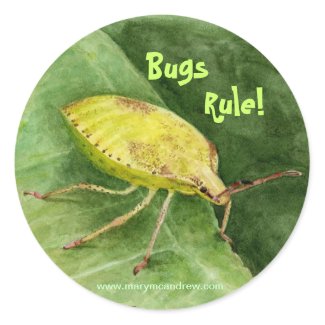
Glossy stickers, you can change the words if you like.
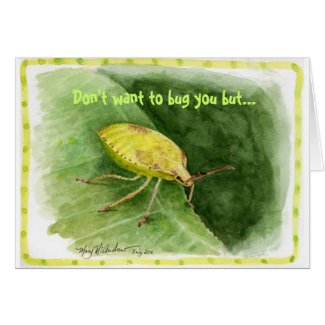
A great card when you need to ‘gently’ remind someone of something!
Hope you enjoyed my being “buggy”…love to hear from you, leave me some comments, shop in my store, but definitely have a great day!
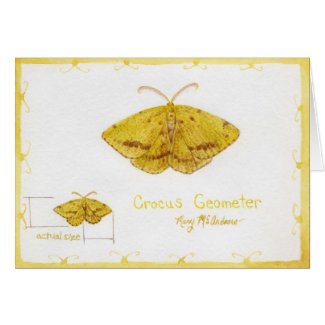
Crocus Geometer") Crocus Geometer Moth full page from my sketchbook journal In the morning when I let Ginger (my dog) out the back door for her morning wee, I always survey the screen porch to see if any visitors of the mothy type, have overstayed their visit. I used to leave the screen door open so I could be lazy and Ginger would just run right out, but stopped when too many flies were coming in! But I did get all kinds of moths in there! Well even with the door shut, some do sneak in and that’s how I found this little guy. Well sad to tell you it wasn’t alive, but laying on the floor in perfect condition. So I gently, gently picked it up and put it in my “Crisco” container for study.
Above is a full sketchpage from my journal, I did a life size study in the lower left corner and an enlarged size in the middle. I had fun with the border by just using my waterbrush with a matching color and added little ‘butterfly’ heads.
 My set up when I sketched the moth You can see in my picture that I lay the moth on the lid of the “Crisco” container and that way I was able to move it around as I worked. My watercolor pan is under it and the sketchbook is on my little table top easel box. (you can see my last page from the lady bug post!)
 small painting sketch") Drawing a study at the same size first Now here I’m showing how nice it was to sketch the same size study by having the moth on the plastic lid. Using my pencil I did comparative measurements to compare the width to the height of the moth. Do you see those lines on the page? I put them just as a teaching tool, to show you that I found the measurement from inside wing to outside tip was the same measurement as the bottom of the wing to the top, his head I think it was. I always use comparative measurements when drawing!
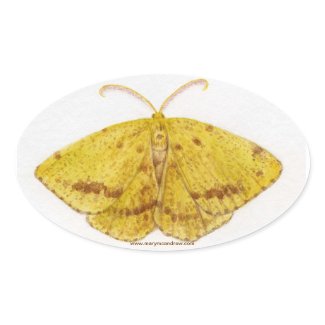
 Crocus Geometer 1") Such a gorgeous colored subject! Isn’t this a beautiful moth? His antennae were really elegant and graceful, very hard for me to paint with watercolor! The more I studied him under a magnifying glass the more I saw and appreciated it’s beauty.
 This is how my larger sketch looked at first. (Above) Now I’ll show you the steps I took to do the large painting of this Crocus Geometer Moth, mostly how I drew it. Do you see how boring and technical it looks? I know, but if you don’t start with a clear drawing done in PROPER PROPORTION it will never look right! Sorry, I”m not shouting, but it is REALLY important! If you do anything, learn how to draw well!
So I used my pencil to compare the width of the wings tip to tip to the measurement of the moth top to bottom. I put light lines on the paper then drew an arc as close to the shape of the ‘real’ moth subject as I could. Then I decided where the wings ended in the centre, keeping in mind that they overlap.
 The second stage is lightly sketching the placement of shapes, wings, body, head. Above you see a lot more drawn here; I drew an arc lightly for the bottom wings too, then decided where the two wings met and overlapped then drew them. I found the wing tips were half way between the head (top) and bottom wing edge, can you see how there’s a little ‘t’ at the tips?; that’s centre from top to bottom.
It’s really fun when you get into a drawing and start to find things that are the same measurement so you can check other parts of your drawing by comparing them! That’s why it’s called Comparative Measurements! (This is something I teach my students first!)
 Then I clean up the lines and decide how the outline will look. Look back and forth at the subject and drawing, look for areas that might be out of line and fix it now. After you feel your measurements are right, you clean up the light lines and decide on the lines you leave. Keep your final line clean and neat. Use your kneaded rubber eraser now to dab repeatedly at the line to lighten it as much as you can, just enough so you can still see it but you can do watercolor over it and not have it show.
Crocus Geometer - lg wc") Laying in some washes with watercolor and adding some details. Here I put the first washes of color on and then started to add where the dark markings are and light wing ‘ruffles’.
Crocus Geometer cr") Larger study of the moth finished. And here it is finished! I just kept adding the tiny spots and built up the larger dark markings. Sometimes it dries and just doesn’t look as colorful because watercolor can look lighter and duller after it dries. So I go back and add some light washes when needed to perk it up, I added bright yellow and more browns on this one. (ps. I did have trouble with the antennae! I need to practice how to do such tiny detail with watercolor!)
I’ve created some really pretty note cards and other things in my shop using this page from my journal, please have a look! Please forward my shop (or this post) to your friends to help me spread the word.
I love this tee shirt!
I’m showing you the page from my journal first, then I’ll tell you a little story about a ‘bug discovery’ I had. You’ll see on the right my studies from the lady beetle I found, bottom left is studies of lady bug ‘faces’ so you can see at a glance how this is a handy way to identify them. It’s not really their face but the pronotum which is the part just behind the head on beetles. Then I have a quote by Paul Cezanne and had some fun adding a old style border. (Please click on pictures for a BIG clear image!)
MC Lady Beetle") Multi-Colored Asian Lady Beetle studies You can read my note that the one leaf I actually traced to get the exact size on my paper. That’s a great thing to do when you’re making ‘scientific’ type notes and it saves time for studying other things about your subject.
Ok…now to get on with my bug story. Now this is really exciting, well for someone who’s interest in bugs has really peeked this summer it is!
 Multicolored Asian Lady Beetle pupa When I went out to get the mail I find myself looking down at the weeds in my front ditch near the driveway. I’m getting more used to spotting insects and today was no different.
 Multicolored Asian Lady Beetle pupa 2 I thought it was some kind of small bug but I didn’t have my (reading) glasses on so I didn’t really see what I was looking at as clearly. 😉
 Multicolored Asian Lady Beetle pupa 3 Well after taking pictures of it I gently set it down by some weeds in my yard, but when I looked at the enlarged pictures on my computer I realized what it was! I double checked in my Field Guide and yup, it’s a Lady Bug pupa. It’s a pupa just like butterflies come out of!
 Multicolored Asian Lady Beetle pupa 4 It was when I saw this picture that I realized it was hatching right now! Yikes!
 Newly hatched Lady bug So I ran back out into the yard and found where I had put it, brought it inside and put it in my plastic “Crisco” container you’ve seen me use before. He/she slept in this overnight (yes in my living room!) and the next morning there it was, all fresh and yellow, a brand new Lady Beetle! How cool is that?
 Newly hatched with wings still very tender Can you see the clear ‘spots’ on it’s yellow wing covers? I had a suspicion that these spots would turn into black spots we all are familiar with. And I think just like butterflies do when first emerged, I think it was letting it’s wings ‘develop’ and firm up…they looked quite tender at this point.
 Newly hatched lady beetle It looks like a little lemon seed, I love it!
 Multicolored Asian Lady Beetle with it's spots developed Well what did I tell you? The very same Lady Bug now with it’s spots all developed. I released it as soon as possible onto the same weeds I found the pupa on. What a wonderful experience it was to see this Lady bug go through these changes!
My eyes are getting better at noticing little things on the weeds and plants around my yard and land. I find that I’m seeing many more bugs, interesting eggs and pupas. If you take your kids out on a bug hunt, tell them to pretend that they have “Eagle Eyes” or “Superman Vision” and they need to stand still, zoom in on leaves and watch for little things. It’s a wonderful hobby to get kids interested in, especially if you loan them a small camera like I use, and get them photographing them.
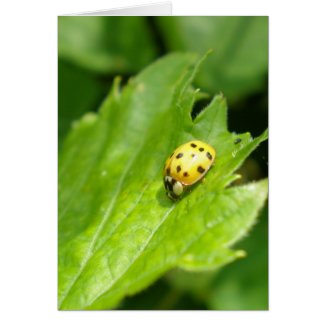
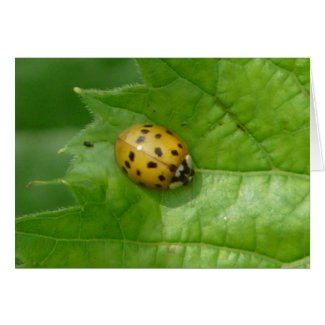
This little beetle is definitely waiting patiently on my list of things to be painted! Below are some note cards I created using the “Multi Colored Asian Lady Beetle” pictures.
|
Welcome to my Blog! The most up to date information about my artwork, nature sketching adventures, or step by step demonstrations. Search using Categories or Tags, or use the search box in the left column.
Please sign up below to get notified when I post new articles.
|
lane with arched branches")
snail cr")


under the oak (2)")
squirrel tail")
Mourning Cloak Butterfly (21)")
P1260816")
P1260805")
P1260801")
P1260839")
goldcrest L")
goldcrest R")


grasshopper 7 (3)")
fat yellow grasshopper (5)")

Long Lane Farm in August")
7-13-11 Eastern Tailed-Blue (9)")
7-13-11 Eastern Tailed-Blue (10)")
P1230732")


coffee stain moth 1")


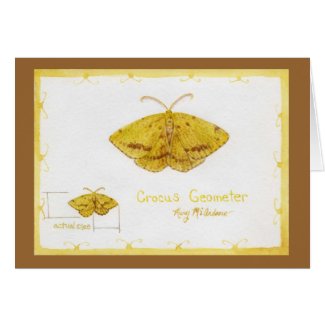
Crocus Geometer")

 small painting sketch")
 Crocus Geometer 1")


Crocus Geometer - lg wc")
Crocus Geometer cr")

MC Lady Beetle")