“Eurasian Eagle Owl” 12-31-08
Another bird of prey you say?? “YES!” say I! Well I decided that I’d concentrate on birds of prey amongst…
Painting + Illustration
Painting + Illustration
Another bird of prey you say?? “YES!” say I! Well I decided that I’d concentrate on birds of prey amongst…
In this post I bring you two owls, both are Barn Owls but look very different. The first is a…
This is a tiny little watercolor painting I did on New Year’s Eve morning, while drinking my coffee and looking…
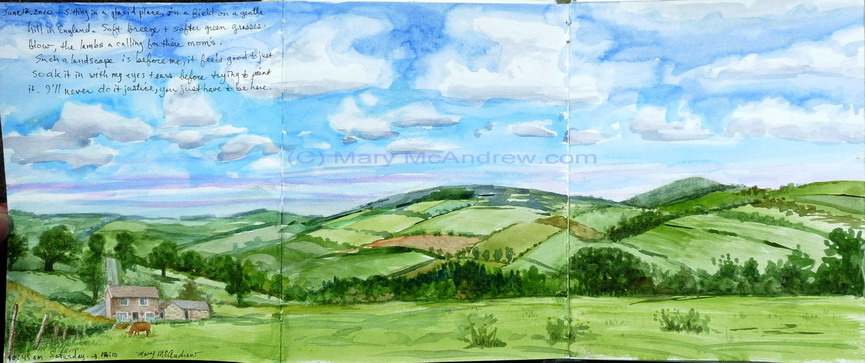
You can read my notes on the page, really not much to say about this other than it was very…
I did this sketch obviously while waiting to eat at Friendly’s in Endicott NY. I went to visit my dad…
It was a full moon a few nights before, so tonight as I saw the glow of the moon trying…
Today was my second day at Muncaster Castle. I’ve uploaded a video for you to listen to at the end…
The sunrise was just too beautiful to ignore. While I was making my morning coffee, I kept looking out the…
Imagine the most beautiful valley you can. The mountains surrounding the valley are covered with rusty reds of Bracken changing…
This is a watercolor study I did to as a demonstration for my fall Nature Sketching and Painting Indoor class…

I did this little sketch (5″x5″) in October, but wanted to post it before too much time slips away! I…
This is about my first day in England and the drive across the country through the Lake District to Ravenglass,…