|
|
My New Sketchbook! (please click pictures for clearer view)
 I had fun decorating the cover of my new sketchbook! Sometimes you just need a new sketchbook. A fresh start along a new path. Something that allows you to jot down all your creative ideas, no matter how small. I’ve put so much of my art career on hold this past year because of preparing to move to England. Lately (as you may know) I’ve been exploring the art of felt making and silk painting and that ties in here too! I wanted a sketchbook that I could draw ideas in and tape things in like a scrap book. So I created this big sketchbook that is meant to stay in the studio, not venture outside for hikes.
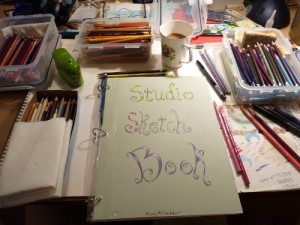 I surrounded myself with color pencils and just had fun! A sketchbook to an artist is like a living thing; we tell it our inner thoughts and ideas, inspirations, by drawing, writing and painting in it. It becomes the very closest, best friend you’ve ever had! Sometimes we share what’s on the pages freely, enjoying the reaction and feedback from those we share it with. But it’s also nice to have a sketchbook that is just for you, that you decide how much of it you’ll share. Most of my sketchbooks the past few years, have been very public; nature sketches done while walking here in New York or in England. I LOVE sharing them! When I was in England it was enjoyable to let interested strangers look through my pages, finding out what they liked best, hearing their comments about places I painted that they recognized. But my new sketchbook I’m ‘allowing’ myself to share only what I want, PHEW! It’s funny the feeling of freedom you get just making that decision as a teacher and one who loves sharing their work.
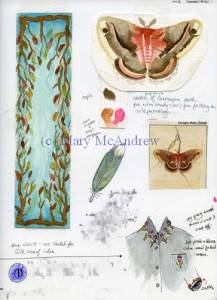 The first page in my sketchbook, totally geared towards felting and silk painting. This is the first page in my sketchbook; you can see it’s all geared towards felting and silk painting. Instead of worrying about this new love distracting me from my illustration and painting, I embraced it because I saw it as good practice while my mind is occupied with other things. I taped some watercolor studies in later used the space around for more notes and ideas.
 Working on the letter “S”. I drew the letters free-form on the cover (which by the way is a piece of colored mat board), later realizing that I should have made them fatter. So I added onto them and it still worked alright. I had fun making the letters look like shiny ribbons.
Ok, what I love about my new sketchbook is the size! I used full sheets of 9 x 12″ papers from various sketchpads. I put bristol board, watercolor papers, card stock and plain drawing paper for an assortment and labeled each in tiny letters along the edge. This way I can continue to test and evaluate what paper I like best. I’m used to working in sketchbooks half this size for drawing and painting in the field.
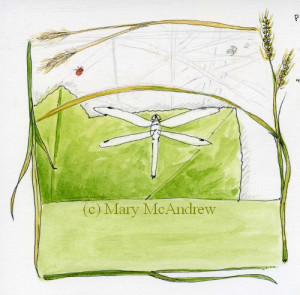 My sketch in progress, for a new poem, “Red Dragonflies”. The very best thing I’ve found use for on these big pages, is that I can jot down a new poem and then right next to it do sketches of my ideas for illustrating it! I was in the garden in September and enjoyed watching two red dragonflies, landing on the leaves, sunning, glittering. When I went in the house I started writing a poem about them and did four stanzas. The next day I added two more and then at the end of the month I tied it up with two more! But the best thing is I sketched an idea of an illustration right next to it, while looking at photos I took of the dragonflies. As I have time I’m adding a bit of watercolor and working on the little sketch.
I also put notes around sketches for ideas of what to put in the painting, like colors and subjects, as below.
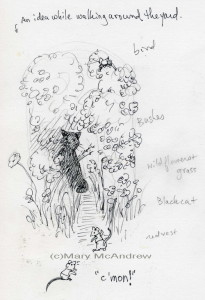 An idea I had for a funny illustration, while walking around my backyard. One day while walking around my yard I noticed the little paths that go into the tall grasses along the edges of my yard. I always look at these and imagine the critters who walk on them and think they’re great subjects for my stories. Well there’s a stray black cat that hangs around my yard sometimes and after seeing the paths and thinking of the cat, I drew this funny little sketch! The cat is waiting in the shadows…but he doesn’t look mean, is he going to eat them? Or is he a friend? The one mouse beckons to the other, “C’mon”….as you wonder what will happen. The little wren at the top looks on.
So there is the evolution of my new sketchbook! Lots going into it and I’ll try to post more soon! Please leave comments below, I love reading them and responding!
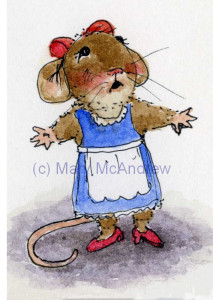 Sketch for a little girl mouse.
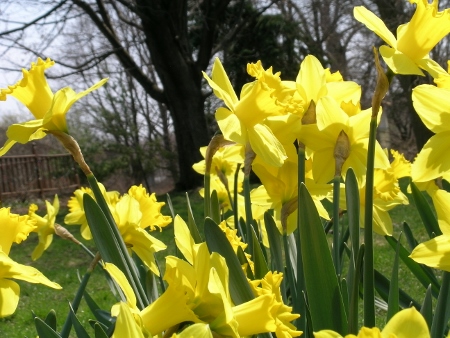 Springtime Daffodils With Spring making it’s appearance I thought it a good time to remember the beautiful poem by William Wordsworth, one of England’s most famous and loved poets. He wrote this poem inspired by a walk on April 15 by Lake Ullswater, in the Lake District, the shores of which even today are full of Daffodils “fluttering and dancing”. His sister Dorothy accompanied him, which I imagine happened a lot as they lived together, even after he married Mary Hutchinson.
His sister seems to have had a talent too, as she wrote in her “Grasmere Journal” there by the lake on April 15, 1802, “the rest tossed and reeled and danced and seemed as if they verily laughed with the wind that blew upon them over the lake”. I copied the entire text from Wikipedia of what she wrote and include it below, after her brother’s poem. I include it because I think it’s so beautiful and insightful and we know it inspired her brother a full two years later in 1804, to write his famous poem. Now I love hearing about someone using their journal like that, just as I would have done! And though they experienced this beautiful scene 211 years ago, we can still relate to it today, which is what makes it timeless.
“The Daffodils” or “I Wandered Lonely as a Cloud” by William Wordsworth
I wander’d lonely as a cloud
That floats on high o’er vales and hills,
When all at once I saw a crowd,
A host, of golden daffodils;
Beside the lake, beneath the trees,
Fluttering and dancing in the breeze.
Continuous as the stars that shine
and twinkle on the Milky Way,
They stretch’d in never-ending line
Along the margin of a bay:
Ten thousand saw I at a glance,
Tossing their heads in sprightly dance.
The waves beside them danced; but they
Out-did the sparkling waves in glee:
A poet could not but be gay,
In such a jocund company:
I gazed — and gazed — but little thought
What wealth the show to me had brought:
For oft, when on my couch I lie
In vacant or in pensive mood,
They flash upon that inward eye
Which is the bliss of solitude;
And then my heart with pleasure fills,
And dances with the daffodils.
To read more about William Wordsworth visit this page we created about him on the “Old School Tours” website.
Below click on the beautiful painting of Lake Ullswater by J. M. W. Turner to see it enlarged.
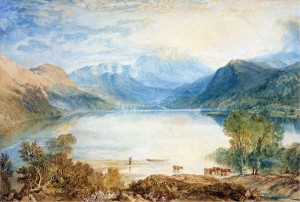 J. M. W. Turner – Ullswater from Gobarrow Park It’s just ‘that beautiful’, but I especially like the dreamy way Turner captures the landscape.
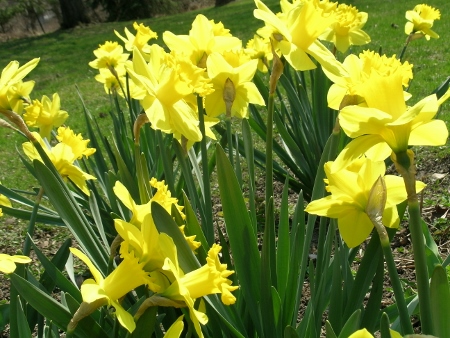 “Fluttering and dancing in the breeze” And here’s the copied text of what his sister Dorothy wrote:
“When we were in the woods beyond Gowbarrow park we saw a few daffodils close to the water side, we fancied that the lake had floated the seed ashore & that the little colony had so sprung up — But as we went along there were more & yet more & at last under the boughs of the trees, we saw that there was a long belt of them along the shore, about the breadth of a country turnpike road. I never saw daffodils so beautiful they grew among the mossy stones about & about them, some rested their heads upon these stones as on a pillow for weariness & the rest tossed and reeled and danced & seemed as if they verily laughed with the wind that blew upon them over the Lake, they looked so gay ever dancing ever changing. This wind blew directly over the lake to them. There was here & there a little knot & a few stragglers a few yards higher up but they were so few as not to disturb the simplicity & unity & life of that one busy highway — We rested again & again. The Bays were stormy & we heard the waves at different distances & in the middle of the water like the Sea.”
—Dorothy Wordsworth, The Grasmere Journal Thursday, 15 April 1802
Now isn’t that beautiful? It sets the scene in a real way for the famous poem her brother was inspired to write. And we know the date he was inspired, even though he wrote the poem two years later, because Dorothy had entered it in her journal on April 15, 1802! Sometimes I look back at my journals and read the dates, comparing how the weather is ‘this’ year as to then. I noticed that last year on Easter Sunday I was out sketching frog eggs and thinking of renewel of the earth. This year the frogs are calling like mad but no eggs yet! Today I’m headed out for an ‘explore’, we’ll see if we can find some. The point is, even if you just jot down some notes about the weather, how your plants are growing, or the birds you see, you can look back and remember. You’ll be surprised at how fresh it will stay in your mind especially if you draw or paint things, because you take time to really study and absorb the scene.
Enjoy today folks, happy spring!
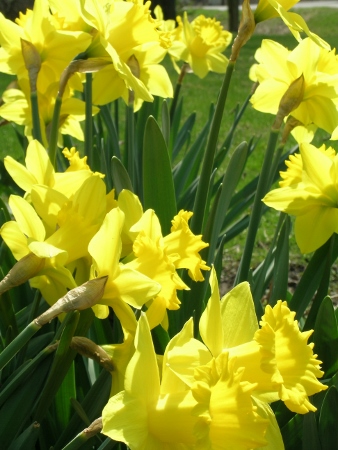 “A jocund company” All photographs (c) Mary McAndrew
ps. Sorry I don’t have drawings of my daffodils, but I have been doing sketches of fuzzy buds and will post those next!
It’s been weeks since I’ve been out in the field sketching, and now that I’ve been out I feel renewed! I guess that’s how we should feel in Spring. I put on my Wellies or “Mud Boots” grabbed my sketch kit and camera and set out. Come with me and I’ll show you my walk with sketches and photos! (Please click on pictures to view clearer.)
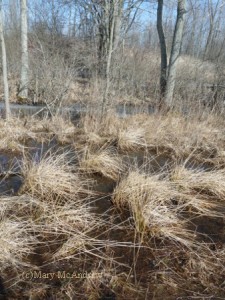 Dried grasses in “Pasture Lane” on the way to the pond. The first lane I walk in follows the pasture so it’s always been called “Pasture Lane”. No animals in the pasture now but still lots of wild things to look at. This lane has lots of nice dried rushes and sedges in it; I love this color, especially with the blue sky. It won’t be long I’ll be spotting all kinds of Nursery Web Spiders and underwater little nymphs and creatures.
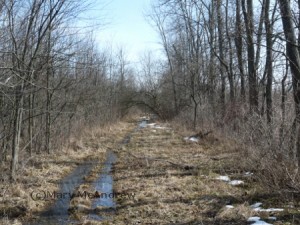 Natural arch of branches on Long Lane This is on “Long Lane”, looking towards “Aspen Hall” and it’s a natural archway of branches that’s been forming the past few years. I keep breaking branches when I go under it to keep it a bit under control! I’ve done sketches and paintings of it before, and not too long ago photographed it covered with snow! But as I was standing here I decided to go up “Memory Lane” to my left. This leads me to “Oak Lane”, one of my favorites, where I thought I’d check things out.
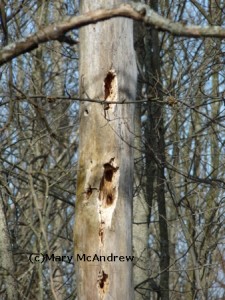 Woodpecker hole in dead tree by “Memory Lane”. Just at this intersection the woods are quite wet and I always see dead trees with lots of woodpecker holes. This one looks like it’s been freshly pecked at.
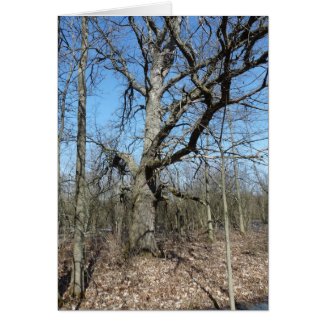
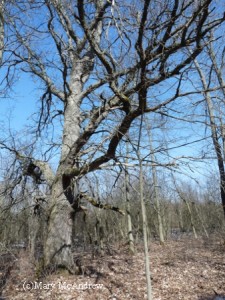 One of the ancient oaks in “Oak Lane”, standing tall and strong. I ended up in “Oak Lane” my favorite place on my property where the oaks are huge and tall, standing for many many generations. I made a little place to sit right up next to the tree at it’s base, by spreading my trusty garbage bag out, first checking for pokey sticks and bits. There I sat, ate a snack and enjoyed the peace, then did a small sketch of the grapevines growing about me. Hmm…funny but that seems sort of rhymy to me…lets see:
“Here I Sit”
Before I sat down
Upon leafy ground
I gave the spot a good scour
Where I’d while away the hour.
There were pokey sticks
And hard little bits
I had to clear before I sat,
So I could sit and have my snack.
Well, now here I sit
With favorite sketchkit
Having a think and a good look,
At what will go in my sketchbook.
by Mary McAndrew
Well that was fun! I just made that up!
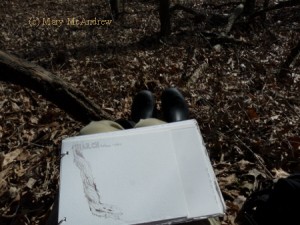 Here’s the start of my “Grapevine” sketch I put my sketchbook on my knees and decided to draw the big grapevine branch hanging near me…that’s it by my leg.
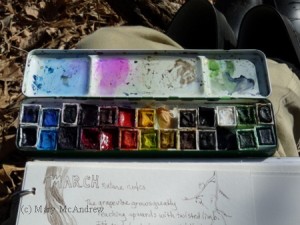 My watercolor palette, I just love the colors! There’s a close up of my watercolor palette I take when I go afield, it’s getting pretty stained now and I’ll have to look for a new one. Some of my colors I have in temporary little plastic containers, just to see if I want to add them to the kit.
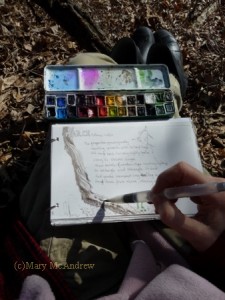 Using a waterbrush to paint. This is one of my waterbrushes, it’s actually not one of the more expensive ones but it worked great for me today. It has good juicy water-flow and the tip stayed sharp for details. I also wrote words about the grapevine on the page that I’ll type out below:
“The grapevine grows greatly
reaching upwards with twisted limb.
It’s rough bark twisting tightly tense
along it’s sinuous length.
Great muscle of wooden rope reaching right up
to entangle and strangle it’s host.
And gentle innocent long trailing tendrils
Hang down from above,
stirring in the breeze
to tease.”
by Mary McAndrew
As I wrote the words I let my mind think poetically and freely. I knew later I’d like to write a poem from some of the words I found because I liked the way they sounded together. Here’s the finished sketch below and then the new poem follows:
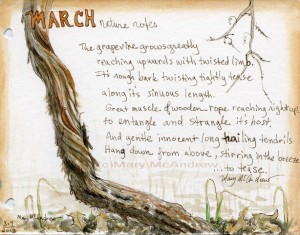 Grapevine sketch and words done in the field. Here’s my little poem I wrote just now while looking back at the words:
“The Grapevine”
Grapevine growing greatly
Reaching upwards with twisted limb,
Rough bark twisting tightly
Tense, sinuous and slim.
Great muscle of wooden rope
Reaching right up to entangle,
Clinging to unwilling host
As you wind about to strangle.
Gentle, innocent tendrils trail
Stirring in the breeze.
Stronger than you look so frail,
Climbing any tree you please.
by Mary McAndrew
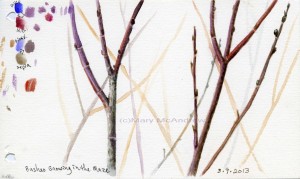 Watercolor started in the field of purpley red bushes. The watercolor above I did half in the field and half at home. On my way back I stood in an field we call “The Maze”, because of all the intertwined paths in it, all cut by me years ago using a tractor and brush hog. It was very difficult to paint the stems while standing there in front of them, tired, cold…but I loved the colors so much and wanted to try and ‘study’ it. When I got back I looked at photos I took using my computer, and did more detail and study. I found myself using Dioxizine Violet mixed with Alizarin Crimson for most of the purpley colors; mixing it with Sepia made a nice shadow color. I had to use a bit of Cadmium Red to brighten up the color here and there. You can see my color notes on the left side there. By the way, I can’t really recall what the name of the bushes are, I think “Red Pannacled…something or other! Sorry, I packed all my field guides up, I’ll see if I can look for them.
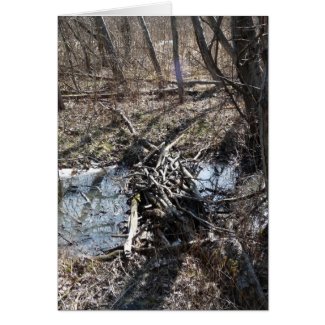
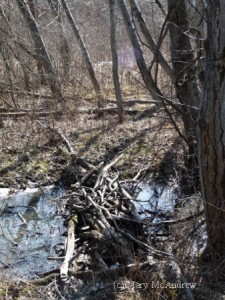 The old stick bridge at “Aspen Hall” This is the old stick bridge in “Aspen Hall”, I add to it every spring and summer, tossing on dead branches to go over the ditch. “Aspen Hall” is located along “Long Lane”, so I’ve done a circle and am coming back towards home now.
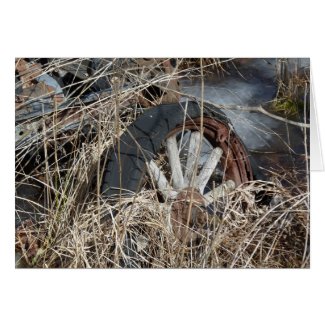
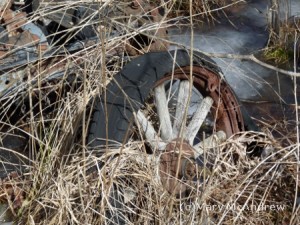 A very old car frame. This is a very old car frame just sitting by the pasture, it’s been there ages! I think the former owner of the farm told me it was Model T or Model A …wooden spokes! How cool!
I’ll leave you with one more picture from my spring walk…
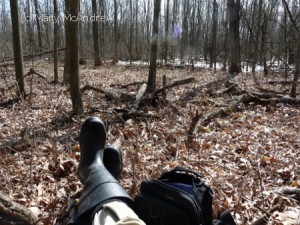 Ahhh…this is the life! I didn’t want you to miss my favorite picture! I love taking pictures of my boots when I go hiking, wherever I am. In my shop I have pictures of my boots in England too! Go here to my shop then scroll down left side column and click “Hiking – Walking + Boots”
Hope you enjoyed our ramble!
Click on the pictures below to see my photos as note cards, it has a nice ZOOM feature that’s lets you look closely.
“Great Old Oak Tree” glossy note cards
“The Old Stick Bridge” glossy note cards
“Old Wheel” glossy note cards
Today was cold, oh so cold but SUNNY!, and that makes all the difference in the world. It’s been a long while since I’ve sketched in the field (or while walking) since coming home from England.
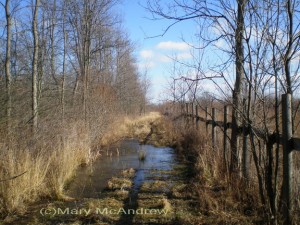 Pasture Lane in February, all icy and beautiful. I wore my mud boots or Wellies because I knew it’d be wet. The photo shows the wet lane and as I walked here and all through the field, it was creaking and cracking ice under foot. It was actually fun and reminded me of some movie scenes when you’d hear that familiar creaking of ice, just before the huge crack creased through the ice towards the unfortunate victim! Haha…oh but don’t worry, the water under ‘my’ ice is only a few inches deep! A tip from me, walk near the grasses along the edges of icy lanes, it’s more solid and less water underneath.
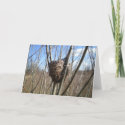
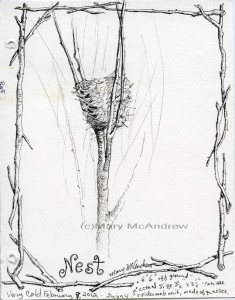 Bird's nest found in the field (click to see nice large image) I spotted this nest so clearly in the bare branches of a bush in the middle of my field. I walked over and found that it was actually above my head, probably around 6′ 6″ or more from the ground. I’m not sure what kind it is, I’ve seen Song Sparrow nests in this field but they were lower. I did a quick drawing while wearing my fingerless gloves, which makes it better but you still get cold! Drawing with a permanent ink pen, I tried to sketch and plan where I needed to ‘not’ draw the branches so I could put the nest in and not have unerasable lines. While I had the real nest in front of me I added the shadows to the branches.
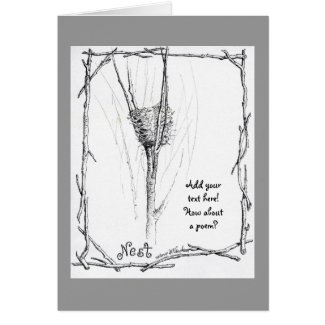
It was when I got home that I started to play around and draw twigs around the page like a frame. I did this as I waited for my water to boil, that nice cup of coffee I’d enjoy soon, to help me thaw. Now that I just studied real branches in the field, it was fresh in my mind and the most important thing is adding the shadows. Just pretend the light is always from the same side (mine was upper right side) and after you draw the branches, add the shadows. Now if I wanted I could add a poem along the right side; below I created a card, in my Zazzle shop, where you can do that!
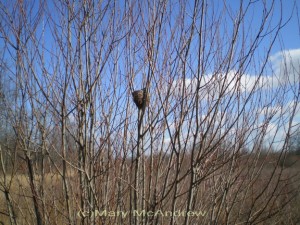 The birds nest up high in a bush Here’s a picture of the nest as it looked from back a few steps, up in the bush.
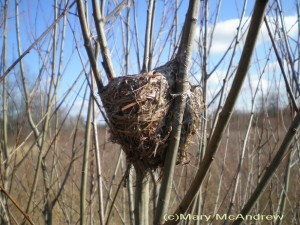 Nest up close. This shot shows the nest up close, I love having my tiny olympus camera in my bag for this type of shot. On purpose I left my ‘regular’ camera at home, determined to push myself to do a sketch today! Well, darn it, I still like taking pics of the beautiful landscapes, close ups of interesting things and if I do a sketch perhaps the subject I drew. I try to always have my tiny camera in my sketch kit. I thought the nest had spider web helping to hold it together but now I look closer and think it could be downy seeds instead. I love the colors of the woven grasses in the nest, though being that it was so cold outside, I really didn’t want to pull out my watercolors as I stood in front of it drawing.
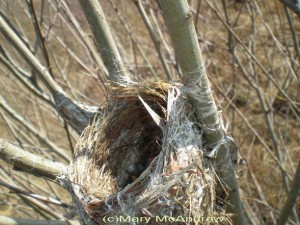 A view from above by holding the tiny camera up high. And here’s the last shot, I held the camera up as high as I could and pointed it into the nest. It’s in such good shape after a whole winter, I’m so glad I spotted it and did my sketch today.
I’ve created some note cards using my photos and sketch in my Zazzle shop, please click any below and have a look! (I especially love the last one!)
“Pasture Lane in February” Note Card
“Birds Nest in February” Note Card
“Birds Nest in Winter Sketch” Note Card with changeable color background
“Birds Nest in Winter Sketch” Note Card with changeable text!
If you have any trouble adding the text you want, please email me and let me help you.
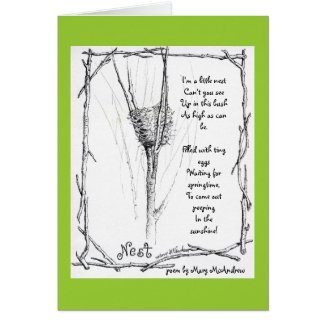
I couldn’t resist, I wrote a poem to go on this card! Please click to see it!
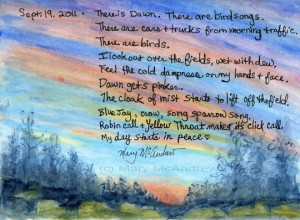 Sketch at dawn in watercolor pencils Today I stepped outside quite early, before the sun was up in fact. I took my sketch journal, waterbrush, watercolor pencils and ink pen and left the camera behind (but not Ginger of course). I sat on the edge of a very damp and cold picnic table that wobbles from age, and used watercolor pencils to quickly record what I could see.
This was easier than watercolors because I could just sketch across the paper quickly trying to guess at how it’ll look once I wet it. I laid down as much of the color as I could before adding water, once you wet it you can’t just scribble color on. Once it’s wet you can add color in two ways, using the tip of your brush to pick up color from the pencil tip, painting with it like watercolors or you can draw directly on the damp paper but the color will be intense and hard to blend or lift off. This is what I planned on to put the darker trees at the bottom, I wanted some of their branches to stay as drawing and fuzz out around it to look like foliage and mist.
The thing about plein air painting a sunrise is it changes so fast. Try to work as quickly as you can then either don’t look any more or peek for ideas to check colors and see cloud shapes etc. I try to avoid one problem that I run into, that’s adding yellow to the clouds then having blue sky wash over it or mix with it….and as you learned in elementary school…yellow and blue makes green! So…a bit of green tint sometimes appears in my sky! Try to blot up mistakes or intense color right away with paper towel and re-wet and blot as you need to.
I wrote the words before I did the drawing, just words of what I could hear, not a poem but kind of a way to get into the moment. If you don’t think you can write poetry or something clever, just write what you can hear. In case it’s hard to read, here’s my words on my painting above typed out:
“Sept. 19, 2011 – There is dawn. There are bird songs.
There are cars and trucks from morning traffic.
There are birds.
I look out over the fields, wet with dew.
Feel the cold dampness on my hands + face.
Dawn gets pinker.
The cloak of mist starts to lift off the field.
Blue Jay, Crow, Song Sparrow song.
Robin call + Yellow Throat makes it click call.
My day starts in peace.”
Well my day started in peace and ended with some stress I guess, my laptop died again and this time I think it’s permanent. I’m having burial services soon, in the meantime I got a Netbook…tiny little thing! We’ll see how we do with it. I had to get something portable as I’ll be leaving very soon for ENGLAND!!! YAYYY!! Please tune in to my blog page (you can subscribe to posts in the right column) and see what I find on my adventures. I’ll be studying nature and taking pictures and we’ll see what else. Eventually I’ll be doing some classes and if you want to come to England to do some sketching, I’ll be doing a tour or two this coming summer there. More on that later, if your interested in that idea email me so I get a feel for what people might like.
That’s all folks! Hope you enjoyed my post today. I have lots of new caterpillar discoveries to share soon, I just have to organize all the photos I shot to go with the paintings I did.
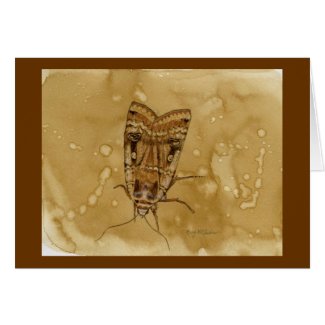
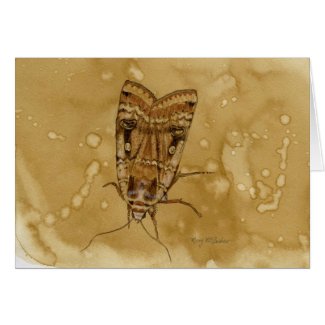
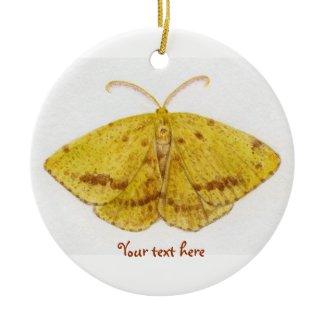
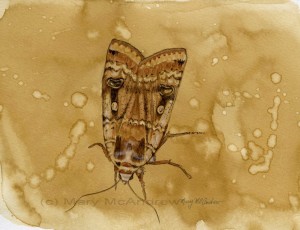 Watercolor moth painted on coffee stained paper This moth is a little watercolor painting I did on coffee stained paper (click it to see it larger and clearer). Using instant coffee to stain your paper is something I taught in my Creative Journaling class. It’s great to use lightly on your paper to make it look antique or like parchment. Here I just played with it like watercolor and brushed it around, then splattered water drops into it. Let it dry totally then you can draw or paint on top of it as I did. I have a few small sheets that I did at the same sitting, so I can grab one when I’m in the mood and use it. I lightly sketched with pencil first then just used burnt umber, burnt sienna, black and a touch of white for highlight. This was from a “Yellow Underwing” moth I photographed last year.
I have always loved the illustrations of Arthur Rackham and it’s the works he did using mostly brown colors that inspired me to work with brown tones alone. Click on any of the illustrations to see cards or gifts I created in my shop! There’s more items coming in the category Vintage Illustrations.
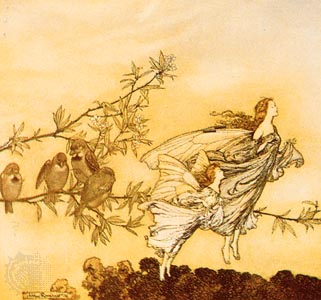 Flippant Fairies Floating Freely Just look at how gorgeous this painting is!! Sigh…I love his work. (Sorry I don’t have a bigger copy to view) The background is just subtle tone, there’s a hint of tree tops below and then the sparrows come into view as they nonchalantly go about their business of preening. The branch is laid out as a perfect design element reaching across the paper and reaching up to lead your eye but not take you totally away from the subject of the fairies. Yes, those fairies, painted lighter than the rest to really make them stand out, aren’t they wonderful? Not having pointy ears, pointy eyes, pointy hair, sexy clothes and striped socks. Good God some of the awful modern day interpretations of what a fairy is is shocking! Just plain tacky and awful!
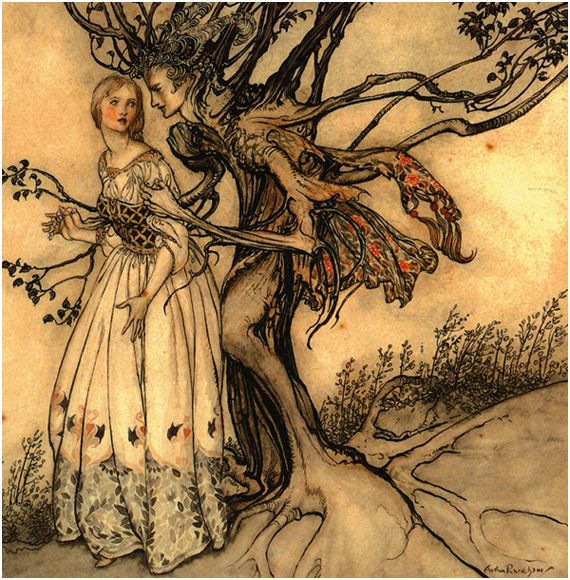 Oh but this is one of my favorites! This is one of my favourites! SIGH….that’s how I feel when I look at work by another artist I revere. I love her dress, the attention to it’s detail but it doesn’t take over the attention of the piece, do you notice how the lower part blends into the tone of the ground and the skirt is the same as the background? It’s all married together, floating but on the same ground, do you know what I mean? Just like the tree roots coming from nowhere out of the paper and growing up into this tree that is alive. I love how he combined just enough elements that say man and tree at the same time, the fabric hanging adds a touch of color that picks up in her cheeks and it’s form adds a floating liveliness to the painting; movement. Not to mention the tenderness of the way they clasp hands….sigh.
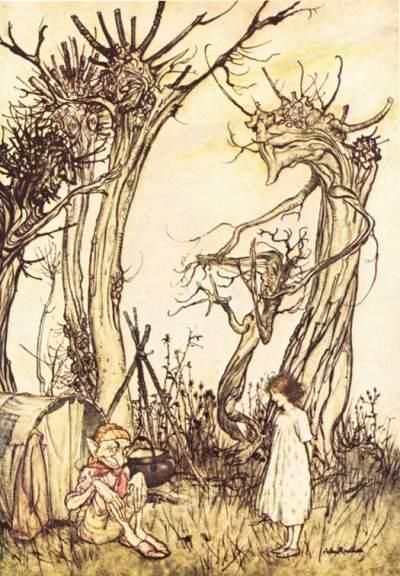 Subtle tones means less distraction In “The Man in the Wilderness” above, I love the way he draws his trees to be just like people, look at the ‘arms’ of the one in the background reaching up to the sky. For a child (or adult) reading the story this illustration would be something to pause over, study and discover. They’d see the obvious girl and elf and think about what they are doing but then they’d look at the trees and realize with delight they have faces and arms! Here again I like how he’s used such simple color to make this illustration, just a simple bit of red and gold on the elf to show the main subject. I can’t wait to use the card in my shop (click picture to see) as an invitation or birthday card, “Can we meet for tea?” “May your day be full of discovery”. Oh, how about a funny one for your friend…”I know you’re kind of different….but I like you all the same!” haha
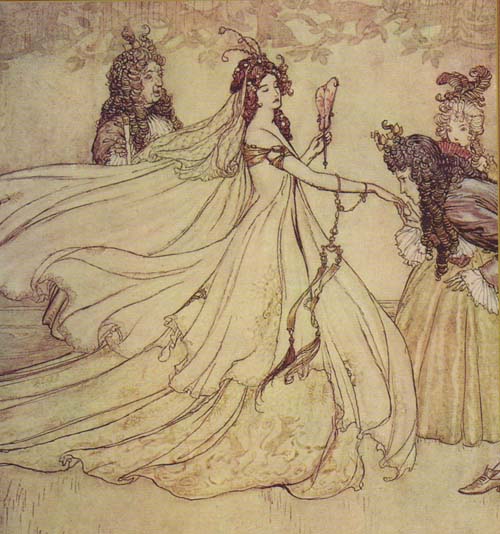 The Queen floats in as if on air This illustration shows use of line at it’s best, do you notice how in some places it’s thicker and heavy then it gets thin and light? This is very important in drawing, good drawing. This one is definitely more of a drawing than a painting, hardly any range of values used, quite flat. It’s all about the lines and what lines!, all swirling and curling, sweeping like there is a magical breeze blowing just her skirts and delicate lace veil. To give some depth and interest I like how he put the pale leaves and branches at the top then used a light similar design on her skirt in just the front.
I have wanted to do drawings and paintings starting with a freely painted base of brown or parchment colored paper for ages. The moth is my first one I guess, though I’ve done paintings before that are monochrome browns, (Autumn watercolor, Etain oil, Twilight oil) they were never started on a freely tinted paper. By that I mean a piece of paper where you just play with the color and use water drops and salt to add interest and you end up with something that in itself looks good. I’ve played with coffee staining before (as you can see on this post) but never got around to painting on them. So I’m hoping to do some more starting with small studies like this moth. Hope you enjoyed my discussion on using browns and the great Arthur Rackham! (more sighs) Oh, and I found an excellent, though old, article written about a show of his works in London in 2002 here on the “Telegraph”.
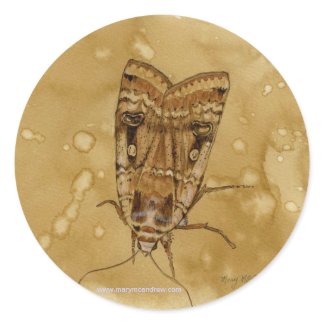
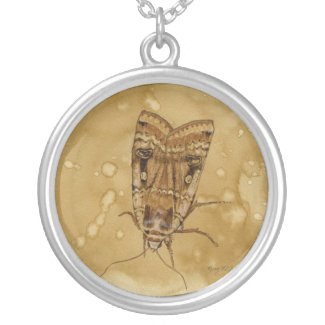
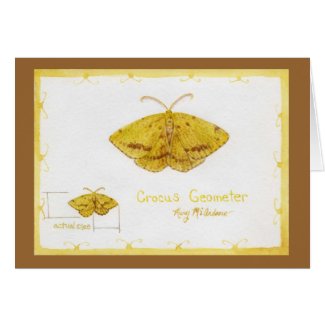
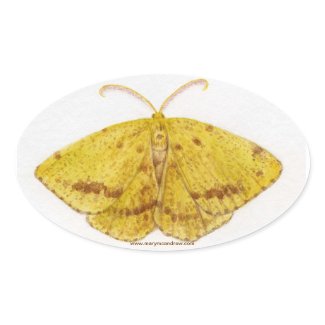
Below are a few items I designed with the Moth painting on it, please click the picture to see them in my shop. Enjoy and let me know if you’d like it on another item!
Try these stickers out, they’re glossy and I love ’em!
Below, Sterling Silver necklace!
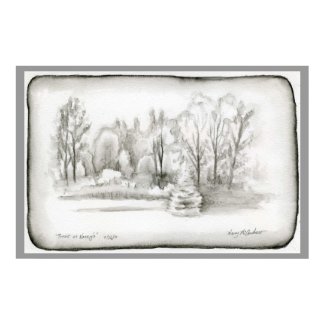
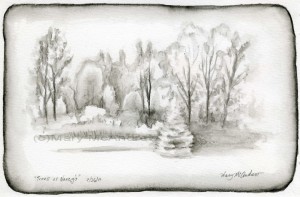 Trees at Nancy's - Inktense 'Ink Black' watercolor pencil (Please click on the pictures to see them clearer, use the back button to return)
I had a chance to visit with my friend Nancy the other day and we sat on her back deck to do some sketching. We had a nice view; just behind her place is a small pond with trees on the other side. I was showing her how to do something simple by just using one watercolor pencil, the Inktense “Ink Black” by Derwent Pencils. I keep one in my kit always because sometimes it’s nice to just do a sketch with a waterbrush using this one pencil. The nice thing is you can go back over your black and white study with color after, the Inktense pencils will not lift off like watercolor can. It IS a VERY intense pencil, go very lightly at first and see what it does when you wet it. I started with the simple border as kind of a warm up, just draw a line around your page then use your waterbrush to wet it. To get it to look like mine, keep your brush ‘inside’ the line with the tip always touching and rubbing the line, letting the color run into the wetness left behind from the brush.
Sketch your scene lightly, trying to do most of it before you wet it. Once you wet the paper you’ll have a hard time adding more lines because they will be very dark and intense! If you need to just touch your waterbrush to the tip of the pencil to pick up more ink, then use your brush to add it to the sketch. Test how dark it is on a piece of scrap paper before you touch your sketch, this will help you avoid mistakes. I really like the look of this, sort of like an old antique picture.
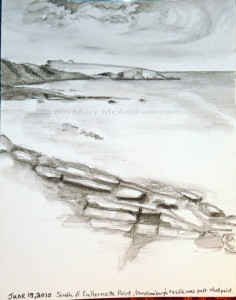 Sketch of Cullernose Point from the south Here’s a sketch I did in England last year, along the coast of Northumberland, of Cullernose Point as viewed from the south. I had my sketch journal with me (OF COURSE!!) and because we wanted to keep walking, just sitting a bit and doing a sketch with no color worked well. I used my waterbrush and especially like how the clouds came out.
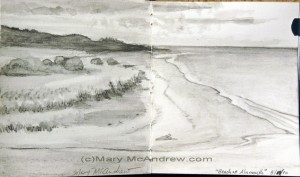 Alnmouth, Northumberland -water soluble graphite Now I thought I’d add this one too just to show how nice it can be to do non color studies. This was done with water soluble graphite, not the colored type, just plain old graphite color! We were at Alnmouth, Northumberland England; a beautiful coastal spot! I did it in my tiny sketch journal which was so much fun to use! It was a wonderful experience to stand on the hill at the coast and capture the scene forever in my memory. Please read my post about it here to see the wonderful photos I took that day! I loved being there and can’t wait to go back for more! I love, love, love England!
I hope you enjoyed my little ‘non color’ sketches, as I said they’re a great way to capture a scene without the worry and time of adding color. And thanks to my friend Nancy for a nice visit! (ps. I photographed lots of dragonflies at her place and two of them were new for me!) I created a really nice print and greeting cards in my shop, see the links below! I love the dark grey background with it.
 Make your own card at Zazzle
When you see this print in my shop (below) don’t be scared by the price! It shows you the huggest size but can be ordered as a 16×11 for only $11.20 too!
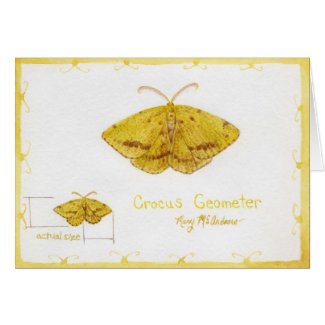
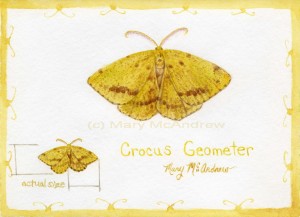 Crocus Geometer Moth full page from my sketchbook journal In the morning when I let Ginger (my dog) out the back door for her morning wee, I always survey the screen porch to see if any visitors of the mothy type, have overstayed their visit. I used to leave the screen door open so I could be lazy and Ginger would just run right out, but stopped when too many flies were coming in! But I did get all kinds of moths in there! Well even with the door shut, some do sneak in and that’s how I found this little guy. Well sad to tell you it wasn’t alive, but laying on the floor in perfect condition. So I gently, gently picked it up and put it in my “Crisco” container for study.
Above is a full sketchpage from my journal, I did a life size study in the lower left corner and an enlarged size in the middle. I had fun with the border by just using my waterbrush with a matching color and added little ‘butterfly’ heads.
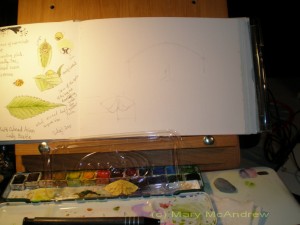 My set up when I sketched the moth You can see in my picture that I lay the moth on the lid of the “Crisco” container and that way I was able to move it around as I worked. My watercolor pan is under it and the sketchbook is on my little table top easel box. (you can see my last page from the lady bug post!)
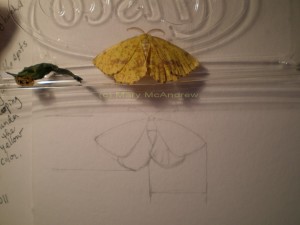 Drawing a study at the same size first Now here I’m showing how nice it was to sketch the same size study by having the moth on the plastic lid. Using my pencil I did comparative measurements to compare the width to the height of the moth. Do you see those lines on the page? I put them just as a teaching tool, to show you that I found the measurement from inside wing to outside tip was the same measurement as the bottom of the wing to the top, his head I think it was. I always use comparative measurements when drawing!
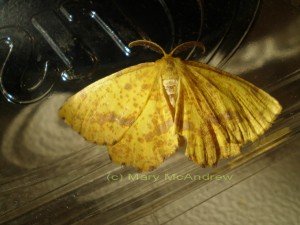 Such a gorgeous colored subject! Isn’t this a beautiful moth? His antennae were really elegant and graceful, very hard for me to paint with watercolor! The more I studied him under a magnifying glass the more I saw and appreciated it’s beauty.
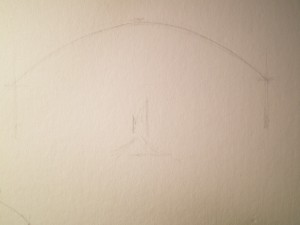 This is how my larger sketch looked at first. (Above) Now I’ll show you the steps I took to do the large painting of this Crocus Geometer Moth, mostly how I drew it. Do you see how boring and technical it looks? I know, but if you don’t start with a clear drawing done in PROPER PROPORTION it will never look right! Sorry, I”m not shouting, but it is REALLY important! If you do anything, learn how to draw well!
So I used my pencil to compare the width of the wings tip to tip to the measurement of the moth top to bottom. I put light lines on the paper then drew an arc as close to the shape of the ‘real’ moth subject as I could. Then I decided where the wings ended in the centre, keeping in mind that they overlap.
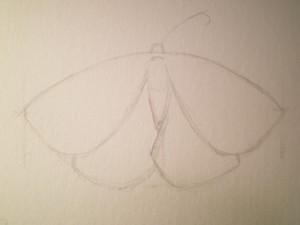 The second stage is lightly sketching the placement of shapes, wings, body, head. Above you see a lot more drawn here; I drew an arc lightly for the bottom wings too, then decided where the two wings met and overlapped then drew them. I found the wing tips were half way between the head (top) and bottom wing edge, can you see how there’s a little ‘t’ at the tips?; that’s centre from top to bottom.
It’s really fun when you get into a drawing and start to find things that are the same measurement so you can check other parts of your drawing by comparing them! That’s why it’s called Comparative Measurements! (This is something I teach my students first!)
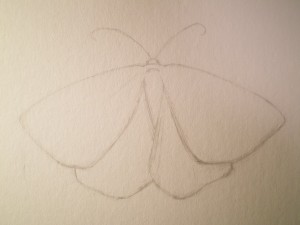 Then I clean up the lines and decide how the outline will look. Look back and forth at the subject and drawing, look for areas that might be out of line and fix it now. After you feel your measurements are right, you clean up the light lines and decide on the lines you leave. Keep your final line clean and neat. Use your kneaded rubber eraser now to dab repeatedly at the line to lighten it as much as you can, just enough so you can still see it but you can do watercolor over it and not have it show.
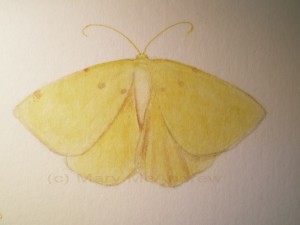 Laying in some washes with watercolor and adding some details. Here I put the first washes of color on and then started to add where the dark markings are and light wing ‘ruffles’.
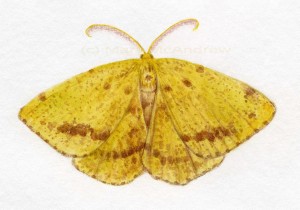 Larger study of the moth finished. And here it is finished! I just kept adding the tiny spots and built up the larger dark markings. Sometimes it dries and just doesn’t look as colorful because watercolor can look lighter and duller after it dries. So I go back and add some light washes when needed to perk it up, I added bright yellow and more browns on this one. (ps. I did have trouble with the antennae! I need to practice how to do such tiny detail with watercolor!)
I’ve created some really pretty note cards and other things in my shop using this page from my journal, please have a look! Please forward my shop (or this post) to your friends to help me spread the word.
I love this tee shirt!
(Click on any picture to see larger, picture links at the end of the post go to my shop, enjoy!)
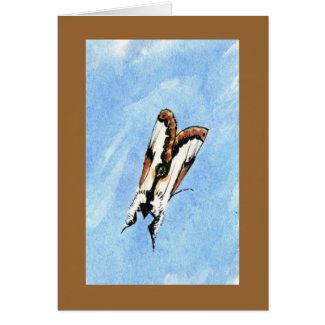
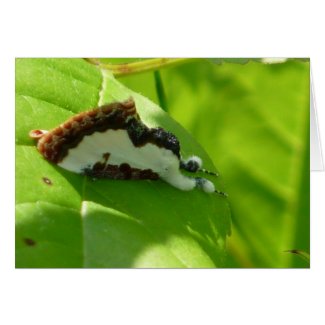
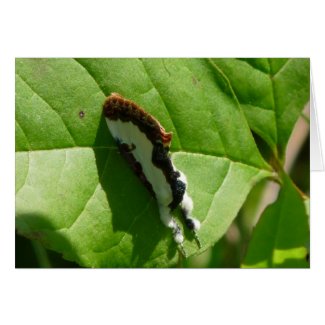
 The "Beautiful Wood-nymph" moth...my newest discovery! As your family and friends get to know how much you love to study new bugs and things, they will start to point things out to you that they find. This is great because it’s more ‘eyes’ watching for things than just your two. Well my son Paul, home from college, said there was an interesting moth on the back screen. I didn’t pay much attention until he again said, “Mom, you really should look, it’s really different looking!”
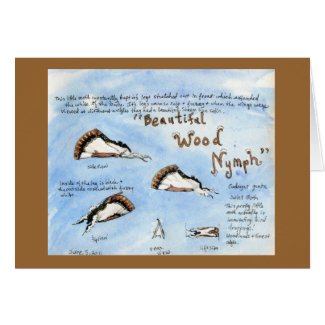
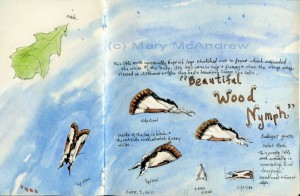 My two page spread of studies from life of the moth. Glad I listened and glad I looked! It was a small moth who must have made it’s way onto my porch looking for the lights. Above you can see how I used two pages of my sketch book journal to do studies. I’ll share with you the steps I usually take when I find a new bug to study.
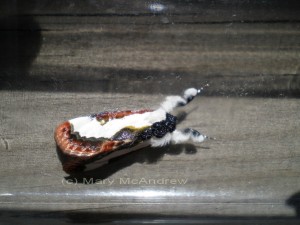 View from above taken with my tiny Olympus camera. Before anyone gets their portrait painted, I get as many photos as I can to file for references, maybe for a future painting or at least to properly identify it. I usually have some plastic containers around that I use, this one was perfect, it’s from a “Crisco Sticks” shortening package; the kind you buy with three sticks in a pack and they’re easy for measuring. One of the plastic containers has a lid and the whole thing is nice clear plastic!
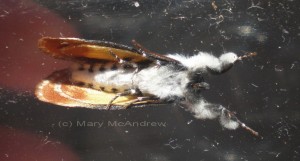 View underneath the moth, many times reveals a surprise color! I also have some fine mesh that I can put over the top with a rubber band, I never want to kill the creature (unless it’s a house pest, I may not be so nice then!) I love using my tiny Olympus camera to take the close up photos, it works great on the macro setting. This shot is through the bottom of the container. Another tip, I go outside into the natural light if I can to take pictures, the color is always so much better; this was taken in bright sunlight.
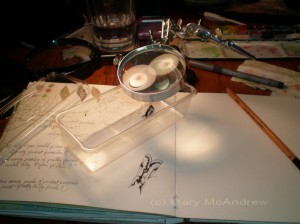 This is my set up showing how I positioned the moth under a magnifying glass. This photo shows you my set up for drawing. Now that I have lots of pictures to save, I put him under an old magnifying glass that stands up and start sketching. Do you see there is no lid? The moth was staying put, maybe because of the light, so I kept the lid off to work. I start with a light pencil sketch and then use permanent ink (you can see my pen in the background, this was an Itoya Finepoint System .2)
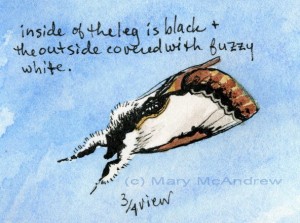 I did a 3/4 view to show another angle. This is a close up of one of the sketches, I try to do different angles to show various aspects of the bug. I thought the furry legs were fascinating! (and made it look ‘cute’ actually!) I colored him in after drawing with the ink, but sometimes I do it in the opposite order. I laid the washy blue background in after I colored all the moths, I wanted it to be lose and just ‘pretty’.
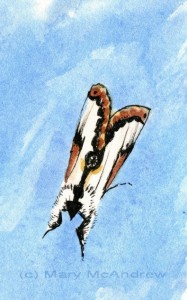 View from above of the Beautiful Wood-nymph. What an appropriately named moth…”Beautiful” really is in it’s name!
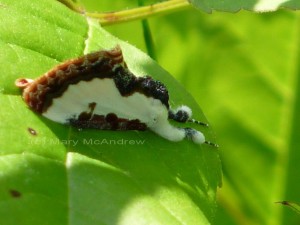 Beautiful Wood-nymph in the 'wild' on a leaf. Now here’s the cool part of my story! I went for a ramble the very next day, hoping to find some interesting butterflies to photograph. I was into the first pasture and saw a tiny fluttering in a low plant, I watched for where it seemed to end up then just studied the leaves and grasses, looking for a butterfly. See below:
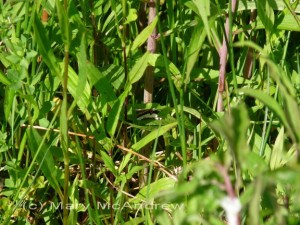 Hiding down low in the grasses, can you believe I found him?! Ok, I’ll brag a little here, I think I have good eyes for spotting things, because I found him! Hiding amongst all those grasses and leaves. Can you see how well he can blend in, but then, not totally.
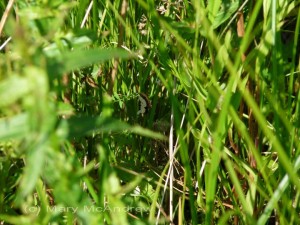 Another shot showing how well they hide on the leaves! Then he flew around again and re-landed; this shot shows him pointed downward, always keeping his legs stretched out in front.
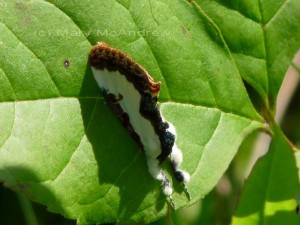 The Beautiful Wood-nymph imitating bird dropping, that's his job! When they do that, it makes them look like bird droppings and that’s their defense!! I’ve seen pics in books about such things, but never saw one myself. Though he imitates such a yuchy thing, the moth itself is really pretty! I enjoyed studying how the wing pokes up through with a curling flourish and the fuzzy legs that remind me of a Poodle dog. The wings had a sheen in the sunlight that looked like white satin.
The big thing all of this made me realize, was that I’ve been living here for about 17 years and I never noticed one of these before! Well, much of that time I was busy raising my boys, taking care of animals and whatever else. I didn’t go out walking in my fields all the time as I do now. What I’m trying to say is there is SO MUCH around us that isn’t seen, unless we start looking closer to see it. And then, like this moth, once you see it and study it, it’s more likely you’ll see it again. Try not to miss anything, try to capture it all and the best way is in a sketch journal!
(No moth was harmed in the making of this blog entry, the names were not changed because he’s not innocent, he’s guilty of being “Beautiful” heehee)
The following pictures go to glossy Note Cards I created using my painting and photographs of the moth. Please have a look and share the links with nature loving friends you think may enjoy them!
**
**
**
**
This one has customizable text!
**
And here’s the last one!
Let me know if there’s anything you want created or customized in my shop, I’m glad to do it for you!
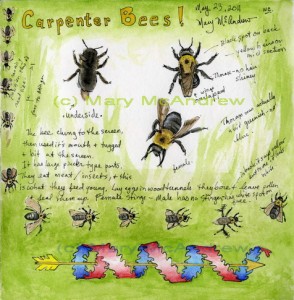 Studies of Carpenter Bees, watercolor and ink. You know there are interesting things all around us to discover, some are right under our noses…or under our eaves! I have known about Carpenter Bees but never paid them much attention, until this year. I caught one and started to draw it from life, safely keeping it in a plastic container under a screen. I did the studies above from life, then just for fun added the little quick sketch bees as a border around it. I put the green after to add color and liven it up, and the red and blue ribbon with an arrow was just me messing around!
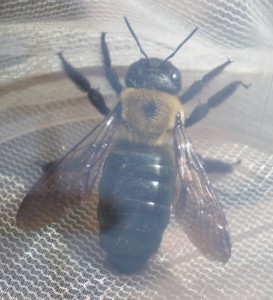 Female Carpenter Bee I captured for study. It seems the bees LOVE the eaves under my back porch, and are making their home there.It may not have bothered me much before, then I watched a video about the damage they can do to your timber. Uh oh. This is a photo of the female bee, you can clearly see the abdomen (end part) is shiny black, unlike the bumble bee which is nice and fuzzy black. It also has a spot on it’s back where there are no bristles, like a bald patch.
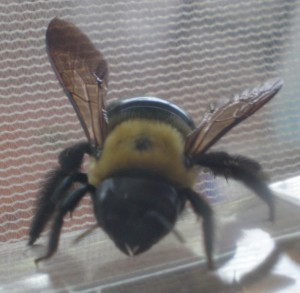 Front view shows no light patch that the males have. Oh my, look at those choppers! The female will chew and cut wood with her mouth parts, so I wouldn’t want her landing on my arm! Yikes! Actually, the female can sting and the male cannot. I liked this view though, with her wings sort of up, head down.
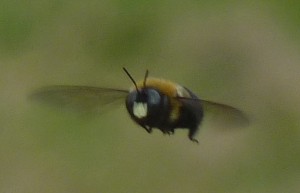 Male Carpenter Bee in flight, showing the light patch. After I drew the bees and photographed the female, I got curious about the bees and that’s when I looked them up online and did a little research. From my upstairs bathroom window you can see the males around the porch eaves below, like they are guarding territory. The male is easy to tell by the light patch on it’s face, it will look whitish to you, but a book said it was yellow. Isn’t this a cool picture? It took me many, many tries just to get the few blurry pictures I have here! I like how he has his antennae up while flying, his little legs tucked under.
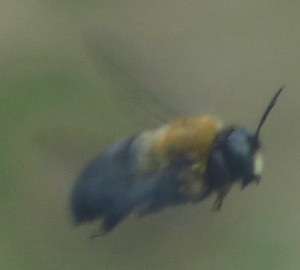 Side view of male bee in flight. Look at this shot!, he’s so stout looking.
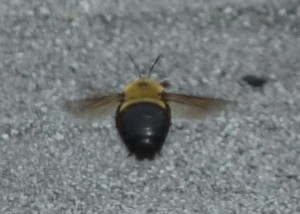 Rear view of Carpenter Bee in flight. This is one from behind, now that definitely looks stout! How does he hold himself up with those little wings?
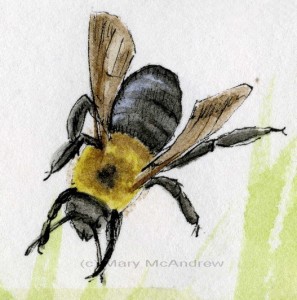 Here's a close up of my sketch so you can see it better. 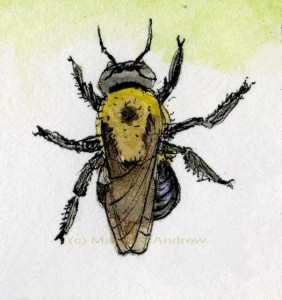 This close up shows how the wings are folded over the back. Here’s a close up that shows the wings folded over the back, you’d never know there were actually 4 wing parts when you look at it. There is two on each side, just like butterflies; each has a forewing and hindwing.

Check out this article about Carpenter Bee Control, complete with videos! Then you’ll see why I need to get rid of the bees.
|
Welcome to my Blog! The most up to date information about my artwork, nature sketching adventures, or step by step demonstrations. Search using Categories or Tags, or use the search box in the left column.
Please sign up below to get notified when I post new articles.
|


