|
|
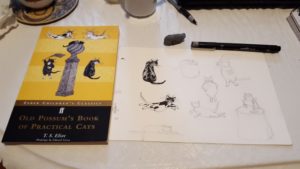 Sketching from my new little book “Old Possum’s Book of Practical Cats” by T. S. Eliot, illustrated by Edward Gorey. I used to watch a show on Public Television that was called Mystery Theatre and the introduction to the show used animated illustrations by Edward Gorey. I’ll never forget his style and I really liked that intro, I found a clip of it on YouTube, click here to go to it. And there’s a second one with a few different scenes, click here to see those. It really brings back memories! So when I saw this book for sale on Abebooks I just had to get it, not just for the illustrations but I was curious to read the poems by T. S. Eliot.
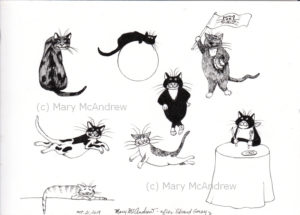 I did a whole page of cats based on the illustrations in the book. I had fun sketching the cats from this book because they’re whimsical and all done in ink. The difficult thing is I did the sketches in the car while Gary was driving, do you know how curvy (and bumpy) the roads are here?! It was hard to draw! So it was when I got home that I went over the pencil drawings with permanent ink pen.
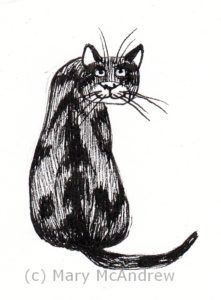 What a great expression! Cat #1 after Gorey. Above is the first cat I did after Gorey. Though the cats were pretty simple I did learn some things by studying Gorey’s illustrations. I really like the way the pattern on his back looks and the close ink lines to shade him. The eyes I did on the cats are a little bit different, you can’t help adding your own take on things.
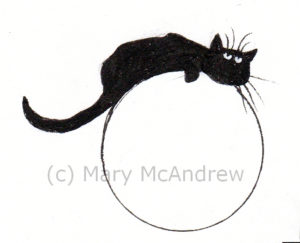 Cat #2, pretty simple, love those eyes and whiskers! Cat #2 was a simple black one, I liked the whiskers and eyes and how he looked on that curved ball. In the book he was actually on top of a pillar with a ball shape on it, it’s right on the cover. I changed it to simplify and draw all the cat, I also gave him eyes that I wanted!
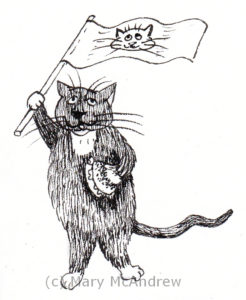 Rah Rah, shish boom bah! Cat # 3 looks like he’s at a sports event, clutching a hamburger! This one was loosely based from another cat on the cover holding a flag, I made him lighter and changed his face a bit.
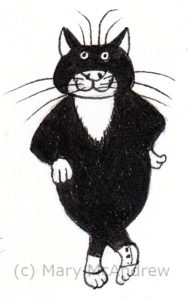 Cat #4 is wearing spats, what a dapper fellow! This is Cat #4, “Bustopher Jones”, the cat about town. He was cool, I liked that he had spats on his feet! But I had to laugh, when I looked back in the book just now to get his name, I realized I forgot his tail in my drawing! haha
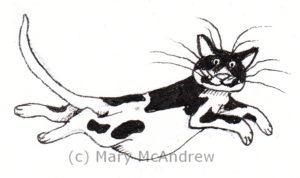 Cat #5, I love his mid air jump and expression. Cat #5, what a face! I love his spots and the expression on his face. Gorey sure liked to give his cats long whiskers too!
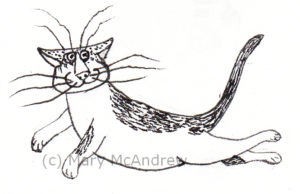 Cat #6, another jumping cat! Cat # 6 is another jumping cat, or maybe he’s flying? I like how the spots were made with small ink strokes.
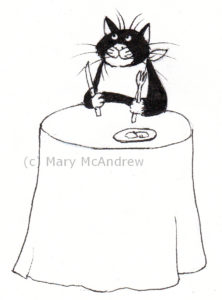 Bustopher Jones returns. Cat # 7 our friend “Bustopher Jones” has returned. I really liked this one and the poem wasn’t bad either. I didn’t love all the poems in the book, but I still haven’t read the whole thing either.
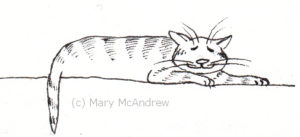 Cat # 8 is a sleepy old cat called “Old Deuteronomy”. Cat #8 is “Old Deuteronomy”, I liked his sleepy expression and fading stripes, also the way Gorey simplified him with no back legs and great position of the front legs.
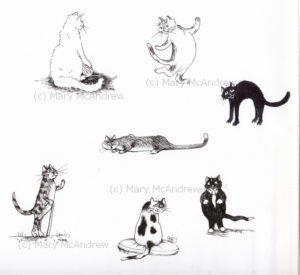 Now we’re onto ‘my’ cats, inspired by Gorey. Then another day I did some sketches inspired by Gorey’s drawings but I tried to change them up a bit with poses, expressions, markings and shorter whiskers! See my individual cats below.
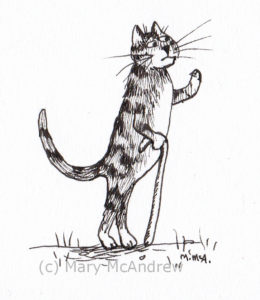 Cat #1, our for a stroll with a walking stick. For cat #1 I used that fur pattern I liked here and had fun with the expression on his face. Is he saying hello to a friend or is something coming and he’s putting his paw up to say stop?
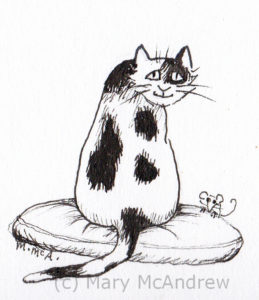 Cat # 2 sitting easy on a satin pillow. Cat #2, there’s a lot I like about this one. I like his eyes, the shape alone gives him a kind sort of look, and wide eyed. Then there’s those graphic spots and before I knew it I drew a pillow and a mouse for him! But he doesn’t look like he’ll eat the mouse.
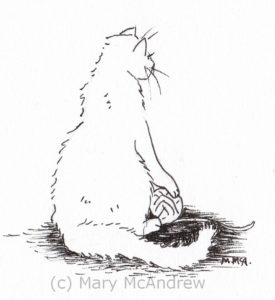 Cat #3 is a pretty cat with longer fur. Cat 3# ended up a white cat, with a bit more furry looking coat. I added a ball of yarn to give it something to play with.
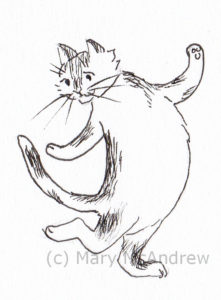 Cat #4 is fun, either dancing or maybe ice skating? And Cat #4 was fun to draw, making up that pose. It looks like he’s ice skating or maybe dancing? A few light spots here and there and some cheek puffs for good measure.
 Cat #5 is like the other laying down cat by Gorey. Cat #5 is like the other laying down cat by Gorey but I changed the position of the feet and added back legs. I like his little surprised expression.
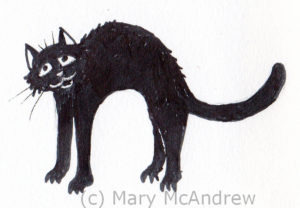 Cat #6 is a typical old style black cat. Cat #6 is a typical old style black cat like you’d see in Halloween illustrations. Usually when the back is arched the cat is shown as scary, but mine is just stretching, I can almost feel him pushing his shoulders up into that ‘cat’ stretch and stretching his claws out as they do. I was very careful to leave a white line for the mouth when I drew the black ink on his face, and his eyes have that friendly shape too.
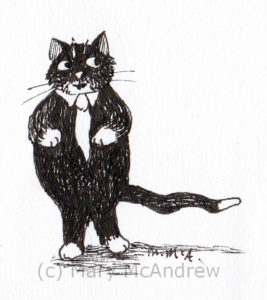 Cat #7 is plump and wearing a tie! Cat #7, I like this one! He’s plump and has huge eyes. I also tried to not fill him in totally with ink so there was a bit of texture on him. A little shadow helps to show off his white toes too.
That’s it for all the cats! Please tell me what you think of the sketches and what you thought of how I made up my own. I really had fun doing these, they were pretty easy for me so it was relaxing if anything. Hope you enjoyed them!
You can also find me on Instagram as “mary_mcandrew_artist” and my facebook art page is “Mary McAndrew Painting and Illustration”, I post random things I’m working on and sometimes views outside.
Hello everyone! As I said in my previous post about the toad in ink, I wanted to try and do some ink drawings in the month of October for what’s called “Inktober”. It’s a challenge that artists do to try and create ink artworks maybe everyday, but I knew I would never be able to do that!
So I did get this little drawing of the “Mossy Fairy House” done using inks and I did a bunch of fun cat cartoons. I’ll share them next time I think, there’s not many but it was a lot of fun! This Fairy House was a good practice for me as I did it entirely with brushes, no ink pen. I’ll show you from start to finish the stages it went through, it’s more interesting and educational in my opinion.
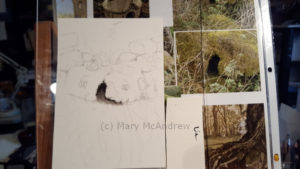 This shows the very beginning next to the reference photo. I sketched my drawing out on a 5×7″ piece of bristol board that I taped to a piece of clear plexiglas. I like using this a lot in the studio, I use it like this and it’s easy to lay on top of reference materials or you can put a lamp behind when you need to trace from your sketch. I also put a piece in front of current illustrations that are leaning behind my easel on the table, don’t want any paint splashes on them now do we?
Anyways, the reference photo is one I shot years ago while hiking in the woods near our village, there is NO shortage of luscious moss growing here in England! It was growing on some rocks that had fallen down ages ago and to me, well it just looked like a Fairy house! What would you think if you saw it?
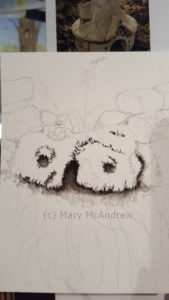 Starting to brush ink in, deciding how to make it look more ‘house’ like. Then I started to brush ink in, trying to decide where to go with this, because the whole thing has got to come from my imagination. I added two ‘windows’ but never felt right about them. You can see I sketched rocks behind and added a chimney.
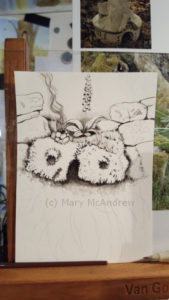 More ink as I pick out the rocks of the wall and put some smoke from the chimney. More ink goes on as I pick out the rocks of the wall and put some smoke from the chimney. I also add one Digitalis or Foxglove flower behind. This grows commonly here and I love it, so do the bees!
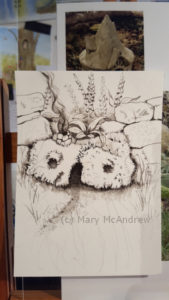 I add more flowers and the path to the Fairy House. Now I’m adding more flowers behind to fill it out (or fill it in however you want to look at it!), and I start to make a path lightly in grey wash. I also flick in some simple grass to start to set a scene, thinking all the time, “what will I put in the foreground?”. I would like to make it a nice illustration and add a fairy but nothing was hitting me.
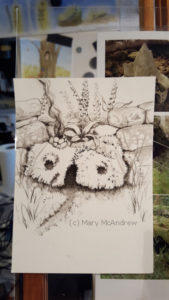 I next do a bit on the stones on my mossy fairy house. Then I start to add washes to the stones of the wall. This was fun because I got to look back through my reference photos of stone walls, which inevitably takes me MUCH longer than it should because I end up thinking about all the different walks it took to get all those photos! Actually more than that, it’s seeing so many photos of things I’d love to paint and this distracts me like crazy! Haha…oh well back to little mossy fairy house!
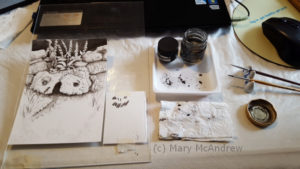 Now I’ve set up in front of my laptop so I could look for reference photos I’ve saved. This photo shows I’ve moved off the easel, I’m done with that little reference photo and am looking up reference photos on my laptop to get inspired for the greenery in front. You can see how I’ve put my ink out, this is a little jar of Speedball Acrylic Ink, next to it is a small jar of water and they are sitting in a plastic paint mixing tray. The ink is permanent so I know I was taking a chance on permanently staining the tray, but it’s ok, I’ll use it for ink now. My brushes are resting on a tiny paintbrush stand I got years ago with a set of chinese brushes and ink. I have a small scrap of paper between the art and the ink, this is for testing marks etc. It kind of looks like I made a Jack O’Lantern face doesn’t it?
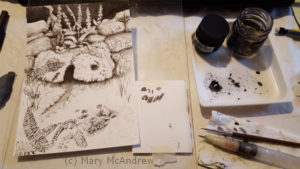 Now I add more ferns and flowers to the fairy house. Ok, so the way the windows looked like two stark dots was bugging me, enter my husband. I like asking him his opinion as he has a sharp eye and doesn’t hold back on opinions! (though sometimes not what I want to hear!). He right away pointed out he didn’t like the windows, they looked too symmetrical, yes, that’s it, they had to be changed! It was nearly impossible to rub out or lift the black ink so I resort to illustrative techniques….out comes the white gel pen! I drew in pencil first how I wanted the fern to go and as you can see I added more in the foreground too. I drew on each leaf with the white pen to make it show, perhaps gouache would have worked well but it’s so tiny I opted for the pen.
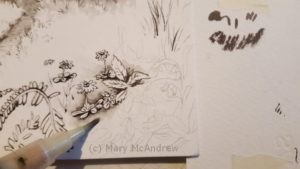 Here’s a close up showing my waterbrush used to create a wash of ink around things. You can see I have my waterbrush out now, this is great for making the soft shadows around the plants. I shot a video clip with my cell phone showing a bit of this. Next time I’ll try and set it up on a holder – tripod or something. I first paint the outline of the plant, then you can either let it dry and go back to it or try to quickly brush along the edge to draw the ink out. I usually like to get the drawing done first so I can think about where I want the ink wash shadows to go all together.
I was able to upload the clip to my YouTube channel, click here if you want to check it out! If anyone knows of some free program that compresses your videos please let me know in the comments, I have an awful time uploading videos.
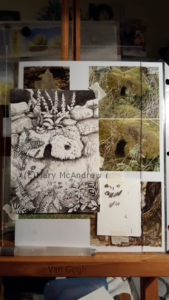 Now we’re back on the easel, working on those plants! Now we’re back at the easel and I’m working on adding more ferns, flowers and details in the foreground.
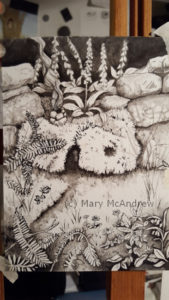 Almost finished! Well we’re almost finished now, I lift a light patch inside the doorway, I really wanted to add something but felt the pressure of wanting to be done too. I’ve left a ‘free’ area on the grass in front of the Fairy House in case I come back to it later with a little fairy or creature. Something that bothered me about the drawing too is how I added so much dark under the house and it looked disconnected from the ground too much, do you know what I mean? So I tied it down a bit by adding grass blades with the help of the white pen and drawing grass with my ink.
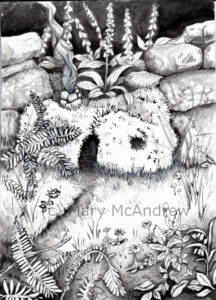 And it’s finished! Here’s the final drawing finished. It came out nicely I think, mostly I’m pleased with doing something that looks a bit different for my style. Adding the black background and darkness in the foreground I find to be exciting looking and graphic. I’m not happy about the smoke from the chimney and could have gone back with a wash of white gouache, but I really was trying to push myself to just use ink. Someday maybe a fairy will find it’s way in here, but that will probably be if I do another version of it. I was ready to say it’s done and get onto the next thing! I’ll share that next, some fun little cat cartoon drawings inspired by illustrator Edward Gorey!
I hope you enjoyed seeing the steps to this little ink drawing, please leave me a comment or any questions below. Cheers!
Hello my dear friends, did you miss me? Well life has just gotten so busy and time went right out the window, I’m sorry about that and feel guilty for neglecting my blog. But here I am to add something new and hopefully start sharing more too.
Have you heard of Inktober? It’s an artist’s self initiative to produce work for the month of October and all has to be ink. I’ve always wanted to do the self challenge because I love drawing with ink, but shied away because of the pressure to produce and being busy. Well I’ve decided (as we all should) to do it in my way, I’ll do some as I can and that’s good for me! haha.
So recently we had a surprise visitor, a tiny frog that came hopping out of my studio, all the way at the back of the house! Now I know this post is about toads but we’ll get to that shortly! We’re not sure if he came in when Gary had the door open to feed the hedgehogs or what but he needed to go outside. This summer I made up a little pond using a ‘tubtrug’ shallow plastic tub, filled with water, rocks and sticks and a tiny solar pump that squirts a bit of water to make some movement.
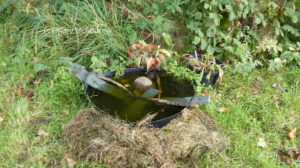 This is the little pond I made from a shallow plastic tub. I’ll tell you what the birds have been loving it, the pheasants drink right at the sides and little birds land on the various pieces of old slate or the sticks to drink. I was excited to watch both the Robin and Blackbird take really good baths in it, splashing all around, it was great! The little water pump just makes a little ‘blurp’ or water repeatedly or when the sun is really bright it flows like a little drinking fountain; it’s supposed to be just enough to get the birds attention and keep the water circulating a bit.
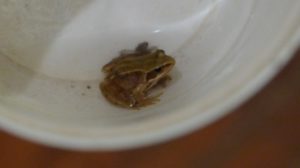 Such a tiny frog, what was he doing in my studio? So back to the frog, we took him outside (it was night-time) and put him in the pond and watched until I was sure he could also get out. You see even a frog can drown if it can’t get out of a tub type thing so be careful when you put water in containers outside. He did just as I expected and kept swimming around and around to the sides, which were too high for him. The way the rocks were situated he could easily have climbed on them and got out, but he had a one track mind to go around the edges. So I arranged some sticks and weeds at the edge so he had lots to grab onto at the rim, and he duly obliged by climbing up then out. Great, now I know if one goes in it can also get out.
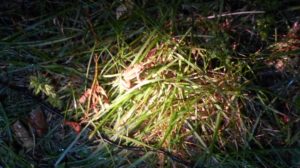 Baby frog hopping away in the wet grass. So on the way back into the house I stopped Gary just before he stepped on a little toad in the dark! This is a real wildlife night! So we took him to the pond, just so he would know about it, I took lots of photos then he got down in the long grass between some pots and it was goodbye! That’s him below, we shone two torches (flashlights) on him for the picture, it worked great.
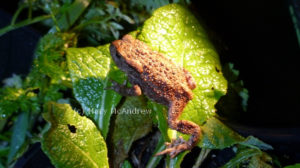
Then another day I was in my back garden planting strawberry runner babies and I looked down and there is a decorative ceramic pot full of rainwater was a little toad, swimming and desperately trying to get out! Poor thing, I scooped him right out and took him to the pond area too, took some pictures and he warmed himself in the sun awhile before leaving.
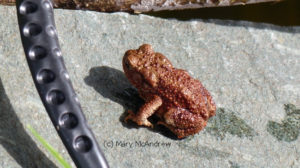 Little toad had a nice dip then soaked in some sun before leaving. So now you’ve patiently waited to hear how Inktober fits in here and to see some artwork! I’ll show you the two drawings I did and some of the stages as I worked, I took a few pictures with my cell phone. (By the way, I share a lot of pictures like this on my Instagram account “Mary McAndrew Artist” and on my Facebook page “Mary McAndrew Painting and Illustration”, you can easily follow me on those and see lots of photos as I draw, paint or see things outside in the garden or from walks.)
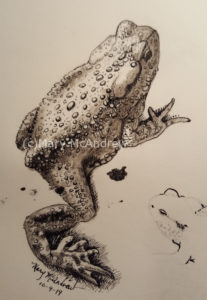
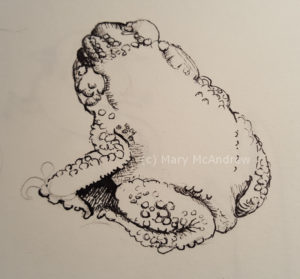 Toad #1 showing my pencil drawing and the start of the inking. I want practice using my dip nibs and ink so that’s what I used here. The ink was a bit old so I struggled a bit until I added enough water to thin it again; I used Rapidograph waterproof ink.
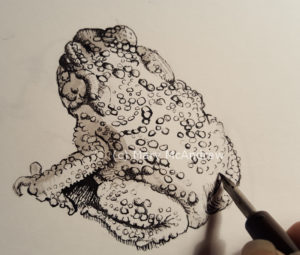 Here I’ve gotten more of his bumps on. You can see on this second picture I’ve put a bit of a light wash of ink, using a brush and water, down his arm, face and side.
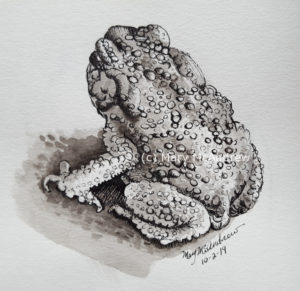 Toad #1 finished You can see I added more washes to the toad, finished his ‘bumps’ (I hate calling them warts, it’s not nice for the toads image!) and put some tone under him to set him off. I also used a white gel pen to put tiny dots on the bumps where needed.
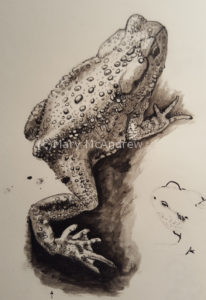
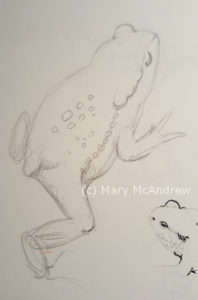 Toad #2 at the drawing stage. You can see in my drawing above of Toad #2 how I used simple ovals to place his feet and leg parts. I sketched simple ovals and circles to get him basically laid out and then could correct the proportions of him before adding details.
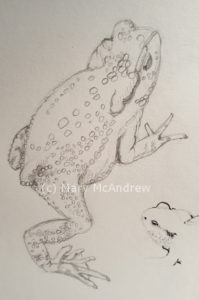 The drawing stage basically done. Above you can see the drawing stage is done, toes are all on but not every bump.
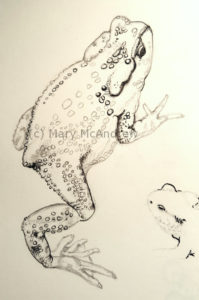 I started adding the ink with a dip nib. I’ve started adding the ink now with a dip nib, but this time I am using Higgins “Black Magic” ink. It said it’s waterproof but later I find this wasn’t totally true!
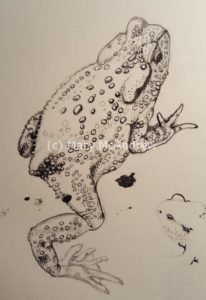 Then there’s always a chance of ink spots! Ah yes, things were going ok but I was struggling with old ink with clumps, adding water and trying to wipe off my nib when needed. Somehow in all this I did manage to drip ink on the drawing, argh! I wasn’t too upset because this is just a study and I’m trying to be a bit loose with it.
 I did some ink washes on the body to show form. I found the ink was not so waterproof when I tried to do washes with a small brush, I had to pick up disturbed ink with a paper towel. So I was able to carefully go over areas with just a damp brush to get the ink to lift and make a wash. You can see I also start to add some black around his back foot, leg and front foot. I really like digging in with darks around subjects to set them off, you’ll see it works to my advantage next.
More ink around him done with the brush, ink and water for diluting. See how that big ink spot is getting covered?
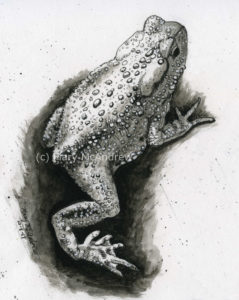 Toad #2 finished! Here he is finished, I layered the ink in and got nice and dark around his body; I like the way it makes him look like he’s coming out of the ground. I edited out the other sketch of a toads head on the paper, just for the final scan. The spot that was on his leg I was able to lift pretty much with water and paper towel. I added white gel pen to his bumps where it was shiny on the photo and finished adding his tiny bumps. Did you know each toad has different bumps? When I compare the two toads they looked so alike, but when you look close you can tell which was which by where their bumps were.
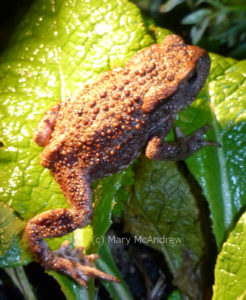 The color photo of this very gorgeous toad! Above is the photo I worked from, I had to flip the photo to draw him facing a to the right. The photo and drawing also look a bit different because my drawing of him is turned a bit so he’s pointing up more, I liked it better that way. I wanted to share with you his gorgeous colors too and show you how lots of his bumps were a deep sandstone red, like jewels on the ground. It’s all about texture with a toad, that must be why I like drawing them!
I hope you enjoyed this post, as I said it’s been an awfully long time I’ve been away from it and will en-devour to share more soon! Please find me on Instagram at “Mary McAndrew Artist” and Facebook business page is “Mary McAndrew Painting and Illustration”. Please leave me some comments below about toads in your area, are they getting ready to hibernate?
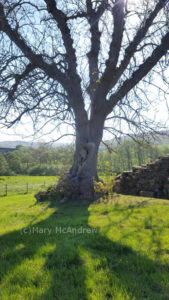 This is the ancient ash tree at Edlingham Castle. I love really old trees. Living here in England I am rich with so many of these wonderful trees. This tree is one that lives at the corner of Edlingham Castle, growing upon what looks like a very old part of the castle. I think some many years ago when the castle was left to ruin, a sapling must have grow up there. The oldest part of the castle was built in the 1300’s and saw many changes over time. I wonder what might be concealed in the rocks all tightly held by this tree’s massive roots? You never know! One thing I know it does have is a geocache that someone hid there, it’s been there years! (oops was I supposed to keep that a secret? 😉 )
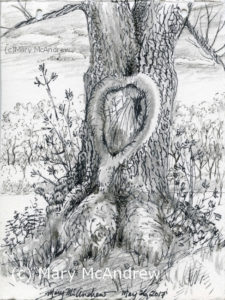 My drawing of the tree done in ink and wax crayon. As I approached the tree, on this sunny May morning, I found a spot in front of it and just plopped down in the grass. I liked the form of the ‘scar’ where a huge limb must have been years ago, I think it was cut off because the area of the cut is so flat. I first sketched it in with an permanent ink pen then used a grey wax crayon to shade in medium values. I like how the two mediums worked together, and they’re easy to carry about in your pocket.
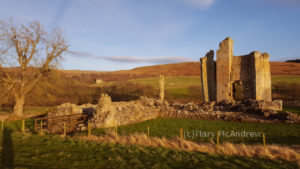 This shows the tree in relation to the castle. That’s the tree on the left (above), you can see how large it is!
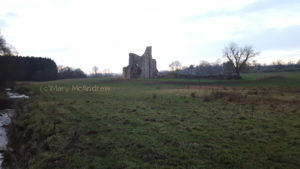 Another view of the castle and the tree on the right, taken in December. This view of the castle I took in December, on a cold grey day, standing near Edlingham burn.
I hope you enjoyed this brief look at Edlingham Castle and it’s old Ash tree! Please leave me a comment below, love to hear if you have any special old trees in your neighborhood!
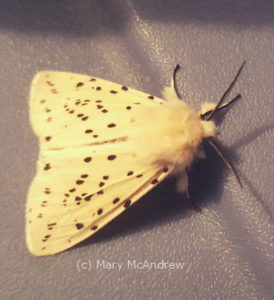 This is the White Ermine Moth that came to visit the other night. This is the White Ermine Moth (Spilosoma lubricepeda) that came to visit us here in Northumberland the other night. What is it about moths that gets my interest so much? There are so many kinds, they hold their wings in different ways and seem to ‘sneak’ into the house and surprise you. This moth has a wonderful ‘Ermine’ fur coat and furry legs. He has long slender antennae with delicate fringe and speckles on it’s wings that are different on every single moth!
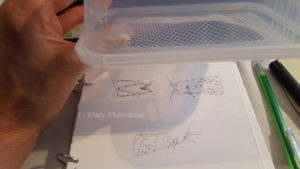 Sketching the moth in my little field sketchbook. I made a simple holding container for when I catch interesting bugs and want to study or draw them. This is just a plastic container from Wilko, I cut a rectangle in the lid and taped some mesh over to cover it. I had a better container before I moved to England made from a clear plastic container, but like so many things I had to leave it behind, so this one will do for now.
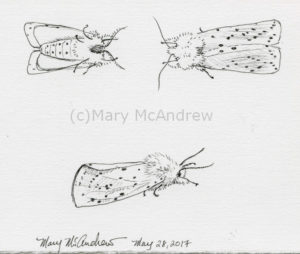 Ink studies of White Ermine Moth First I sketched the moth in pencil, then used permanent ink and erased the lines. I know it would look nice if I did an ink wash around the moth so it will really show how white it is, but this is just a brief study. I feel I have no time for lengthy studies lately! I think when I have some time I’ll go back and put a watercolor wash around the three studies to make them stand out white.
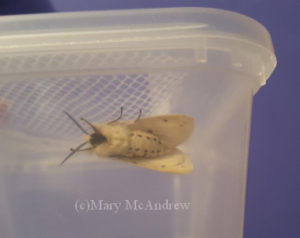 The underside of the White Ermine Moth This shows the underside of the moth, his little furry black ‘face’ and neat rows of ‘buttons’ down his front! It’s things like that that inspire me to think of drawing little characters! One of these days I’ll make a better container, a jar is also very good to use.
The way he holds his front legs and the ‘fur’ on them and his body reminds me of the beautiful moth I discovered back in NY. Here’s the post I did about it: http://marymcandrew.com/beautiful-wood-nymph-moth-june-2011/ I hope you take a look, it really was a ‘beautiful’ moth!
Click this link to see some really great photos of other White Ermine Moths: https://www.ukmoths.org.uk/species/spilosoma-lubricipeda/ It was this website that helped me to get a positive ID on my moth, but I would have had much trouble doing it if I didn’t already know that it was an Ermine Moth.
This will be short and sweet. Just a quick post to share some sketches I did of a little dark Weevil that came by today. He didn’t stop by for tea but I may do a character of him someday so you never know!
(click any pictures to see larger)
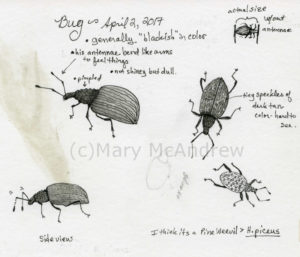 Enlarged sketches of the Weevil Above shows the small sketch page I did. It had a spot of color on it from when I was going to paint something, but this is just a study so it didn’t bother me. You can see in the upper right corner, I always draw two lines showing the bugs actual length. I hope the pictures aren’t too blurry, I only have my cell phone camera right now. I cropped and enlarged them so they may not be as nice as they could be! (getting a new camera is on my list!)
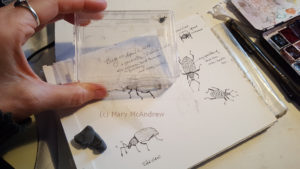 Weevil in my ‘bug’ container to study. Above shows the little container I’ve used for years as a temporary holder for bugs while I study them. None of them have ever held still, it’s so hard to draw them while they constantly walk about. I tried to draw the sketches much bigger than actual size to show more detail.
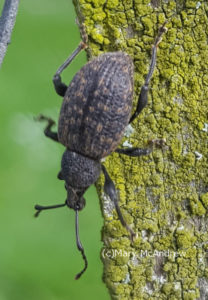 A great natural light picture when I released him. This is when I released him outside on the fence. You can see the tiny dots of tan on his back.
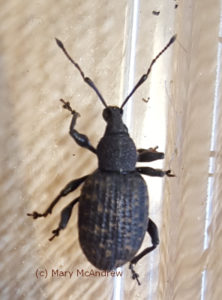 Another nice shot of his texture and color. They must have a special substance on their feet because he was able to walk on all the slipper walls of this shiny plastic container.
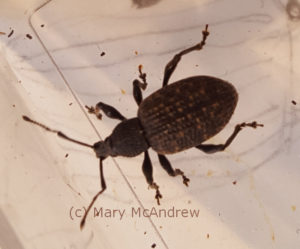 And another shot, you can see his eyes. Look at those antennae! They were bent like an arm would bend at the elbow, and he poked them up and down to ‘feel’ or ‘smell’ (?) his way along.
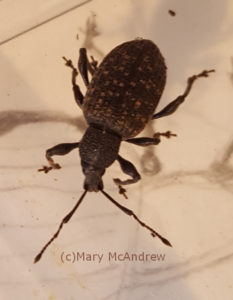 I like how this picture shows how he can bend his body a bit, or neck if he has one! Look at the interesting shape of his legs, and I like how he has his neck bent a bit.
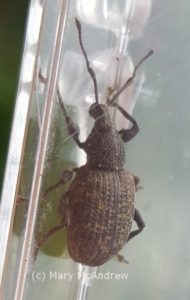 One last picture of him in the container. One last picture of him in the container, I like showing all the different angles. I find the legs so interesting and difficult to draw unless it’s from a photo. He walked constantly while I sketched him and reminded me of one of those wind up toys! I noticed how they moved opposite legs, just like any multi-legged creature would for balance.
Here’s a post I wrote from July, never too late to enjoy a bit of sun I guess!?
July 16, 2015
Did I tell you how much I LOVE living here in Northumberland? I did? Well I won’t get tired of saying it or doing my sketches out in the field.
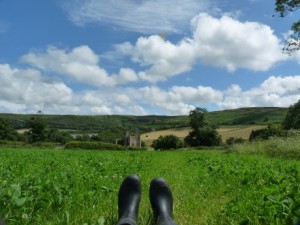 Taking a rest, enjoying the day, in my barn boots of course! I went up in the field near Edlingham Castle, I had it all to myself, no sheep or cows about. It was just that kind of day that I sat on the ground to think, listen to the birds and enjoy just living. Then I just lay back and put my straw hat over my eyes and let time slip by, and it was ok.
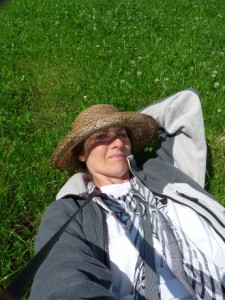 Trying to take a selfie with a 35mm isn’t easy! Laying down amongst the clovers, it made me feel like a kid again. Isn’t that funny? I should go lay in the grass more often! Maybe we could start a national “Lay in the Grass Day”! haha.
Below is a picture of what it looked like, my view from the grasses, the clouds were so beautiful.
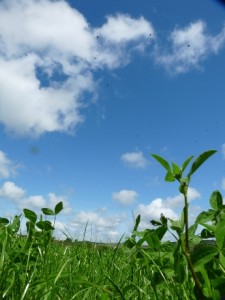 My view from the grass, my mouse eye view. And below, this is what I saw near me, a Ringlet butterfly, a very common sight in the fields here in summer. I’m really enjoying learning the new butterflies and bugs here in the UK.
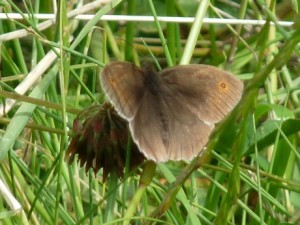 A Ringlet butterfly on a clover head. Well I didn’t just lay around all day, after a little while I went down the field, found a spot to stand and did a small painting. Below is a picture of Edlingham Castle, this was what I drew. You can see by the photo, the lighting never stays the same when you’re painting outside. My painting ended with nice blue skies and sunshine!
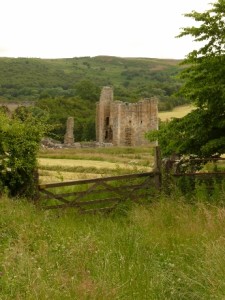 Edlingham Castle view from field. Below is the ink drawing I did first. Sometimes I do an ink drawing then paint with my watercolors, especially if I don’t think I’ll have time to paint it. The other way is to do a light pencil sketch and then paint, drawing with ink a little for details on the pencil before or after painting.
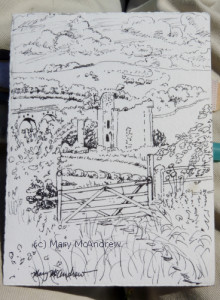 Ink drawing of Edlingham castle, over the gate. Below is my finished watercolor painting, only 4.5″ x 6″. You can see how bright the colors are, the day really was so bright, unlike the photo! The ink drawing makes it look more like an illustration than a painting to me. Kind of like all details are picked out at once, but that’s ok.
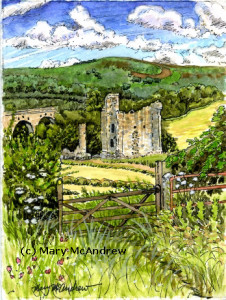 Edlingham Castle, Northumberland. Watercolor and Ink 4.5″ x 6″ I hope you enjoyed a little look back into summer! If you don’t want to miss any of my posts, just put your email in the box at the top right column. It’ll send you an email notice and you just respond then you’ll get my posts right in your inbox. Remember though, it’s best to click to come here and read the post, it lays out better on the page (and you can leave comments here).
I wrote this post way back in July, when it was sunny and warm, now here we are at the end of October! I still have new drawings and paintings to share, it’s just been more hectic than I expected! I’m still settling into this new life, trying to learn how to drive standard (badly!), finding a new accountant, and not being able to find some of my supplies because many things are still packed and stacked in plastic bins! But what has been most excellent is our walks near our home and a few trips to the Lake District. The greatest joy Gary and I share is our love of walking in the countryside. I’m overwhelmed with subject matter, it’s just finding time to sit and work.
So, on to my July post! Please click on the pictures to see them enlarged and clearer, enjoy!
(July 2015) I’m very lucky to have an ancient castle near where I live. I can go visit the site and walk around it, or view it from the fields.
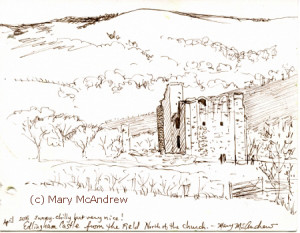 Brown ink drawing of Edlingham Castle done in the field in April 2015. I did this drawing in brown ink (Faber Castell Pitt pen) while standing in the field where only local villagers usually go, way back in April. It’s great to switch your mediums once in awhile when out painting. I think it’s great ‘brain training’ as you have to approach it in different ways, seeing shapes, values, lines, textures and measurements; and thinking what you will use to capture that.
As I am settling into my new studio space here in England, I am still re-organizing my ‘stuff’ and wanting to play with materials I’ve had packed for ages. One of those is charcoal, I haven’t really used it in a long time so lately I’ve been rediscovering it. Below I’ll show you how I did another small drawing of the castle en Plein Air or sitting in a field with my art kit.
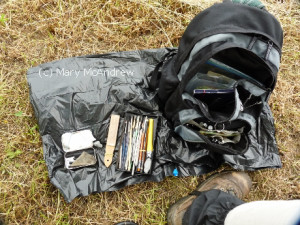 Sometimes I set my stuff out on the ground, this is charcoal drawing supplies. This shows my small backpack, a big lawn + leaf type garbage bag, Altoids tin with loose charcoal sticks and one plastic box with charcoal pencils, tortillions, brushes, sandpaper and eraser. I almost always stand when I work but today I had a small folding camp stool to sit on. The garbage bag is great for when you want to throw your backpack or kit on the ground and it’s all damp OR use it for sitting on.
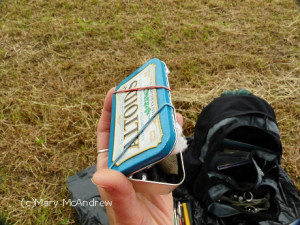 Here’s part of my field kit for charcoals, good ‘ol Altoids tin. And the ever popular ‘Altoids tin’, once used by me for watercolors but now I put my charcoal sticks in here. The rubber bands on the lid are holding a piece of paper towel and some cotton balls in place.
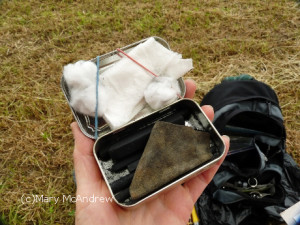 Here it is open and ready to use; I put the messy hard and soft sticks in here. The base holds an assortment of soft vine and compressed charcoal sticks also a piece of chamois for blending and shading.
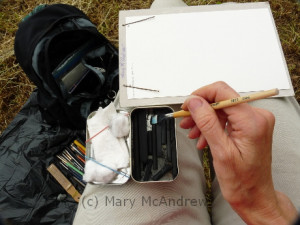 You can use the ‘messy’ charcoal powder in the tin to draw with a brush. When I sharpen points on sandpaper I let the powder fall into this tin and then it’s great to pick up with brushes for shading. A great way to start your sketch with soft blocked in areas of value, using soft or stiff brushes.
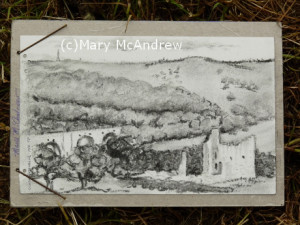 Work in progress, my support is just the cardboard back of a sketchpad. Above here it is almost finished, just a few touch ups and strengthening of darks and details to do.
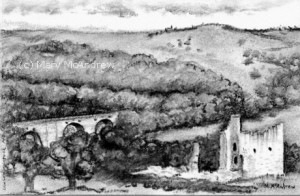 Charcoal drawing of Edlingham Castle, July 2, 2015. And it’s finished! I hope you enjoyed seeing some of my kit and how I worked. I’ll try to post more of those sketches I’ve done! Leave me comments below, I love to hear from you all.
And my other facebook page: Mary McAndrew Painting and Illustration
Winter has passed by and I’m still settling into my new life in England. I did some sketches as I could, being tired from unpacking, cleaning or just being overwhelmed in general. But happily I can see my sketching has increased as the months slip by and I will share all that in further posts to catch up.
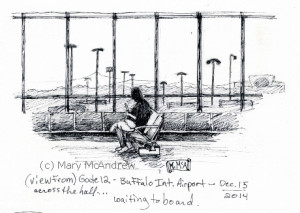 Waiting at Gate 12, Buffalo International Airport…the big day way back in December! Today I’m posting sketches I did way back in December and January. The one above I did while waiting in the Buffalo International Airport, Gate 12, for my flight to the UK. I like the way it came out, a person sitting ‘almost’ in silhouette in front of the huge windows. It definitely helped to pass the time and calm my nervous excitement.
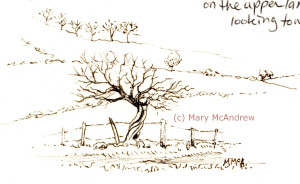 Ink sketch of a very old Hawthorn in a farmers hedgerow. After I settled in I started walking in the mornings, mostly on my favorite lane above the village. Just like at ‘home’ in New York, sketching in winter I mostly use very small pocket sketchbooks. It’s just too cold to stand around freezing my fingers off, so I just do smaller quicker sketches; the most important thing is just to keep sketching.
The drawing above is actually tiny, done at the top of the page, but I like how it came out. It’s done with a brown Faber-Castell ink pen; I love using these pens. It’s a twisted little hawthorn along a sheep field, very exposed to the winds at the top of a ridge. I like it’s character because it reminds me of a bonsai tree. Some of the little trees you see hedges made of are actually very old trees that are trimmed all the time.
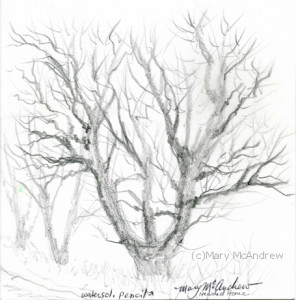 “Tree on Upper Lane”, a rough sketch on a very cold day, using water soluble pencils that I haven’t wet yet! This sketch was done very quickly because it was so darn cold! I love walking on this one lane that goes out of our village because it’s lined with ancient trees and gorgeous views of distant hills and fields. I did it using water soluble pencil but wanted to scan it before I wet it. When you wet them they can get very dark and intense…it still waits for me to wet it with my brushes and mess around.
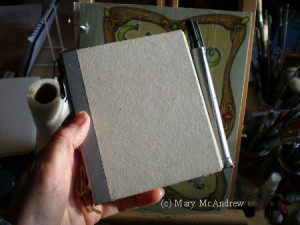 This is one of the small sketchbooks I designed. This is one of the small sketchbooks I designed, it’s great for winter sketches because it’s small. I made a pen holder out of duct tape and attached it to the back cover. I have another one that’s even smaller that I used at home a lot too, just loved sticking it in my barn coat pocket when I went walking.
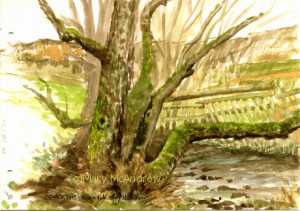 Small watercolor done while sitting along the bank of Edlingham Burn, on a very cold day in January. January 7, 2015 – I walked down to Edlingham Burn (small river) and found a mossy rock to sit upon with this lovely view. Well maybe it’s hard to imagine from such a small sketch, but it was a view of the burn and moss covered trees everywhere, just lovely!
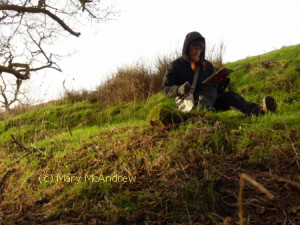 Me in the freezing cold, painting Edlingham Burn. I was very cold painting this, I did it with mittens on mind you, no easy task! I sat on a bit of rock, cold and damp, but it felt so good to be out and finally messing with my watercolors, that I didn’t notice (until I got up, all stiff!) I used one medium sized waterbrush to do this.
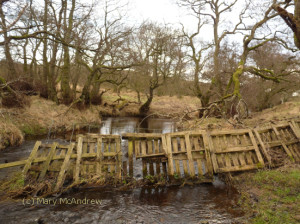 The livestock fence across the burn. Farmers use old pallets across small streams or ‘burns’ here, to keep sheep and cattle in sectioned off fields. I put it in the background of my watercolor sketch you can see above.
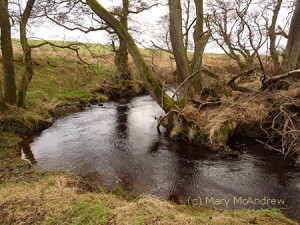 A walk along the burn in January. This is Edlingham Burn, I walked along it looking for a spot to paint. Where the rest of the land was pretty bleak and bare, the river was/is fascinating to me. With all it’s mossy trees, ivy climbing everywhere, dry grasses draping over dark banks touching the cold water and the sound of splashing water, wonderful.
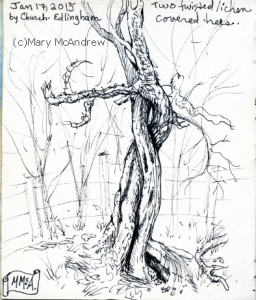 From my small sketchbook, I love the way these two trees were twisting together. These two trees I found behind the old church, in the farmers field. I really like how this sketch came out. They twisted together, almost in an embrace, part lichen covered, part moss. Standing in a cold, bare hedge, naked of leaves or flowers, just waiting till spring! Maybe someday I’ll do a larger color study.
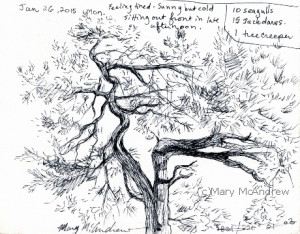 Pine tree across the road from us, I noted the birds I saw while sketching it. January 26th – I did this sketch on a day where I was tired and not feeling particularly inspired. That’s an especially good time to stick to your small sketchbook, just do something small until you ‘do’ feel inspired. It helped me to focus and relax; practice is always a good thing. I noted the birds I saw while doing it, Seagulls, Jackdaws and a Tree Creeper.
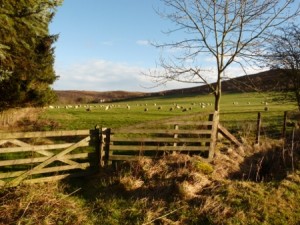 A pretty view of sheep over a country fence. I thought I’d leave you with two more photos, from Jan. 6th on my morning walk. I love watching the sheep in the fields all around me, there are so many kinds here!
 A sheep wondering what I’m doing in her field. This little ewe was watching me, they run away if you get too close, so having a zoom is needed! They are all carrying lambs at this time and I can’t wait to see them in spring!
Check back for more updates, yes there are more sketches, paintings and photos to catch up with from this spring and I can’t wait to share them with you! Sign up in the right column with your email, if you want to be notified when I do new posts. Please leave me comments if you like!
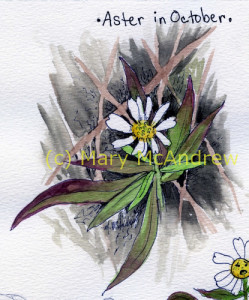 Watercolor study of a white Aster in October. Do you remember when I took that walk in November, hunting for acorn caps? Well I wrote about a little White Aster I came across, alone in the field. Here is what I wrote in that post:
“And one little Aster in the middle of the ‘Maze’, an overgrown field with paths I cut years ago. The white Aster looked up at me with it’s tiny little face, and asked if winter was coming soon? I told it to prepare and go to sleep before the snow falls. It was sad but missed it’s friends, as they had all gone, so it nodded it’s head and drooped a little in it’s tiny stem.”
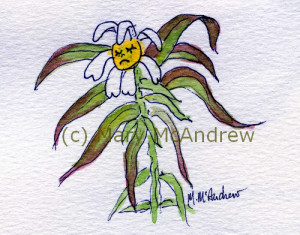 “Sad Aster go to sleep, before the snow falls cold and deep.” At the time I saw it, I just saw a white Aster and thought about it alone there, but I didn’t give it feelings and talk to it. That was my creative mind putting my feelings onto a tiny flower and as soon as I wrote that paragraph a new character was born! Yes, as soon as I wrote that post I wrote a poem called “Sad Aster” and then I did some sketches.
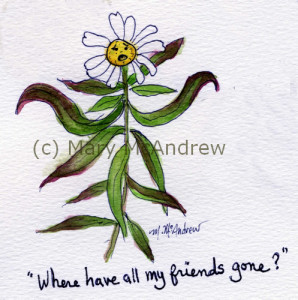 “Your friends are gone, the field is empty,
Where once they stood in numbers plenty.” I’m quite pleased with the little poem and now will work on illustrating it, creating more of a character.
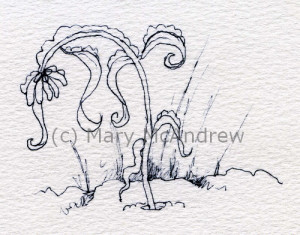 “..before the snow falls cold and deep.” I just thought it’d be interesting to share with you how one walk in nature, when combined with my emotions and thoughts, will sometimes evolve (in my mind) into something other people can relate to.
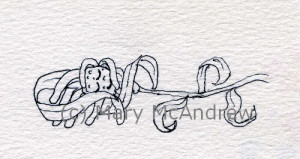 “Little Aster cold and white,
Go to sleep this cold, dark night.” I wish I could share the whole poem but I guess I should wait until it can be published properly.
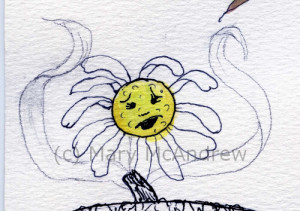 Worried little Aster While I’m warm in my house, I hope she’s sleeping soundly out there under the foot of snow we got this weekend! 😉 Well for now I have to put “Sad Aster” aside while I catch up on some mice illustrations I started, it never ends….so much to do! I’ve also created some small needle felted animals in wool with wire armatures so they are pose-able, and continue to do small experiments with wet felting. One of these days I’ll open an Etsy shop so I can sell them, but for now I must concentrate on my illustrations!
PS. Don’t worry, it’s a happy ending for Sad Aster! 😉
|
Welcome to my Blog! The most up to date information about my artwork, nature sketching adventures, or step by step demonstrations. Search using Categories or Tags, or use the search box in the left column.
Please sign up below to get notified when I post new articles.
|


